Table of contents
- Detecting old and new
- Requirements
- Backup WordPress files and database
- Create CloudFormation new JINKEI stack
- Import Old JINKEI's WordPress data
- Assign the domain name to the new JINKEI CloudFormation Stack
- Update DNS record of the domain name
- Update CloudFormation settings
Detecting old and new
Old (and you need to migrate to the new)
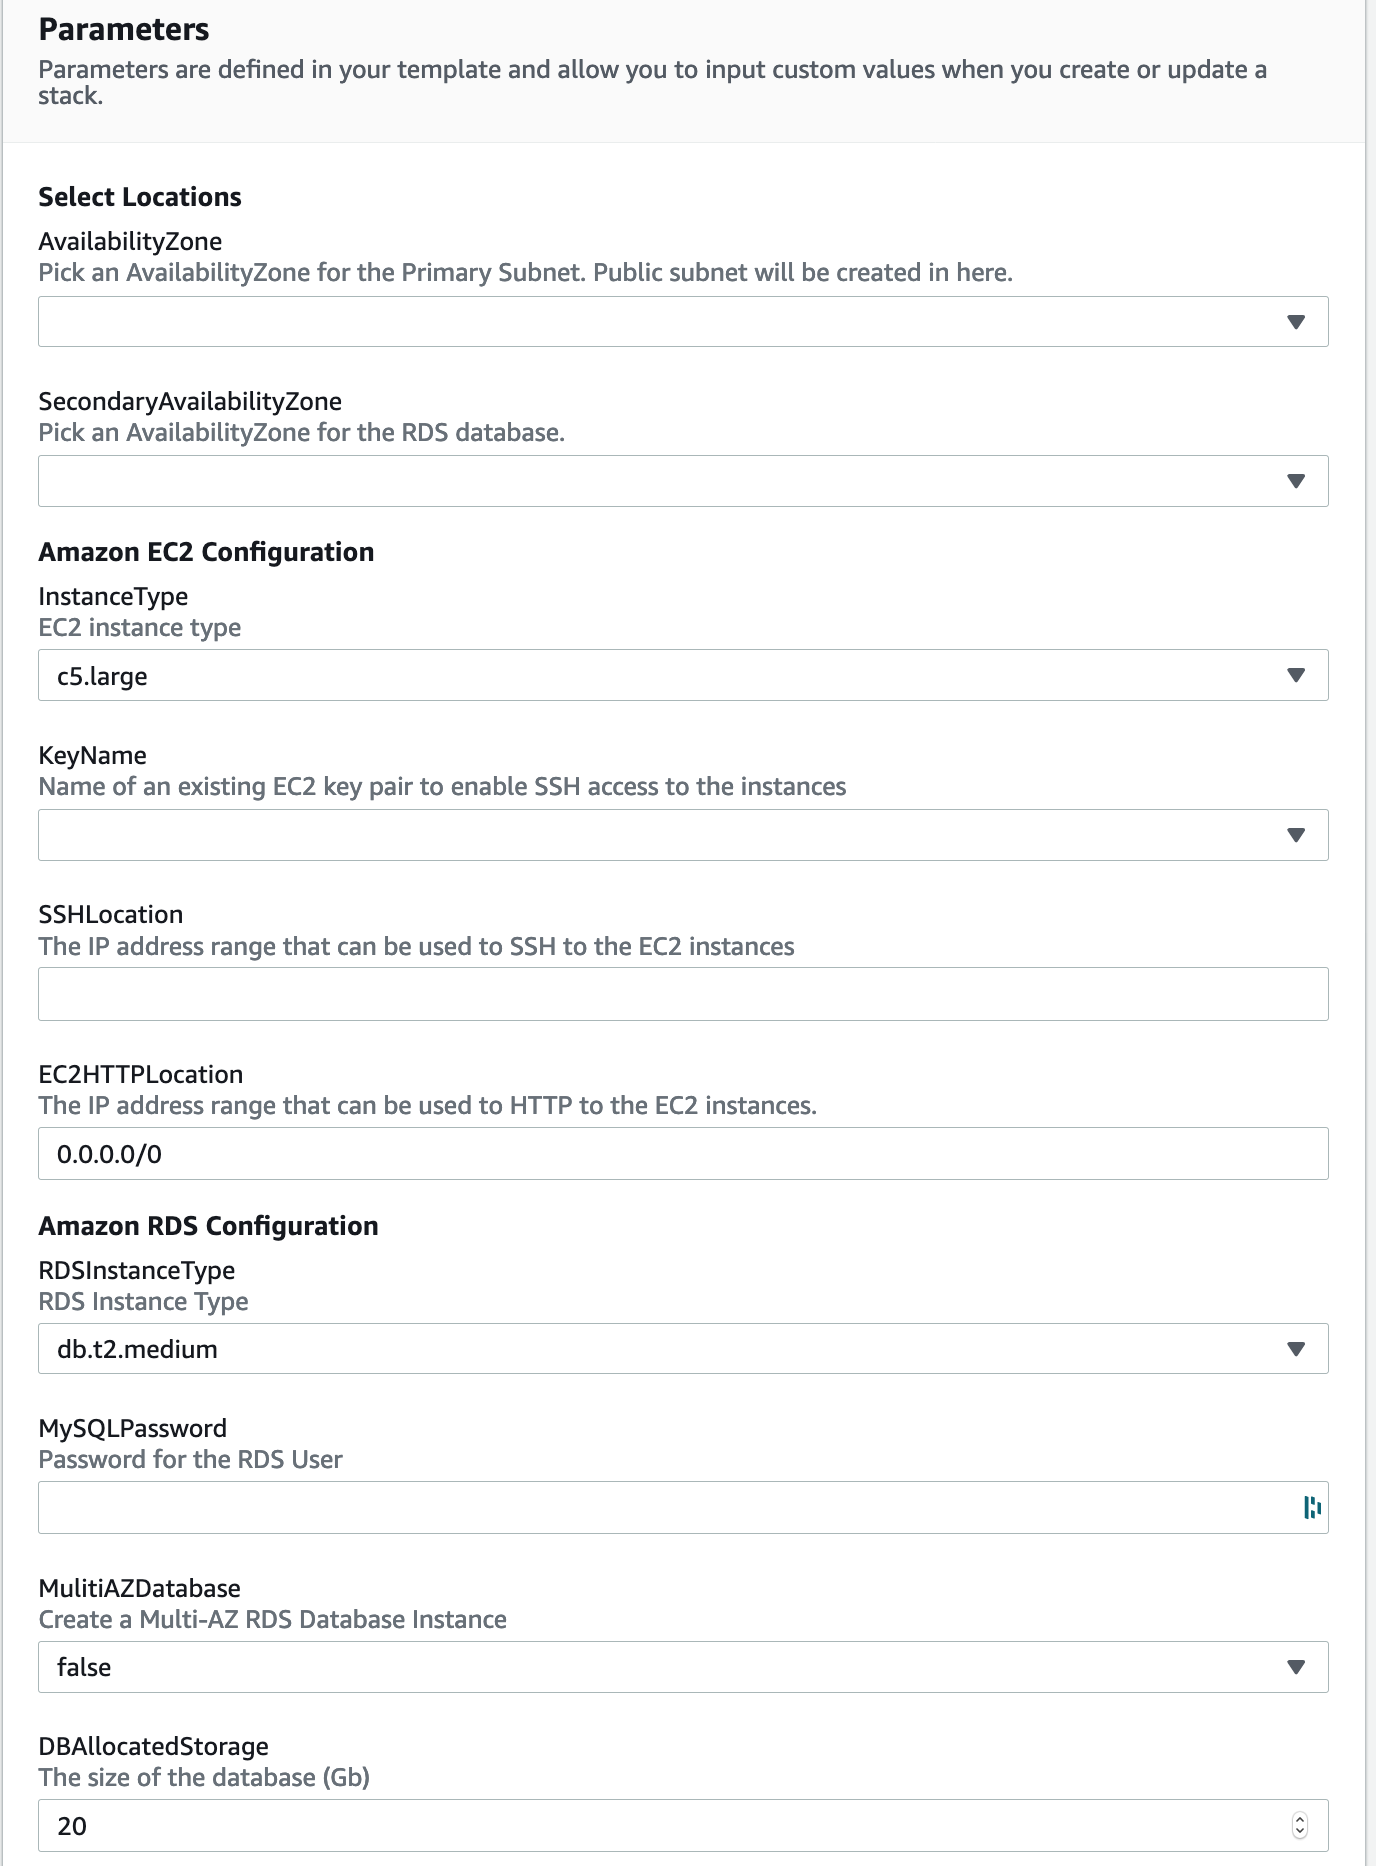
If "SiteDomain" and "CDNCertificationARN" is not shown in the parameter section, you're configuring the old JINKEI stack, we strongly recommend to migrate to the new one.
New (you're running the latest, don't need to migrate)
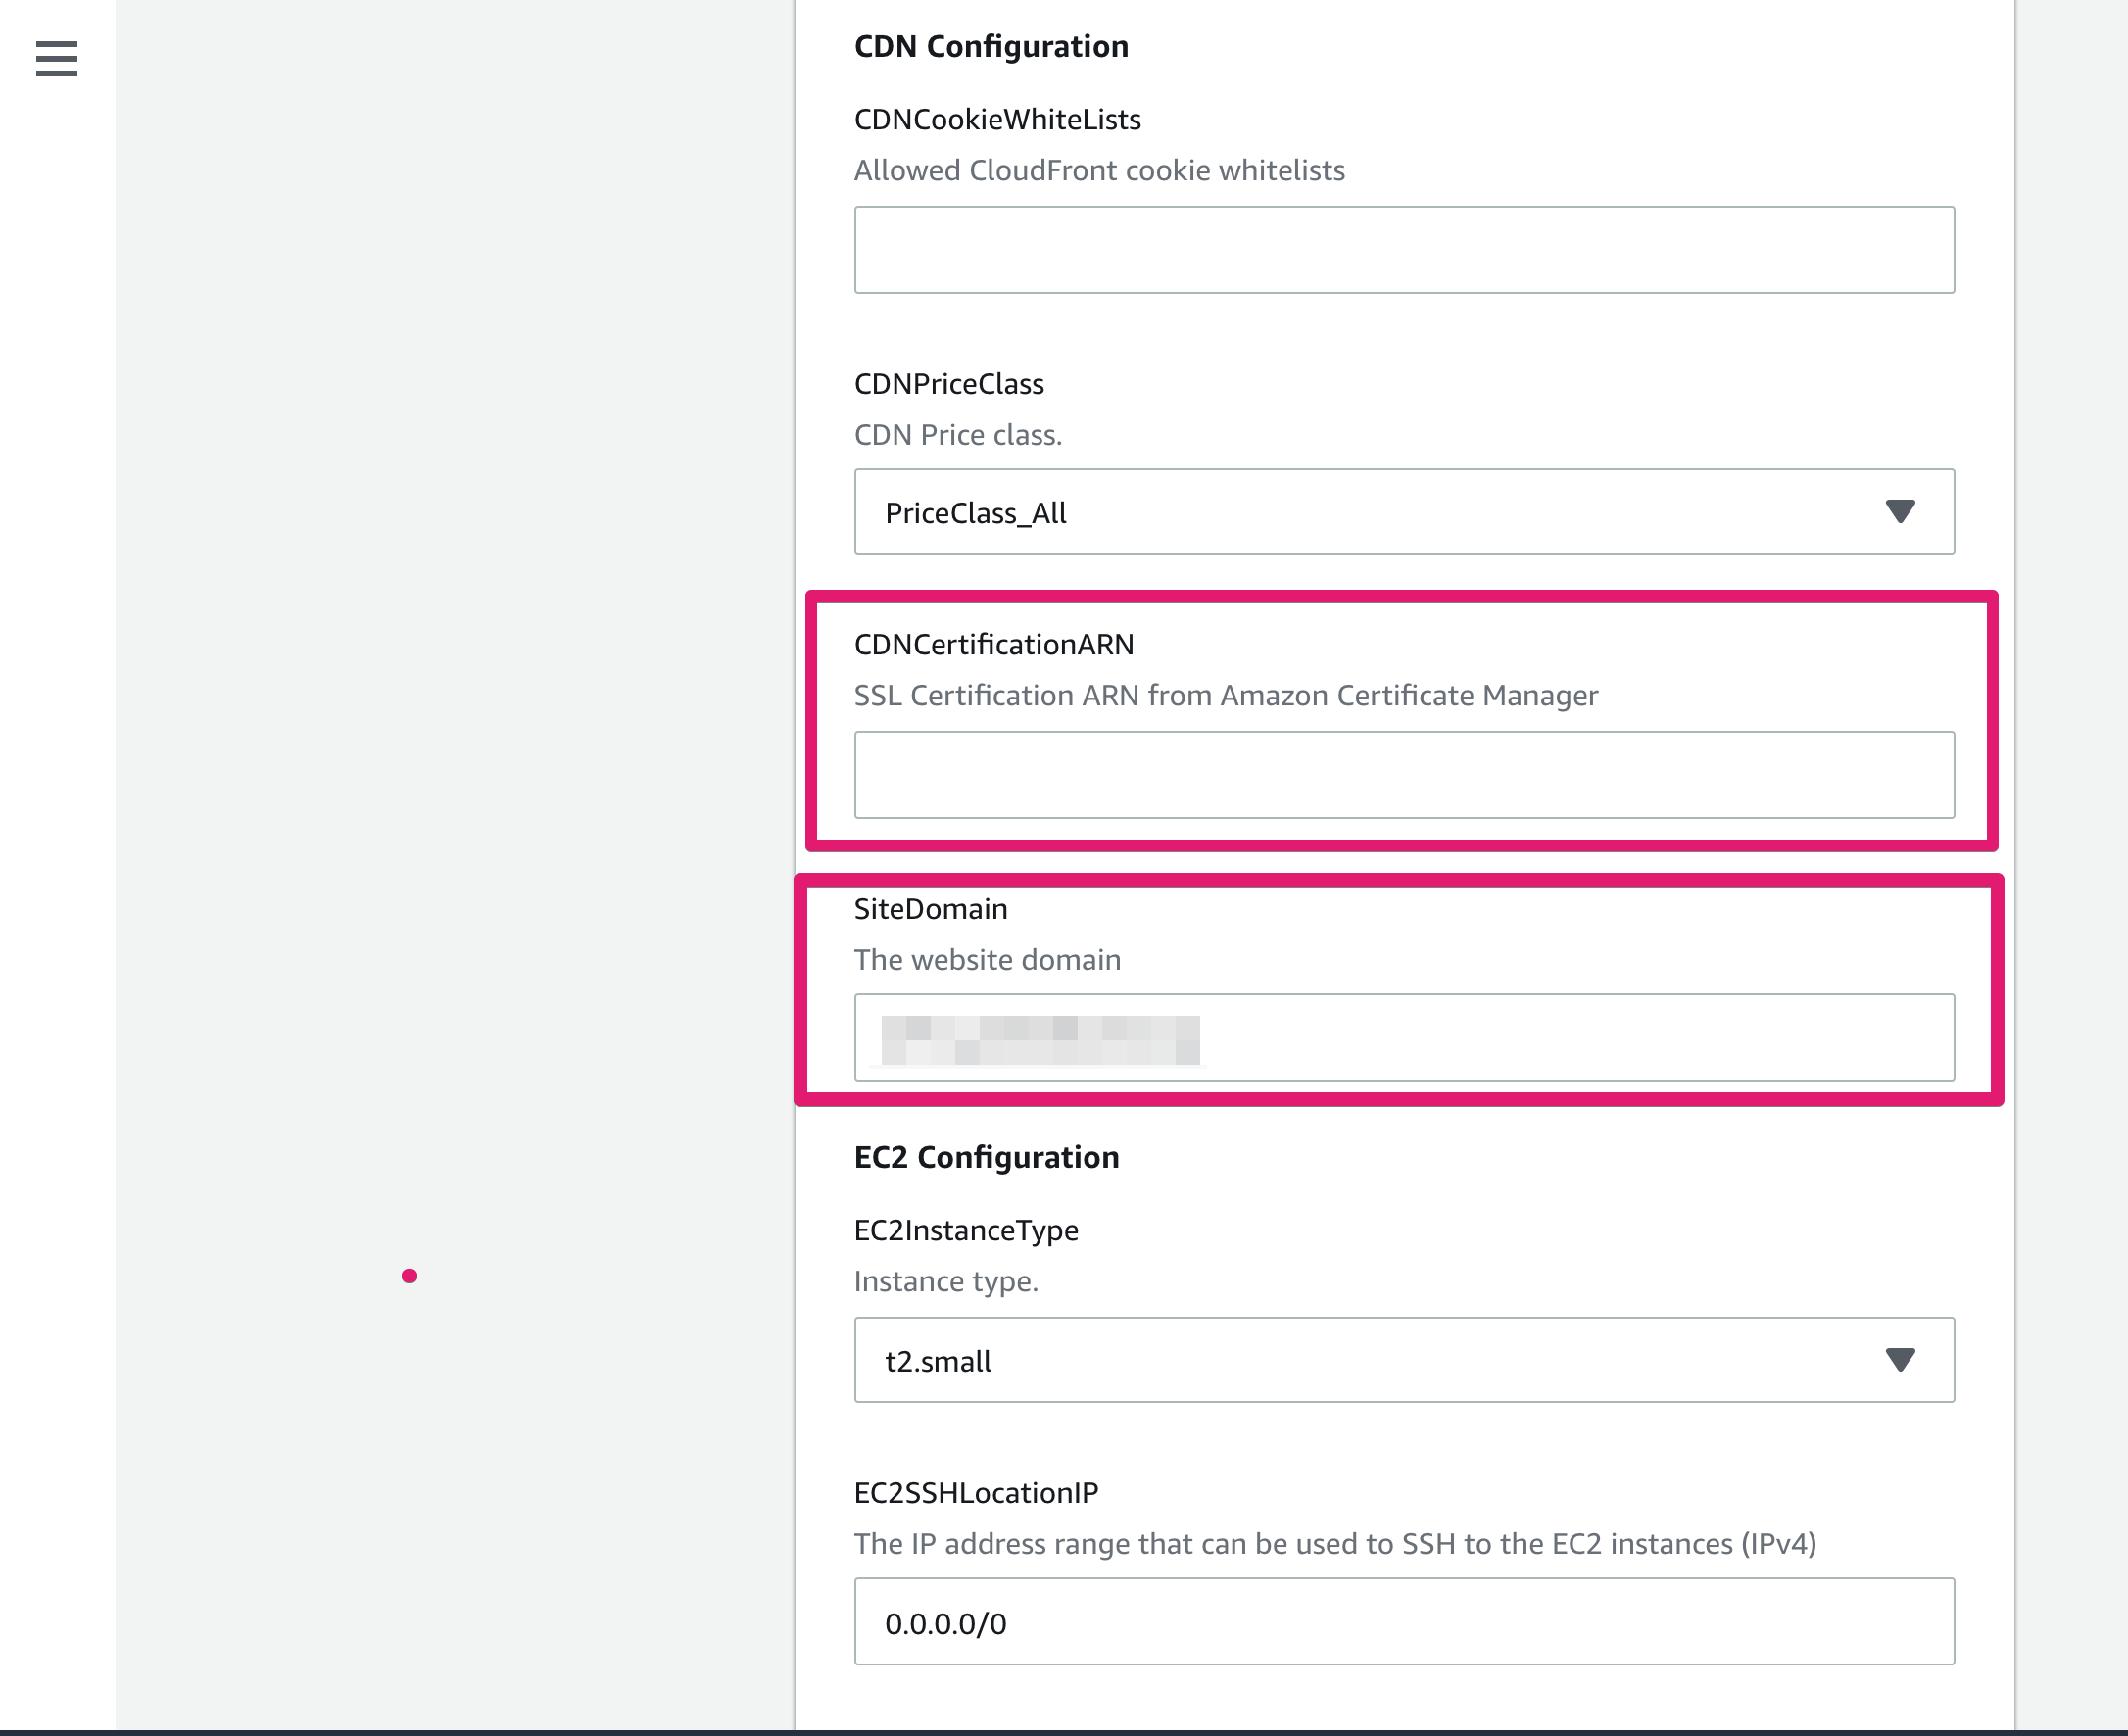
If "SiteDomain" and "CDNCertificationARN" is shown in the parameter section, you're configuring the new JINKEI stack.
Requirements
- AWS account
- DNS server (e.g. Route 53, Cloudflare, GoDaddy)
- Domain name (e.g. jinkei.example.com)
- Certificate certificate for the domain name on us-east-1 region and get ARN of it to attach to CloudFront (e.g. arn:aws:acm:us-east-1:123456789123:certificate/abcd1234-efgh-5678-jlkm-opqrstuvwxy)
- Running JINKEI stack (old JINKEI)
sample CloudFront distribution: oldjinkei.cloudfront.net - Running new JINKEI stack (new JINKEI)
sample CloudFront distribution: newjinkei.cloudfront.net
Old JINKEI stack: Backup WordPress files and database
Backup WordPress files using rsync command
$ rsync -avzhP --stats OLD-JINKEI-INSTANCE-IP-ADDRESS:/var/www/INSTANCE-ID/ ./OLD-JINKEI/
Export database of WordPress
I. Login to running old JINKEI EC2 instance using SSH
$ ssh -i PATH-TO-KEY-FILE ec2-user@OLD-JINKEI-INSTANCE-IP-ADDRESS
II. Export database file using wp-cli
$ wp db export --path=/var/www/vhosts/
 Success: Exported to 'wp_jinkei_example_com.sql'.
$ exit
III. Copy export database file
$ rsync avz --stats OLD-JINKEI-INSTANCE:/home/ec2-user/wp_jinkei_example_com.sql ./OLD-JINKEI/
IV. Make sure all WordPress files and database file are exists.
Create CloudFormation new JINKEI stack
Please refer another support document: How to set up New JINKEI stack
Import Old JINKEI's WordPress data
I. Upload all WordPress files and database file to New JINKEI EC2 instance
$ rsync -avzhP --stats ./OLD-JINKEI/ OLD-JINKEI-INSTANCE-IP-ADDRESS:/home/ec2-user/
II. Login to running new JINKEI EC2 instance using SSH
$ ssh -i PATH-TO-KEY-FILE ec2-user@NEW-JINKEI-INSTANCE-IP-ADDRESS
II. Move uploaded files to /var/www/vhosts/NEW-JINKEI-INSTANCE-ID
$ cd OLD-JINKEI
$ mv local-config.php local-config.php_oldjinkei
$ sudo su -

# cd /var/www/vhosts/NEW-JINKEI-INSTANCE-ID/
# cp -R /home/ec2-user/OLDJINKEI/* ./
# rm local-config.php_oldjinkei
# chown -R nginx:www *
# exit
III. Import wp_www_example_com.sql to the sever
$ wp db import 'wp_www_example_com.sql'
Success: Imported from 'wp_www_example_com.sql'.
$ exit
Assign the domain name to the new JINKEI CloudFormation Stack
I. Add TXT record
<CNAME alias> TXT <CloudFront distribution name>
In this article, record will be the following
jinkei.example.com TXT newjinkei.cloudfront.net
or
_jinkei.example.com TXT newjinkei.cloudfront.net
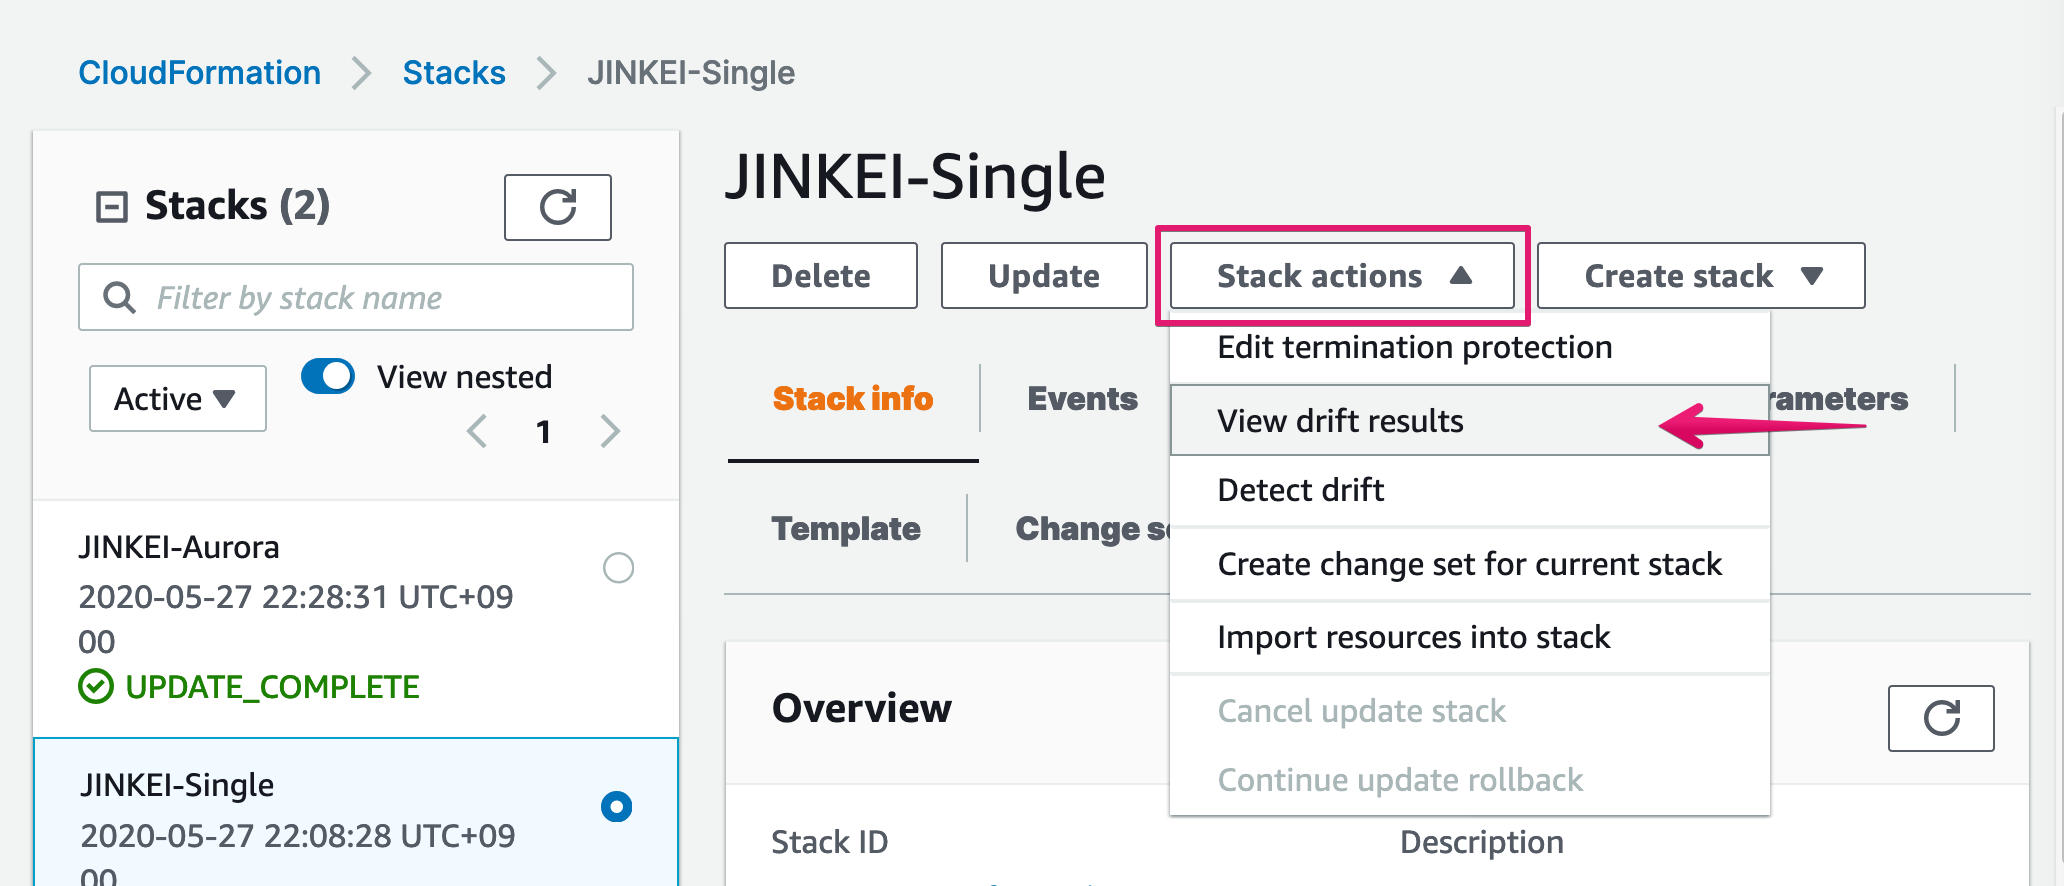
II. Click [Detect drift] under [Stack actions] menu
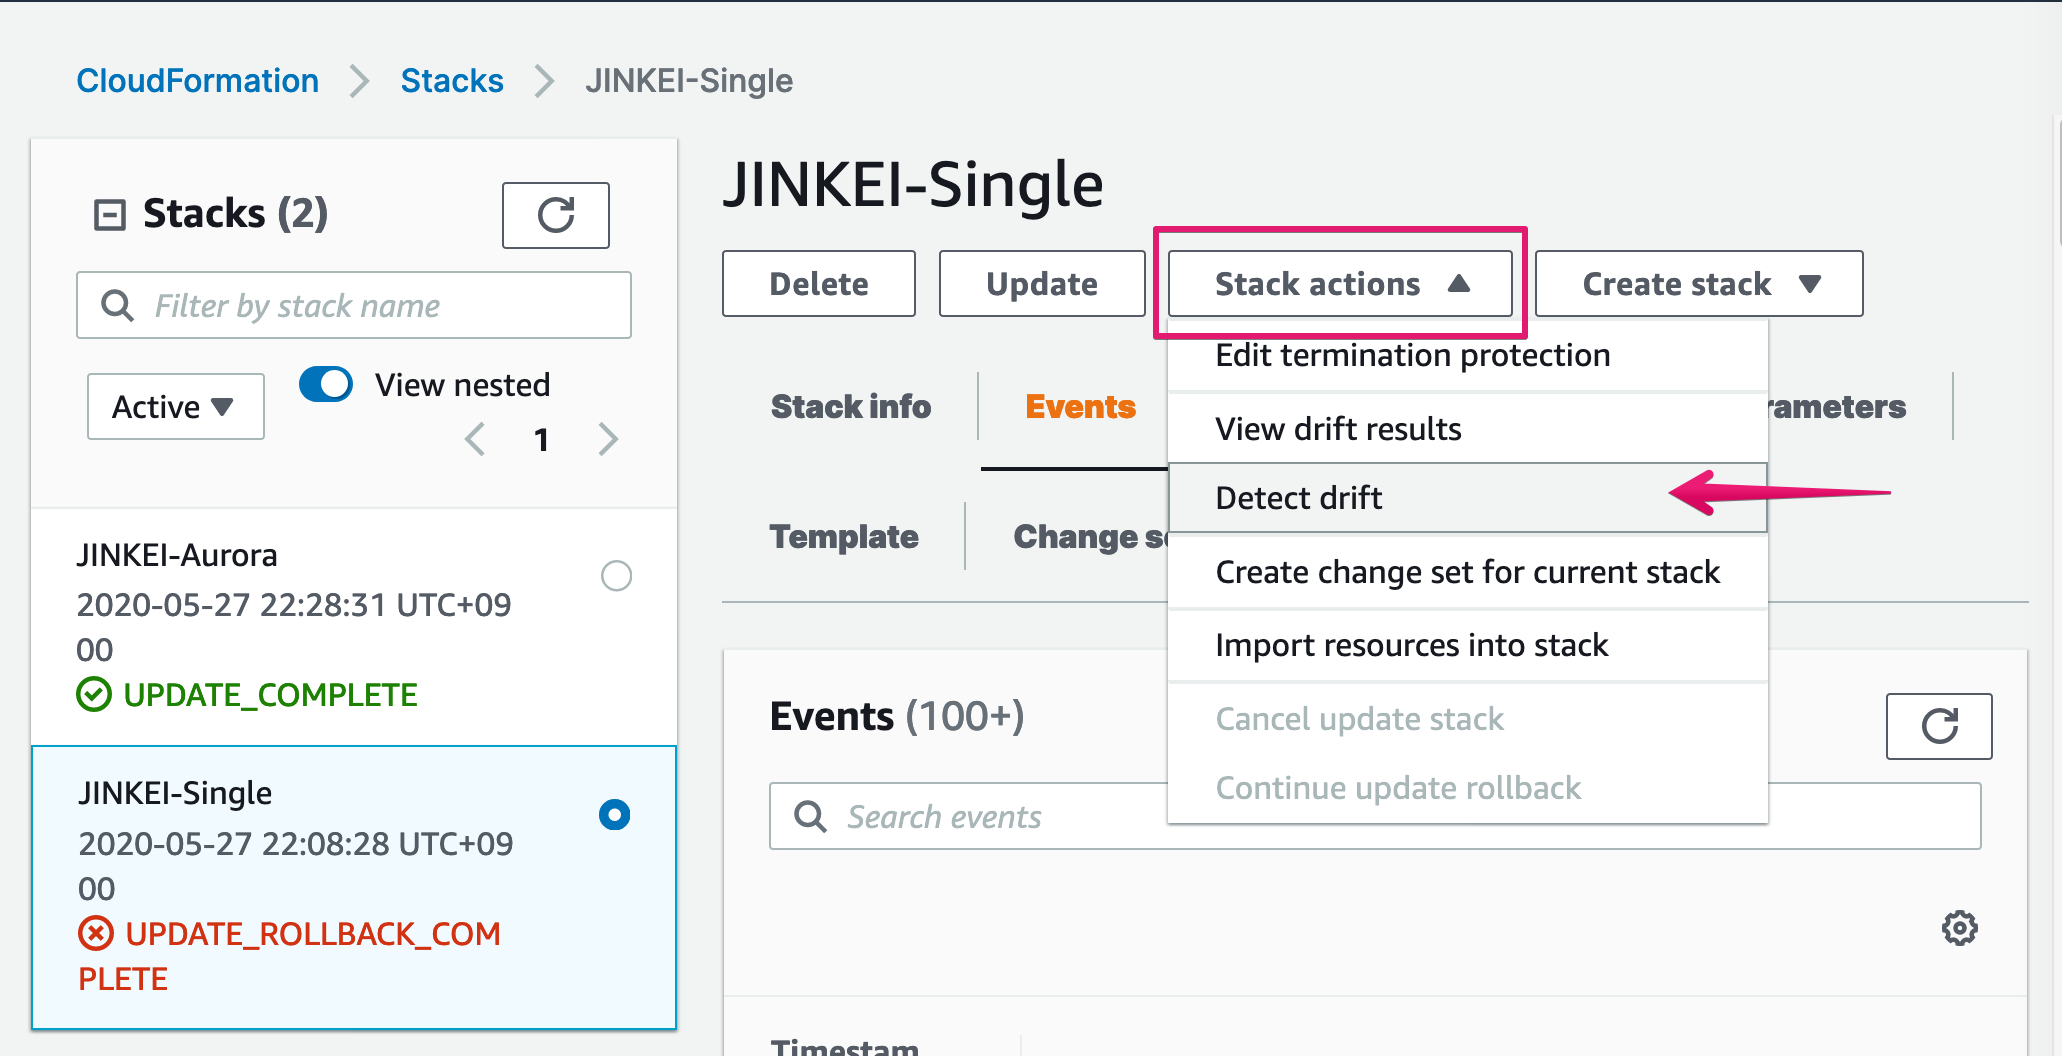
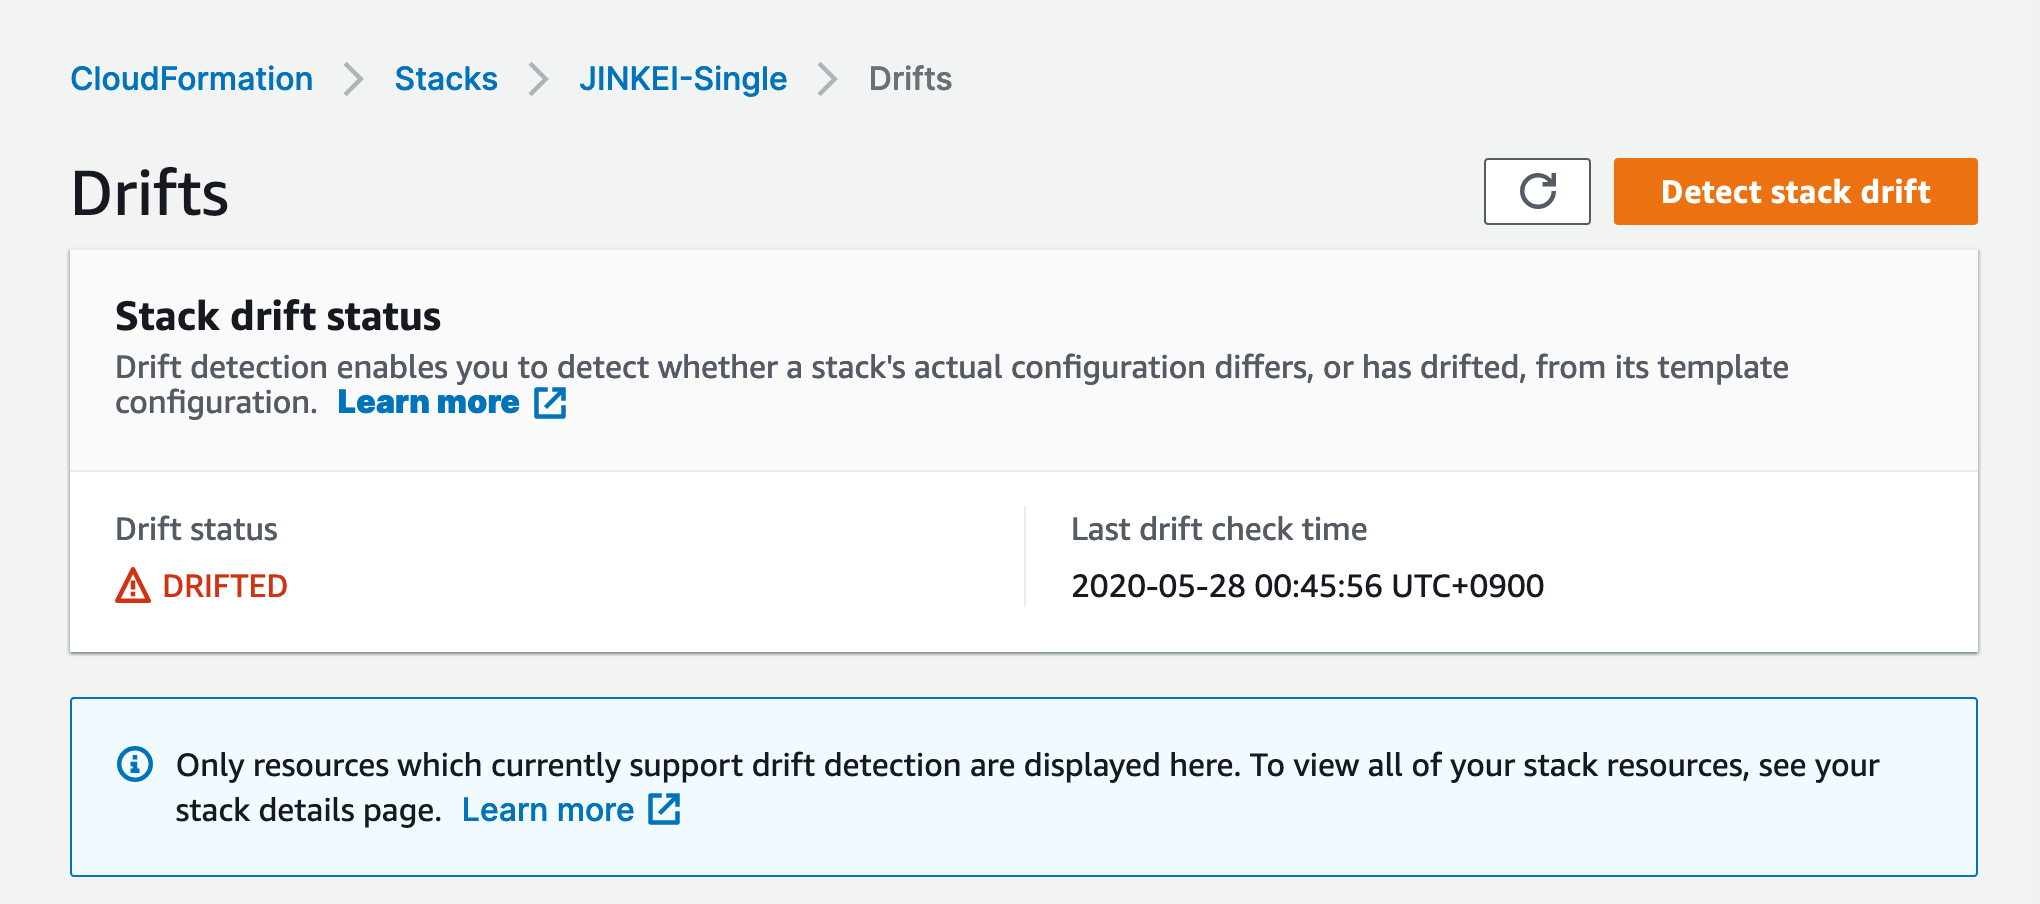
III. Make sure Drift status is DRIFTED
For more details, refer to AWS support document
https://aws.amazon.com/premiumsupport/knowledge-center/resolve-cnamealreadyexists-error/?nc1=h_ls
Update DNS record of the domain name
Change current CNAME record for the domain name
For example, change the following record
to
Update CloudFormation settings
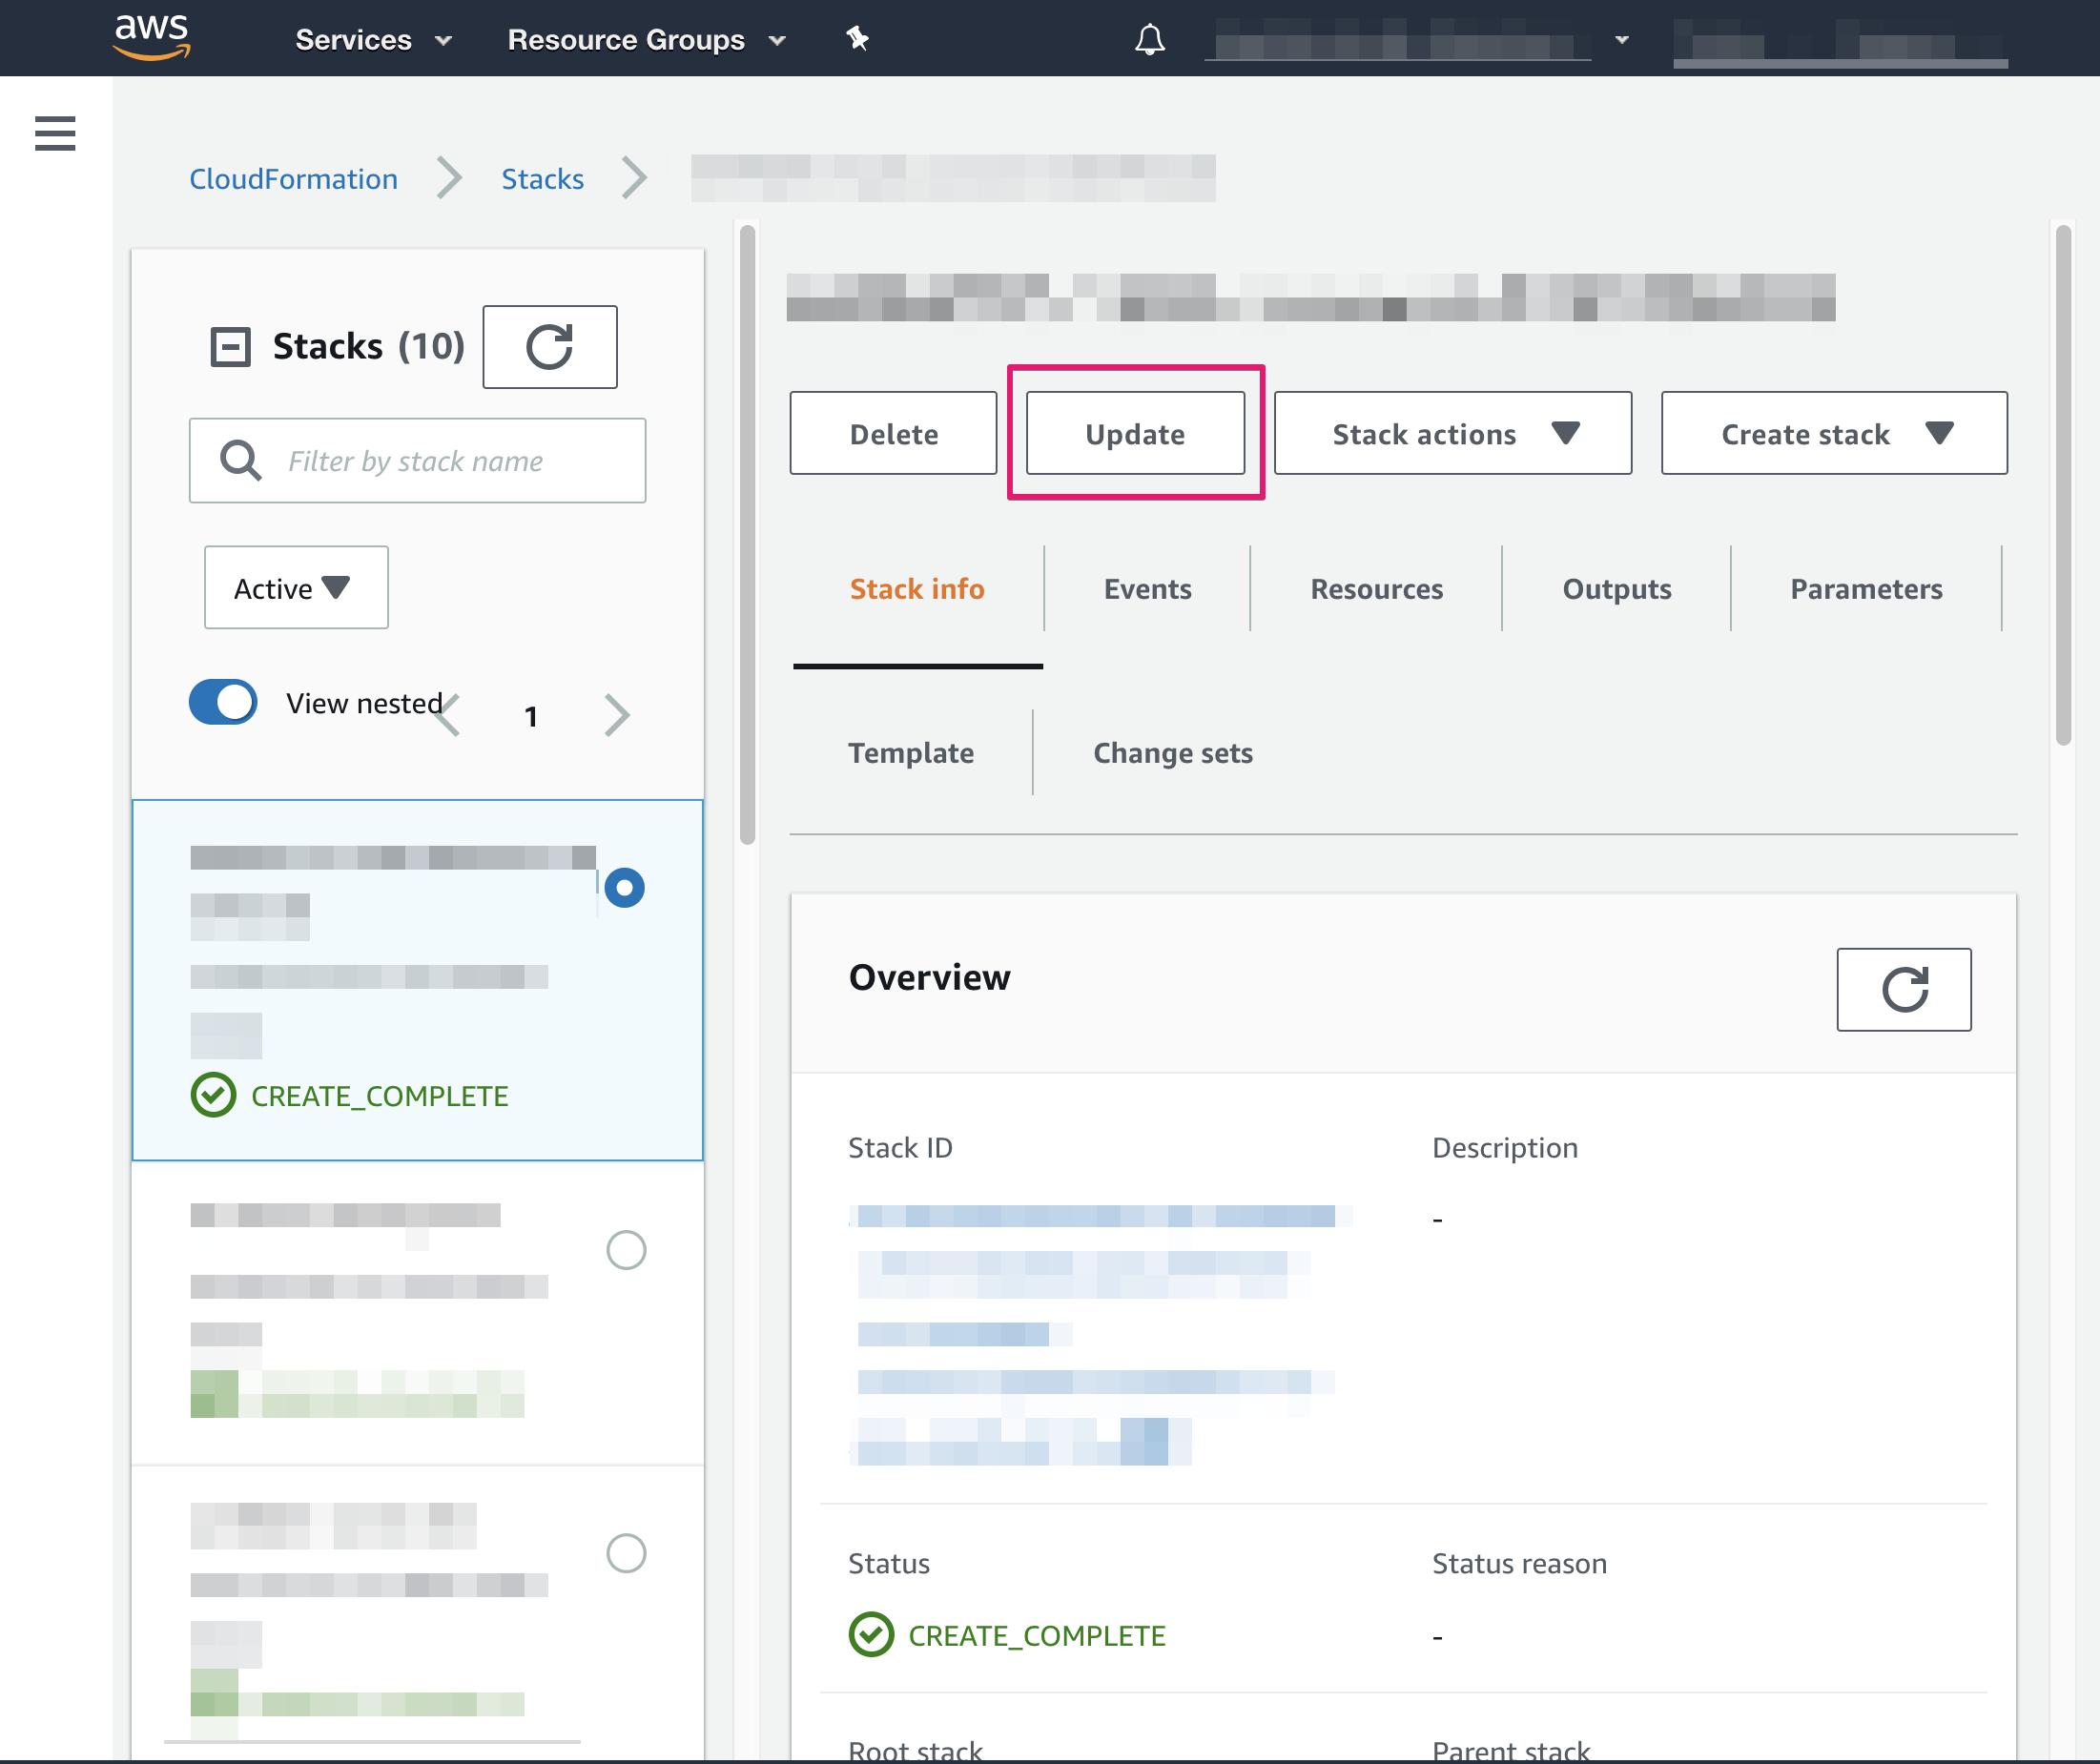
Navigate new JINKEI stack and click Update button
Choose [Use current template] and click [Next] button
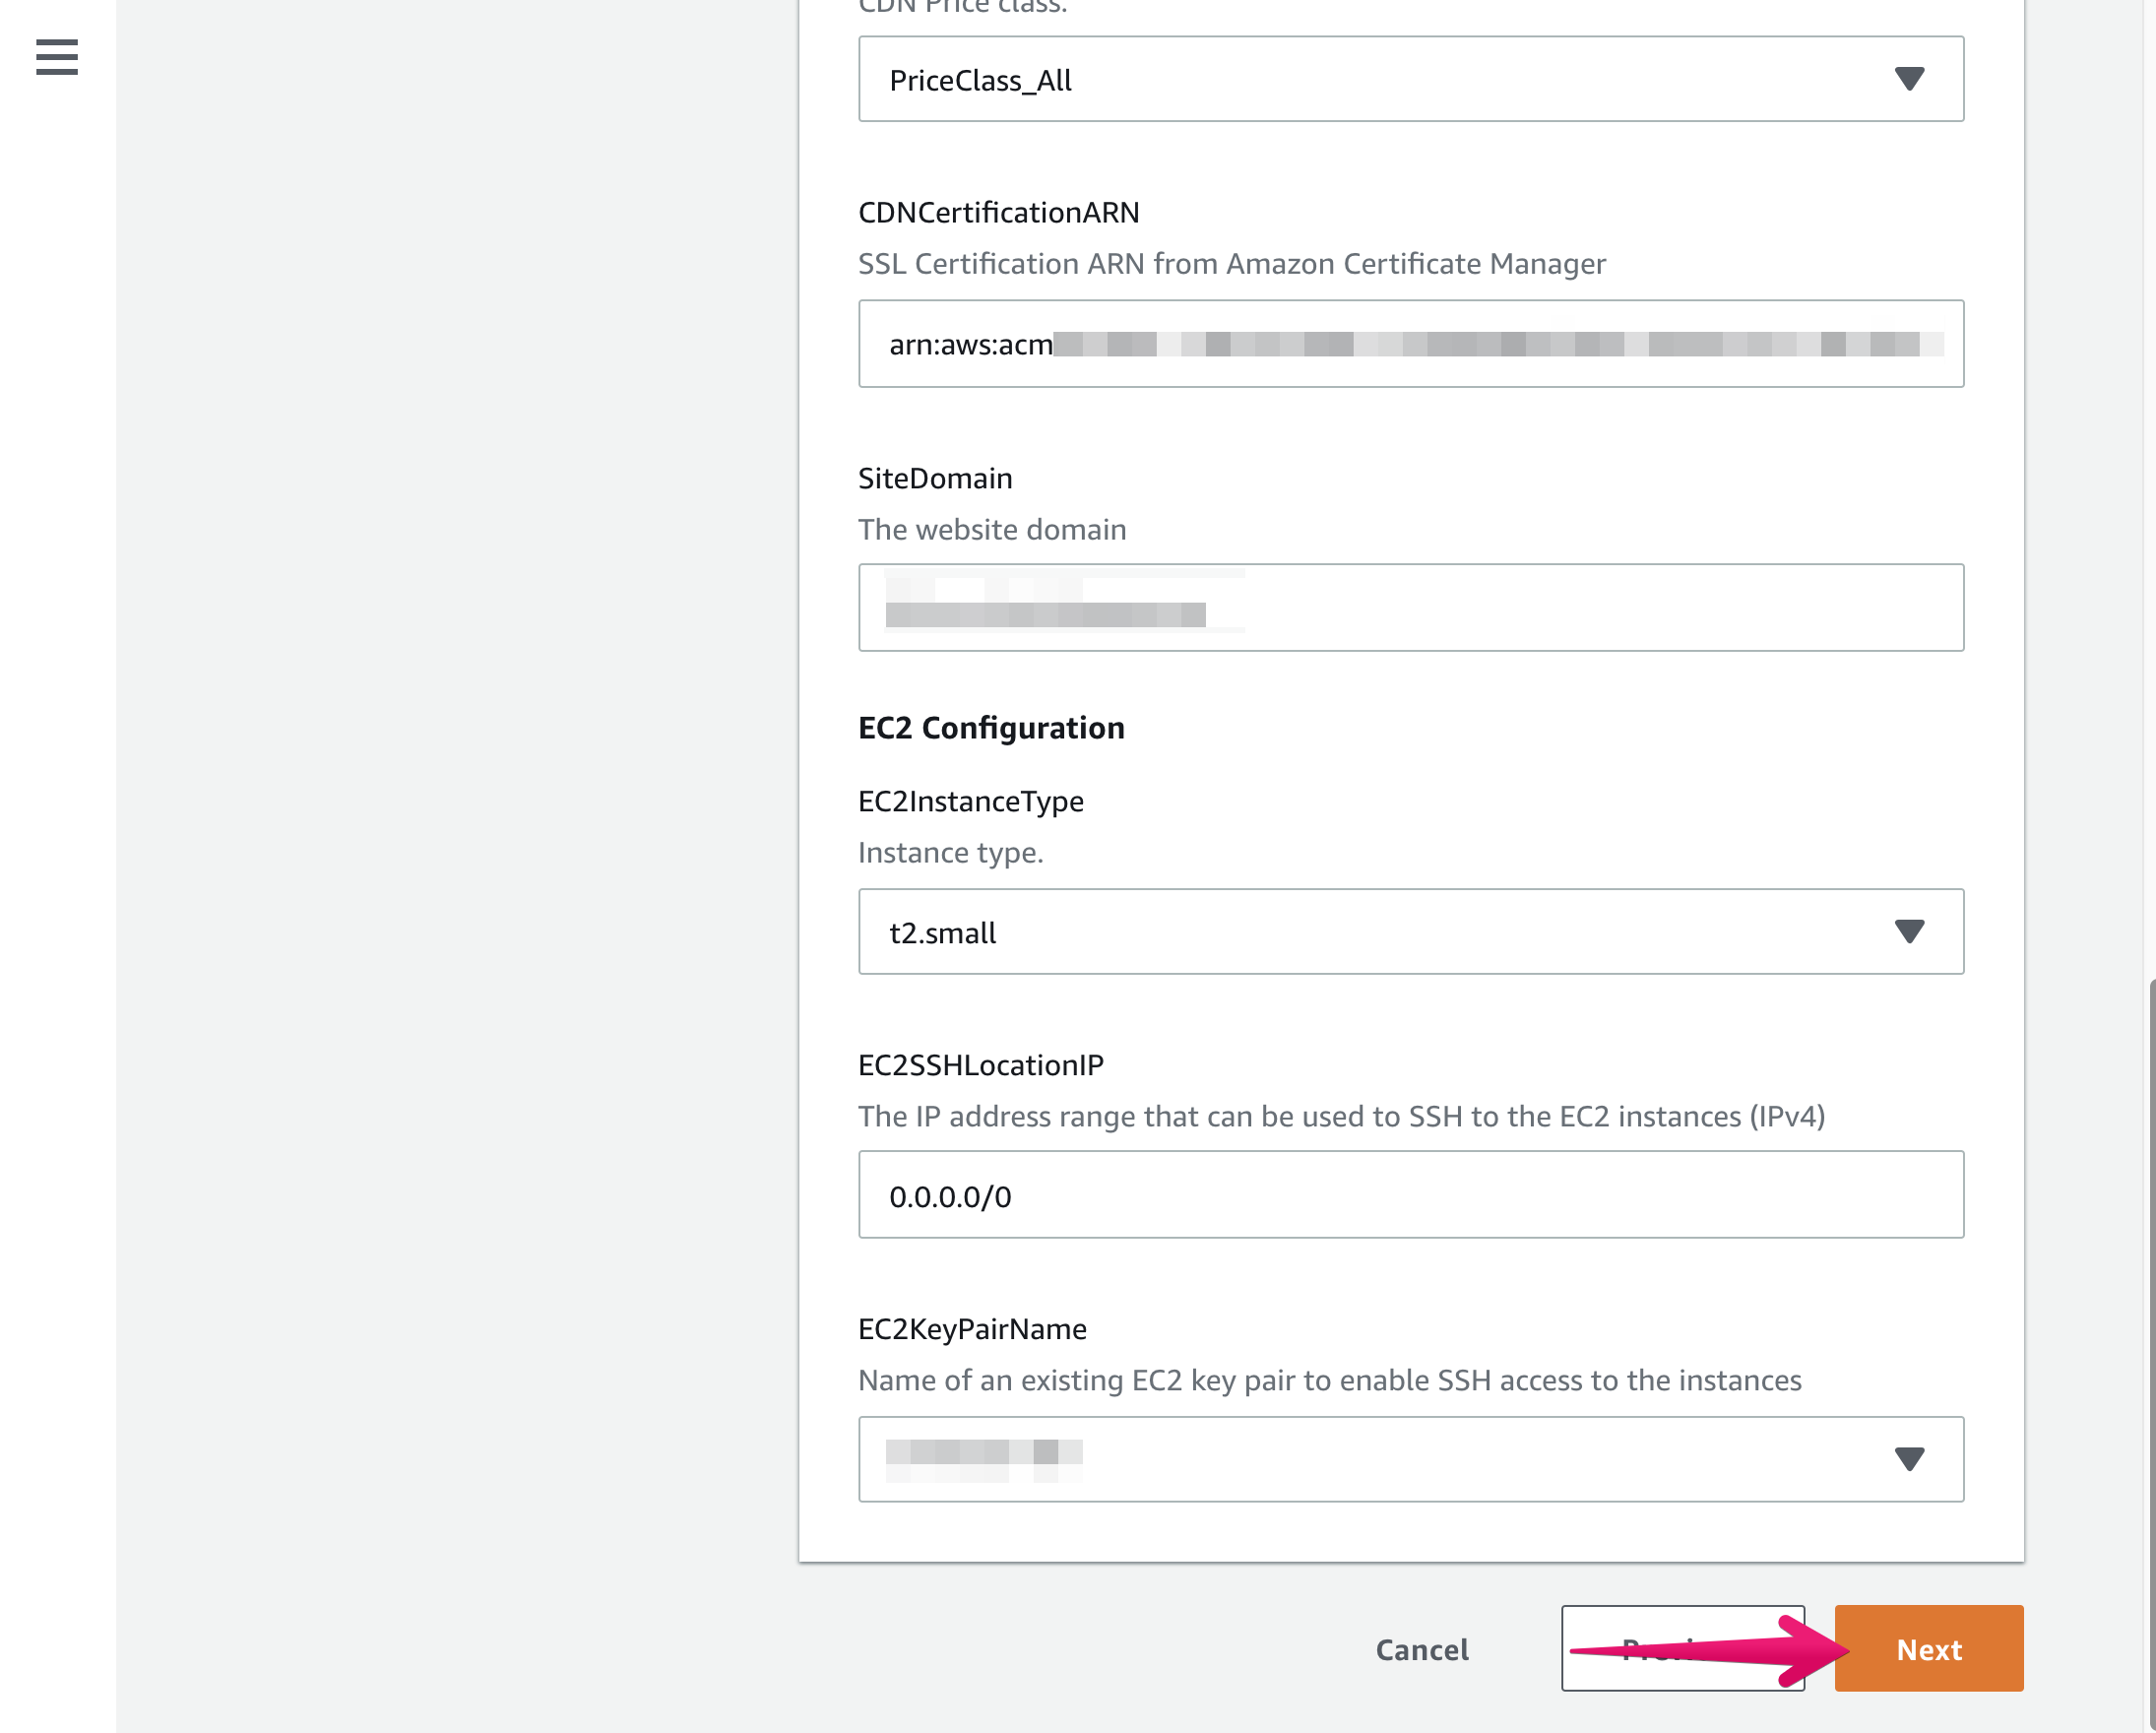
Update values
- Paste copied ARN to CDNCertifiationARN
- Input your site domain name (e.g. jinkei.example.com) to SiteDomain

Scroll down to the bottom of page then click [Next] button
Check Capabilities then [Update stack]

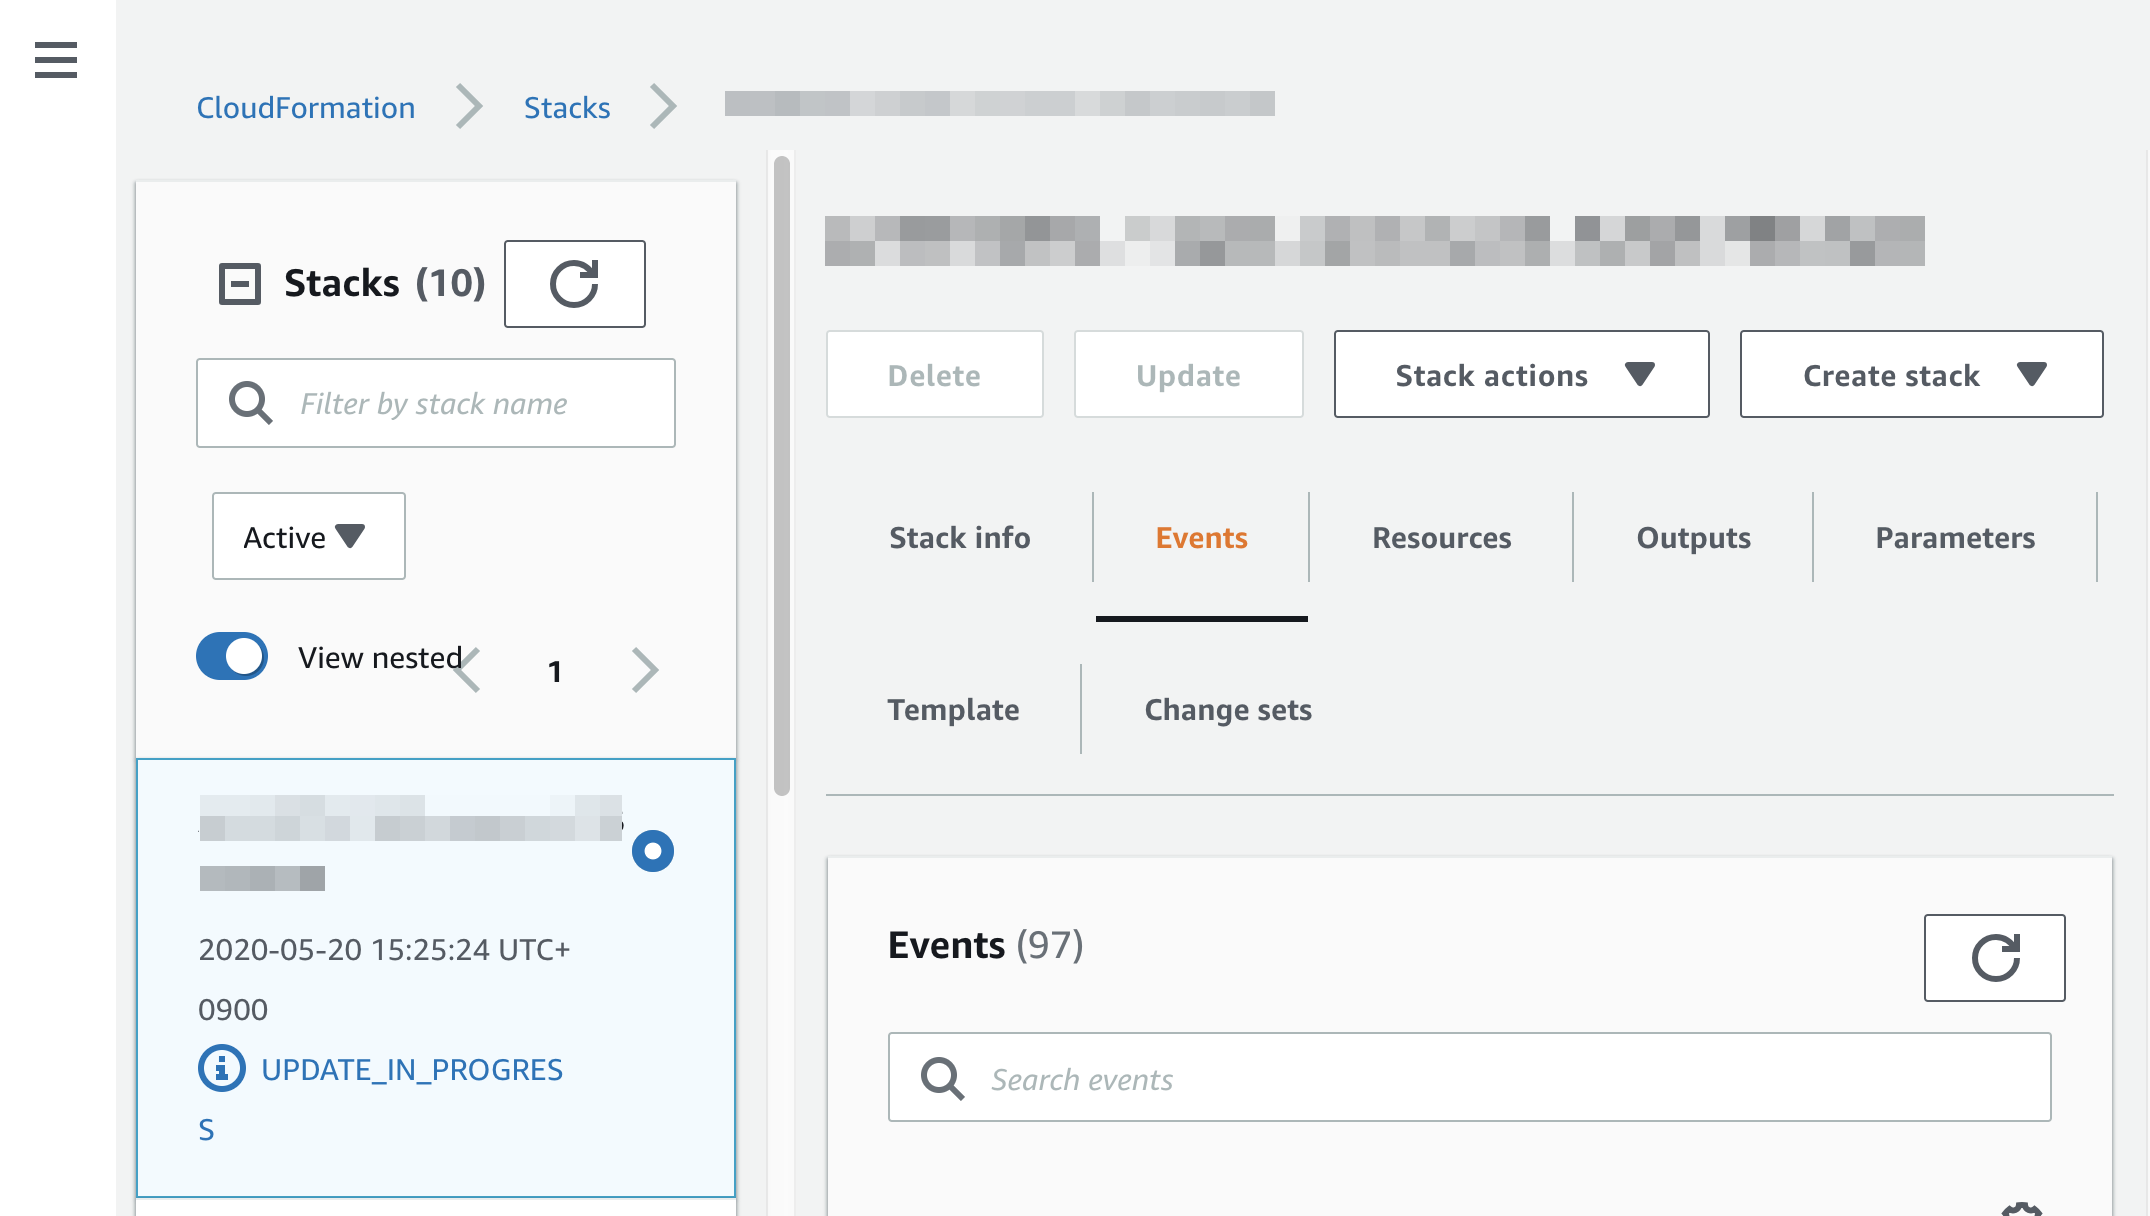
Stack will be updating
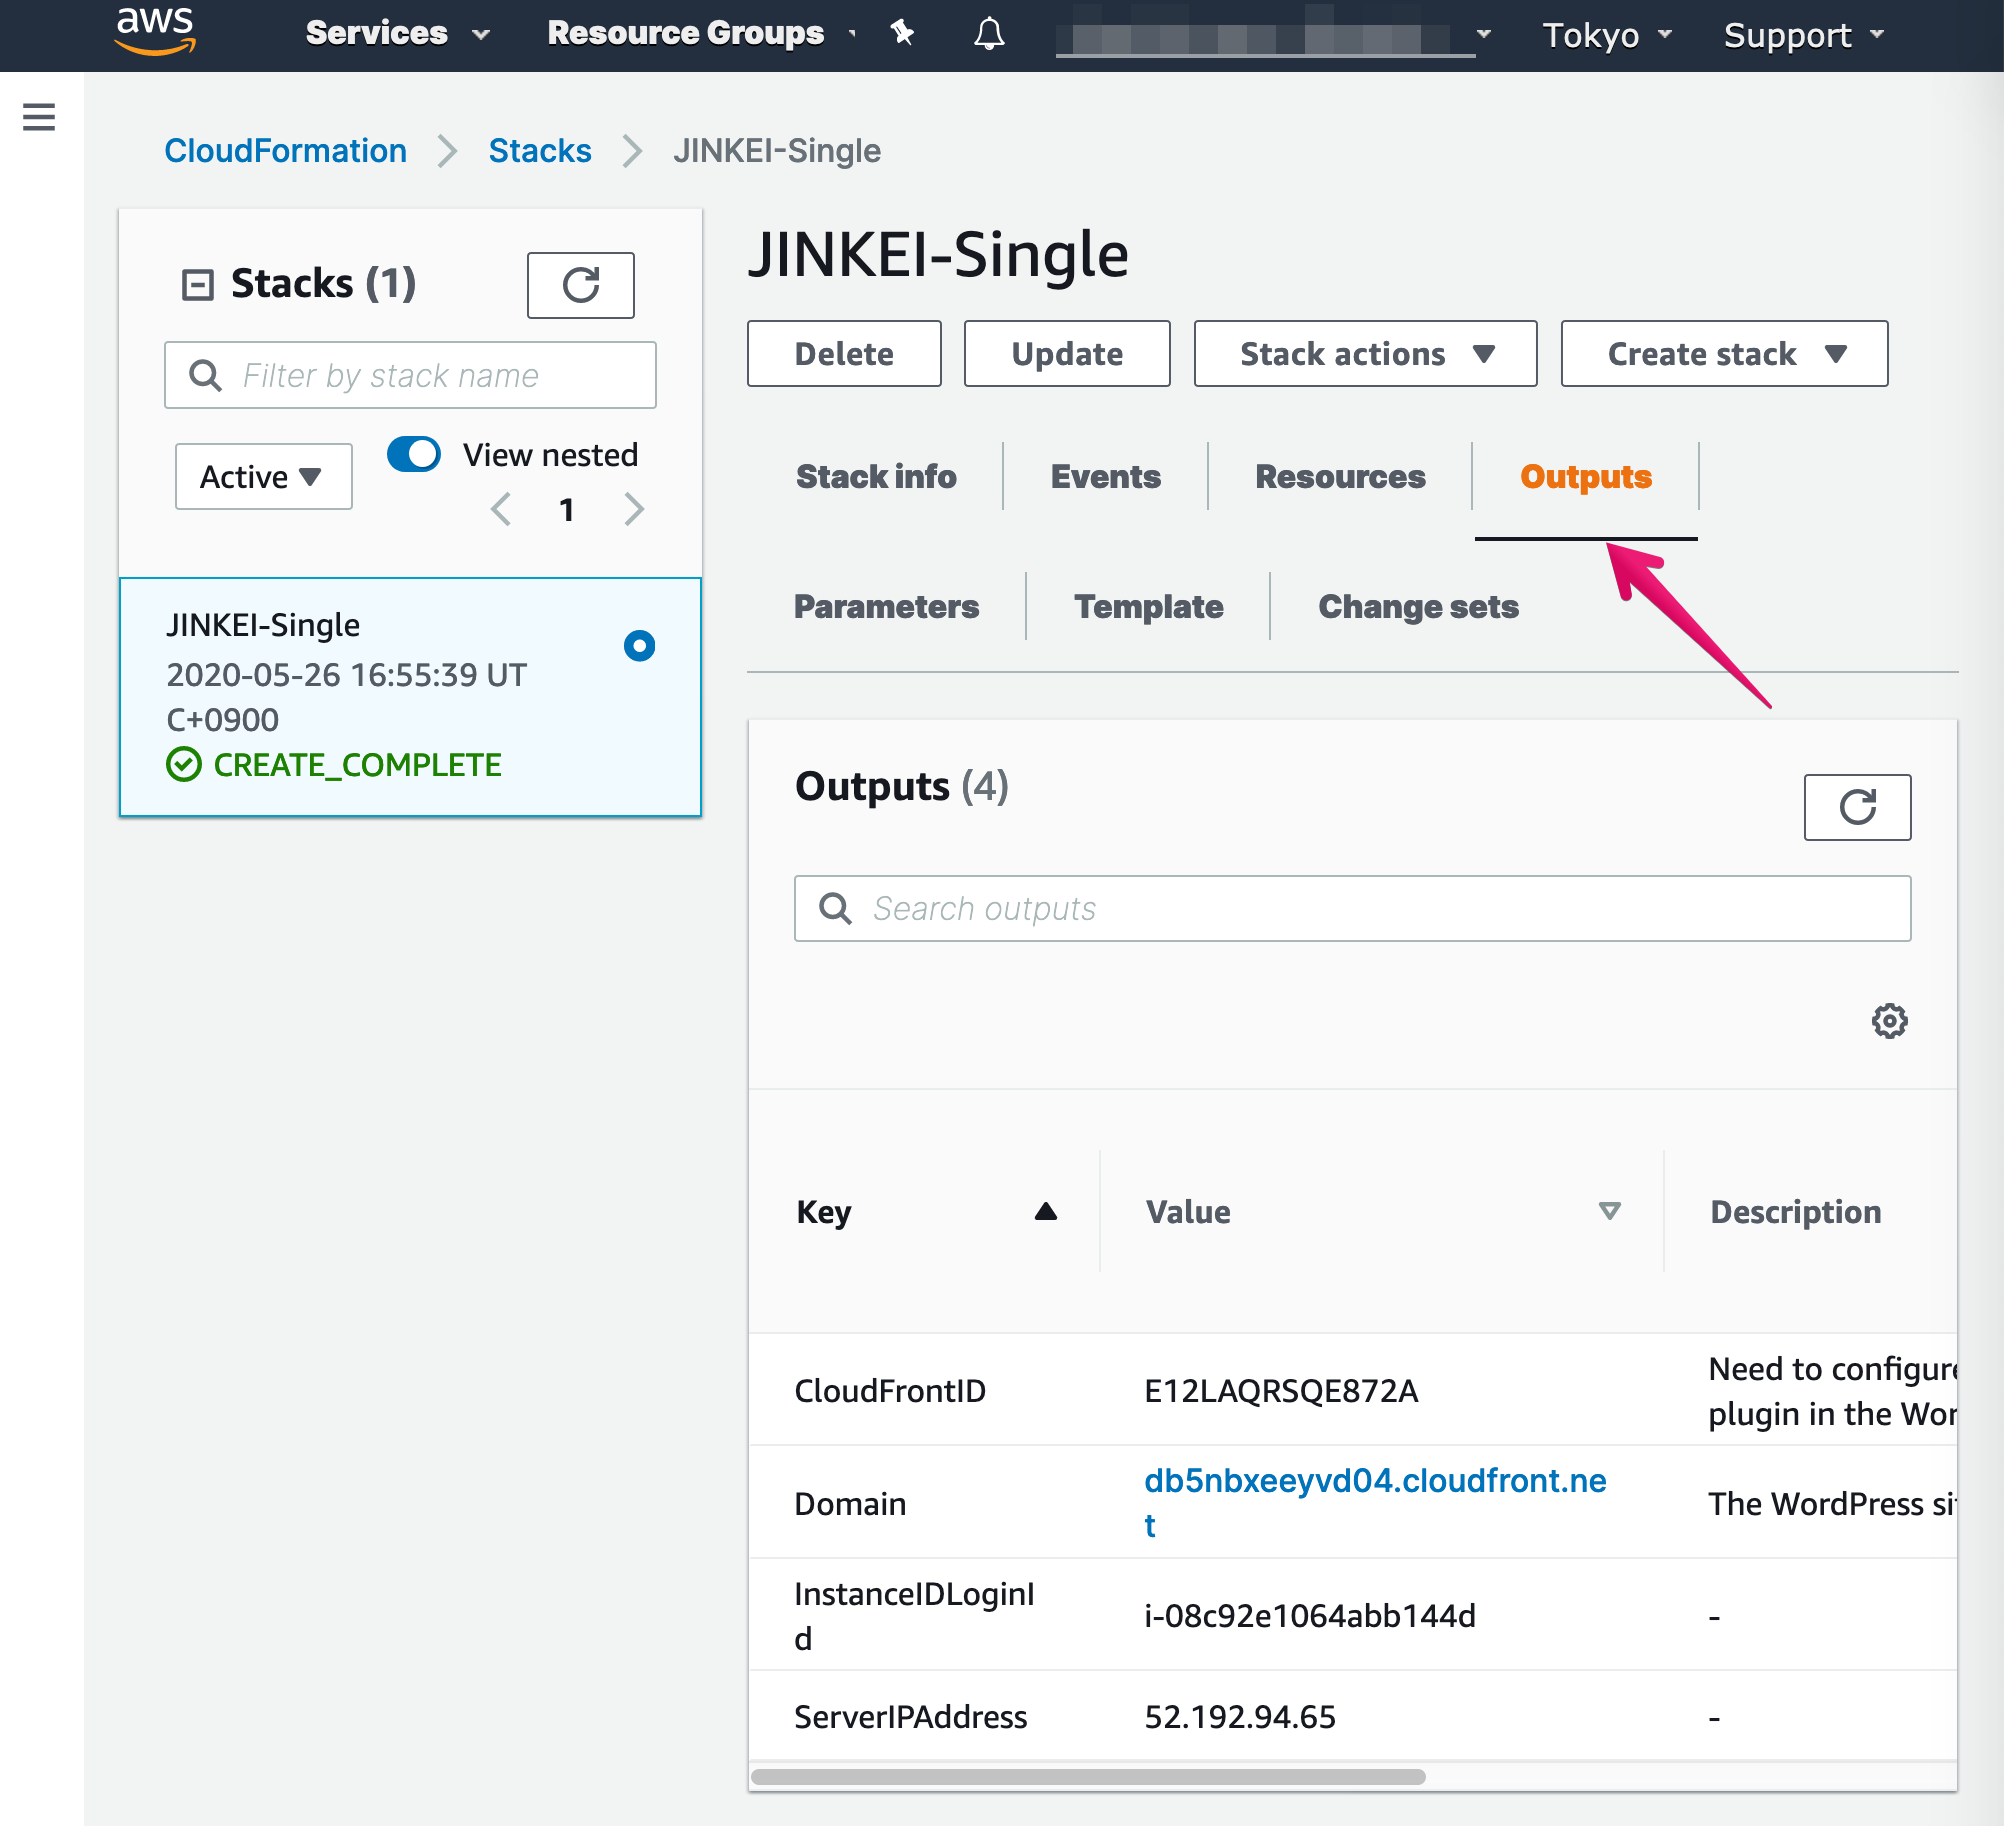
Click Outputs menu