How to set up New JINKEI stack Tomohyco Tsunoda
Table of contents
- Requirements
- Subscribe JINKEI Stack
- Create CloudFormation JINKEI Stack
- Get Certificate's ARN
- Update CloudFormation settings
- Setup WordPress
- Assign the domain name to CloudFormation Stack to make it public
- Update DNS record of the domain name
Requirements
- AWS account
- DNS server (e.g. Route 53, Cloudflare, GoDaddy)
- Domain name (e.g. jinkei.example.com)
- Certificate ARN of the domain name to attach to CloudFront (e.g. arn:aws:acm:us-east-1:123456789123:certificate/abcd1234-efgh-5678-jlkm-opqrstuvwxy)
Phase 1. Subscribe JINKEI Single
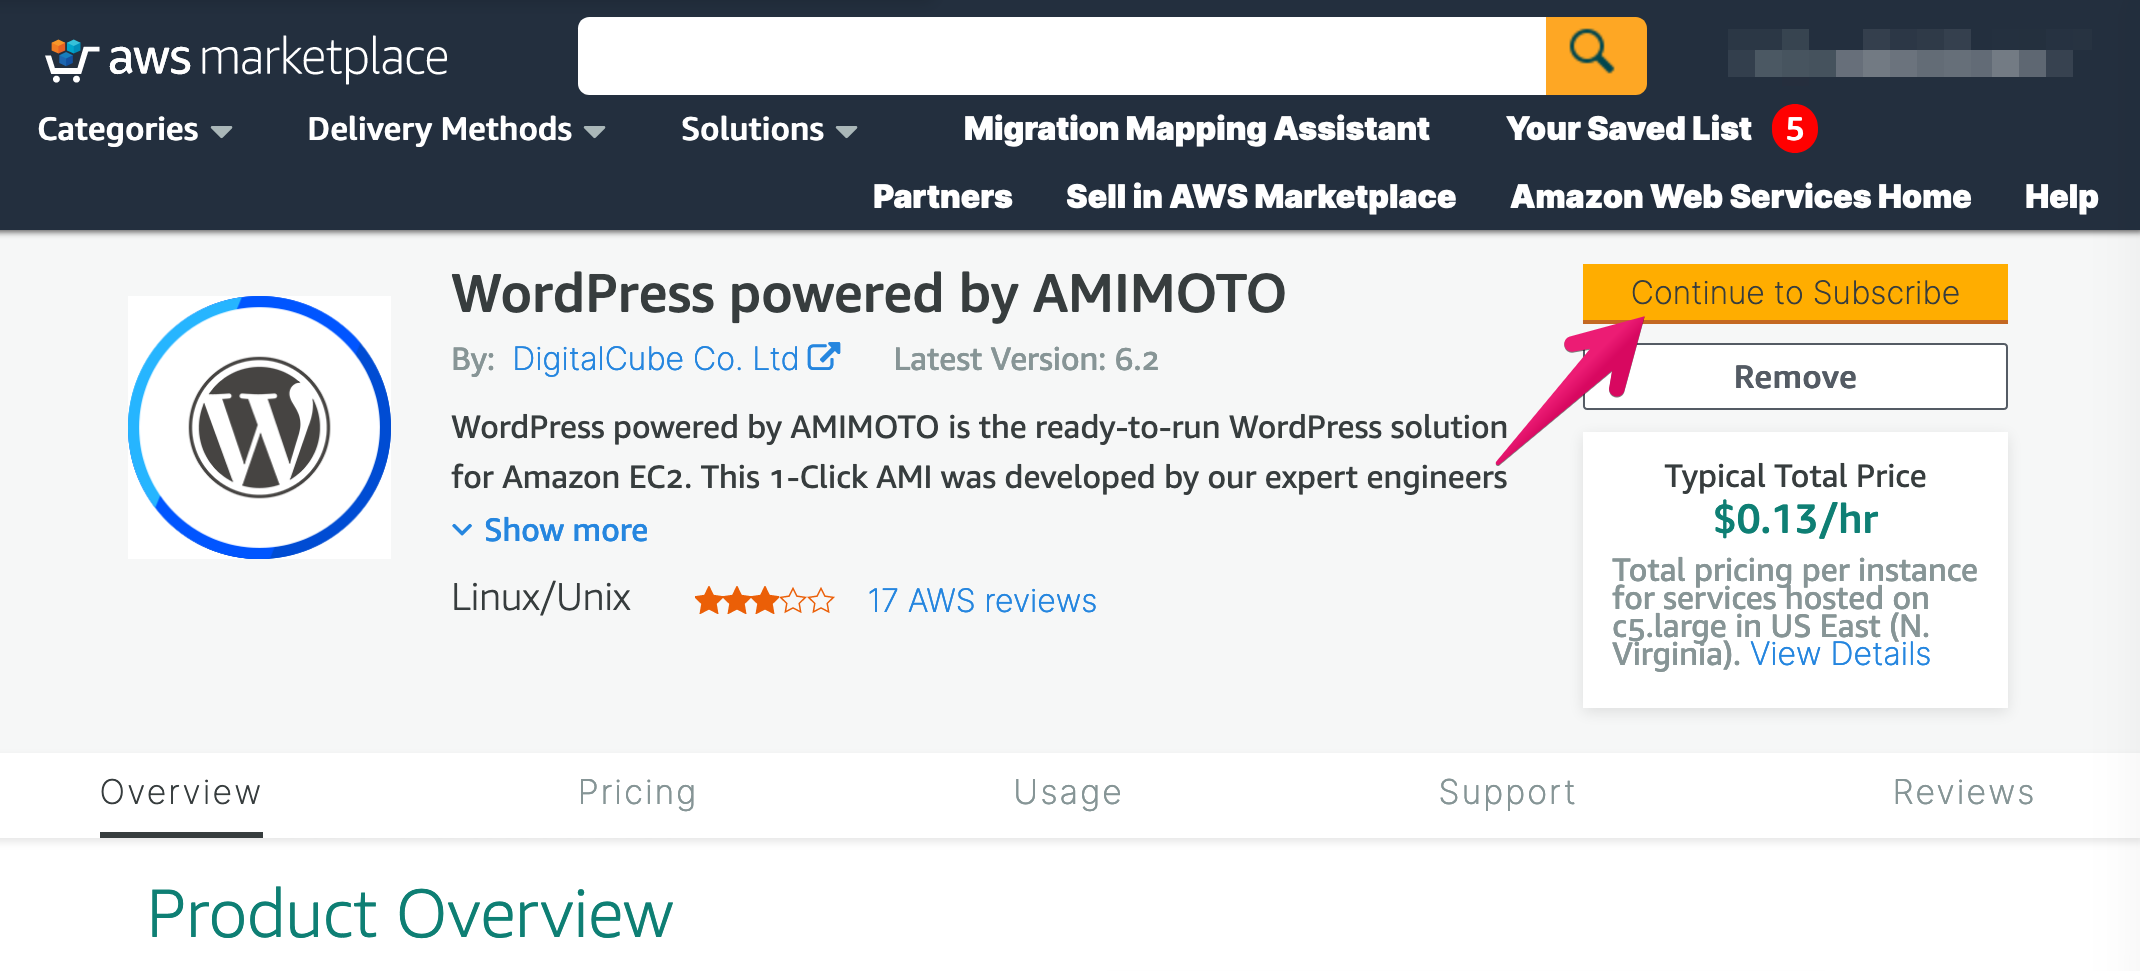
Navigate to WordPress powered by AMIMOTO and click [Continue to Subscribe]
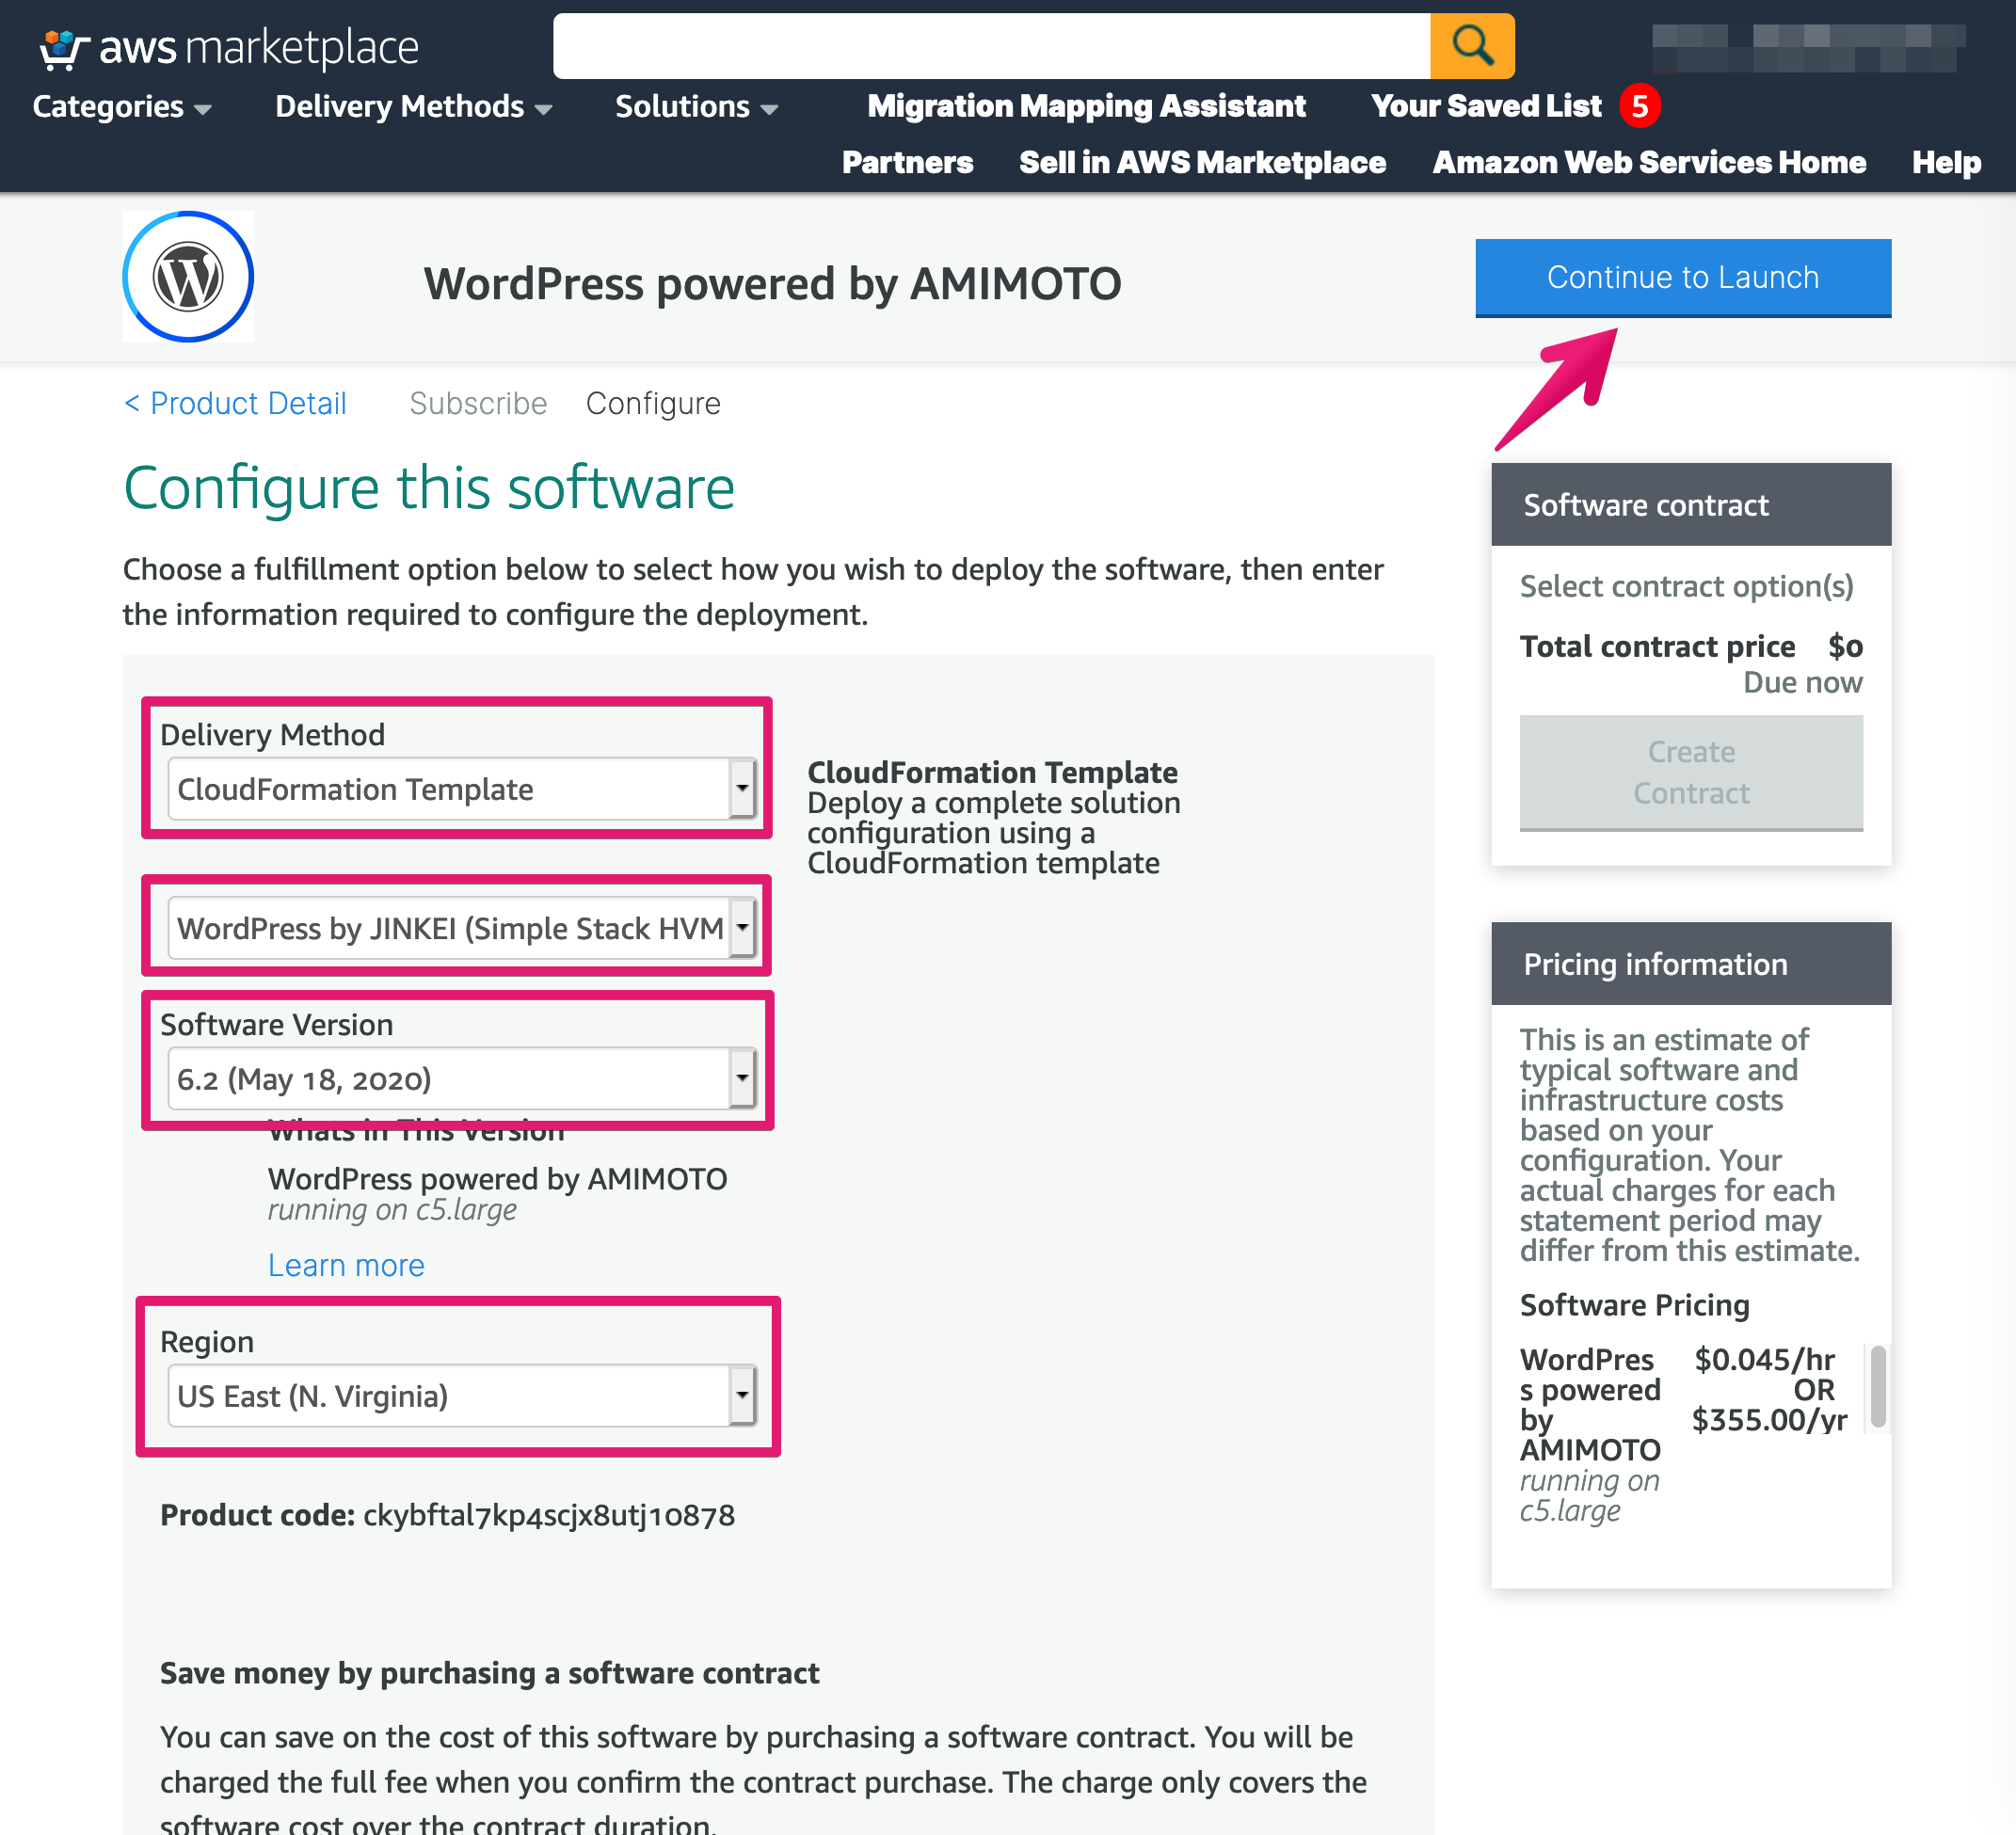
Configure template
i. Select Delivery Method
- Choose [CloudFormation Template] in Select Fulfilment Option
- Choose [WordPress by JINKEI (Simple Stack HVM Aurora] or [WordPress powered by JINKEI (Simple Stack HVM]
ii. Software Version
- Choose latest
iii. Region
- Anywhere you demand
iv. Click [Continue to Launch]
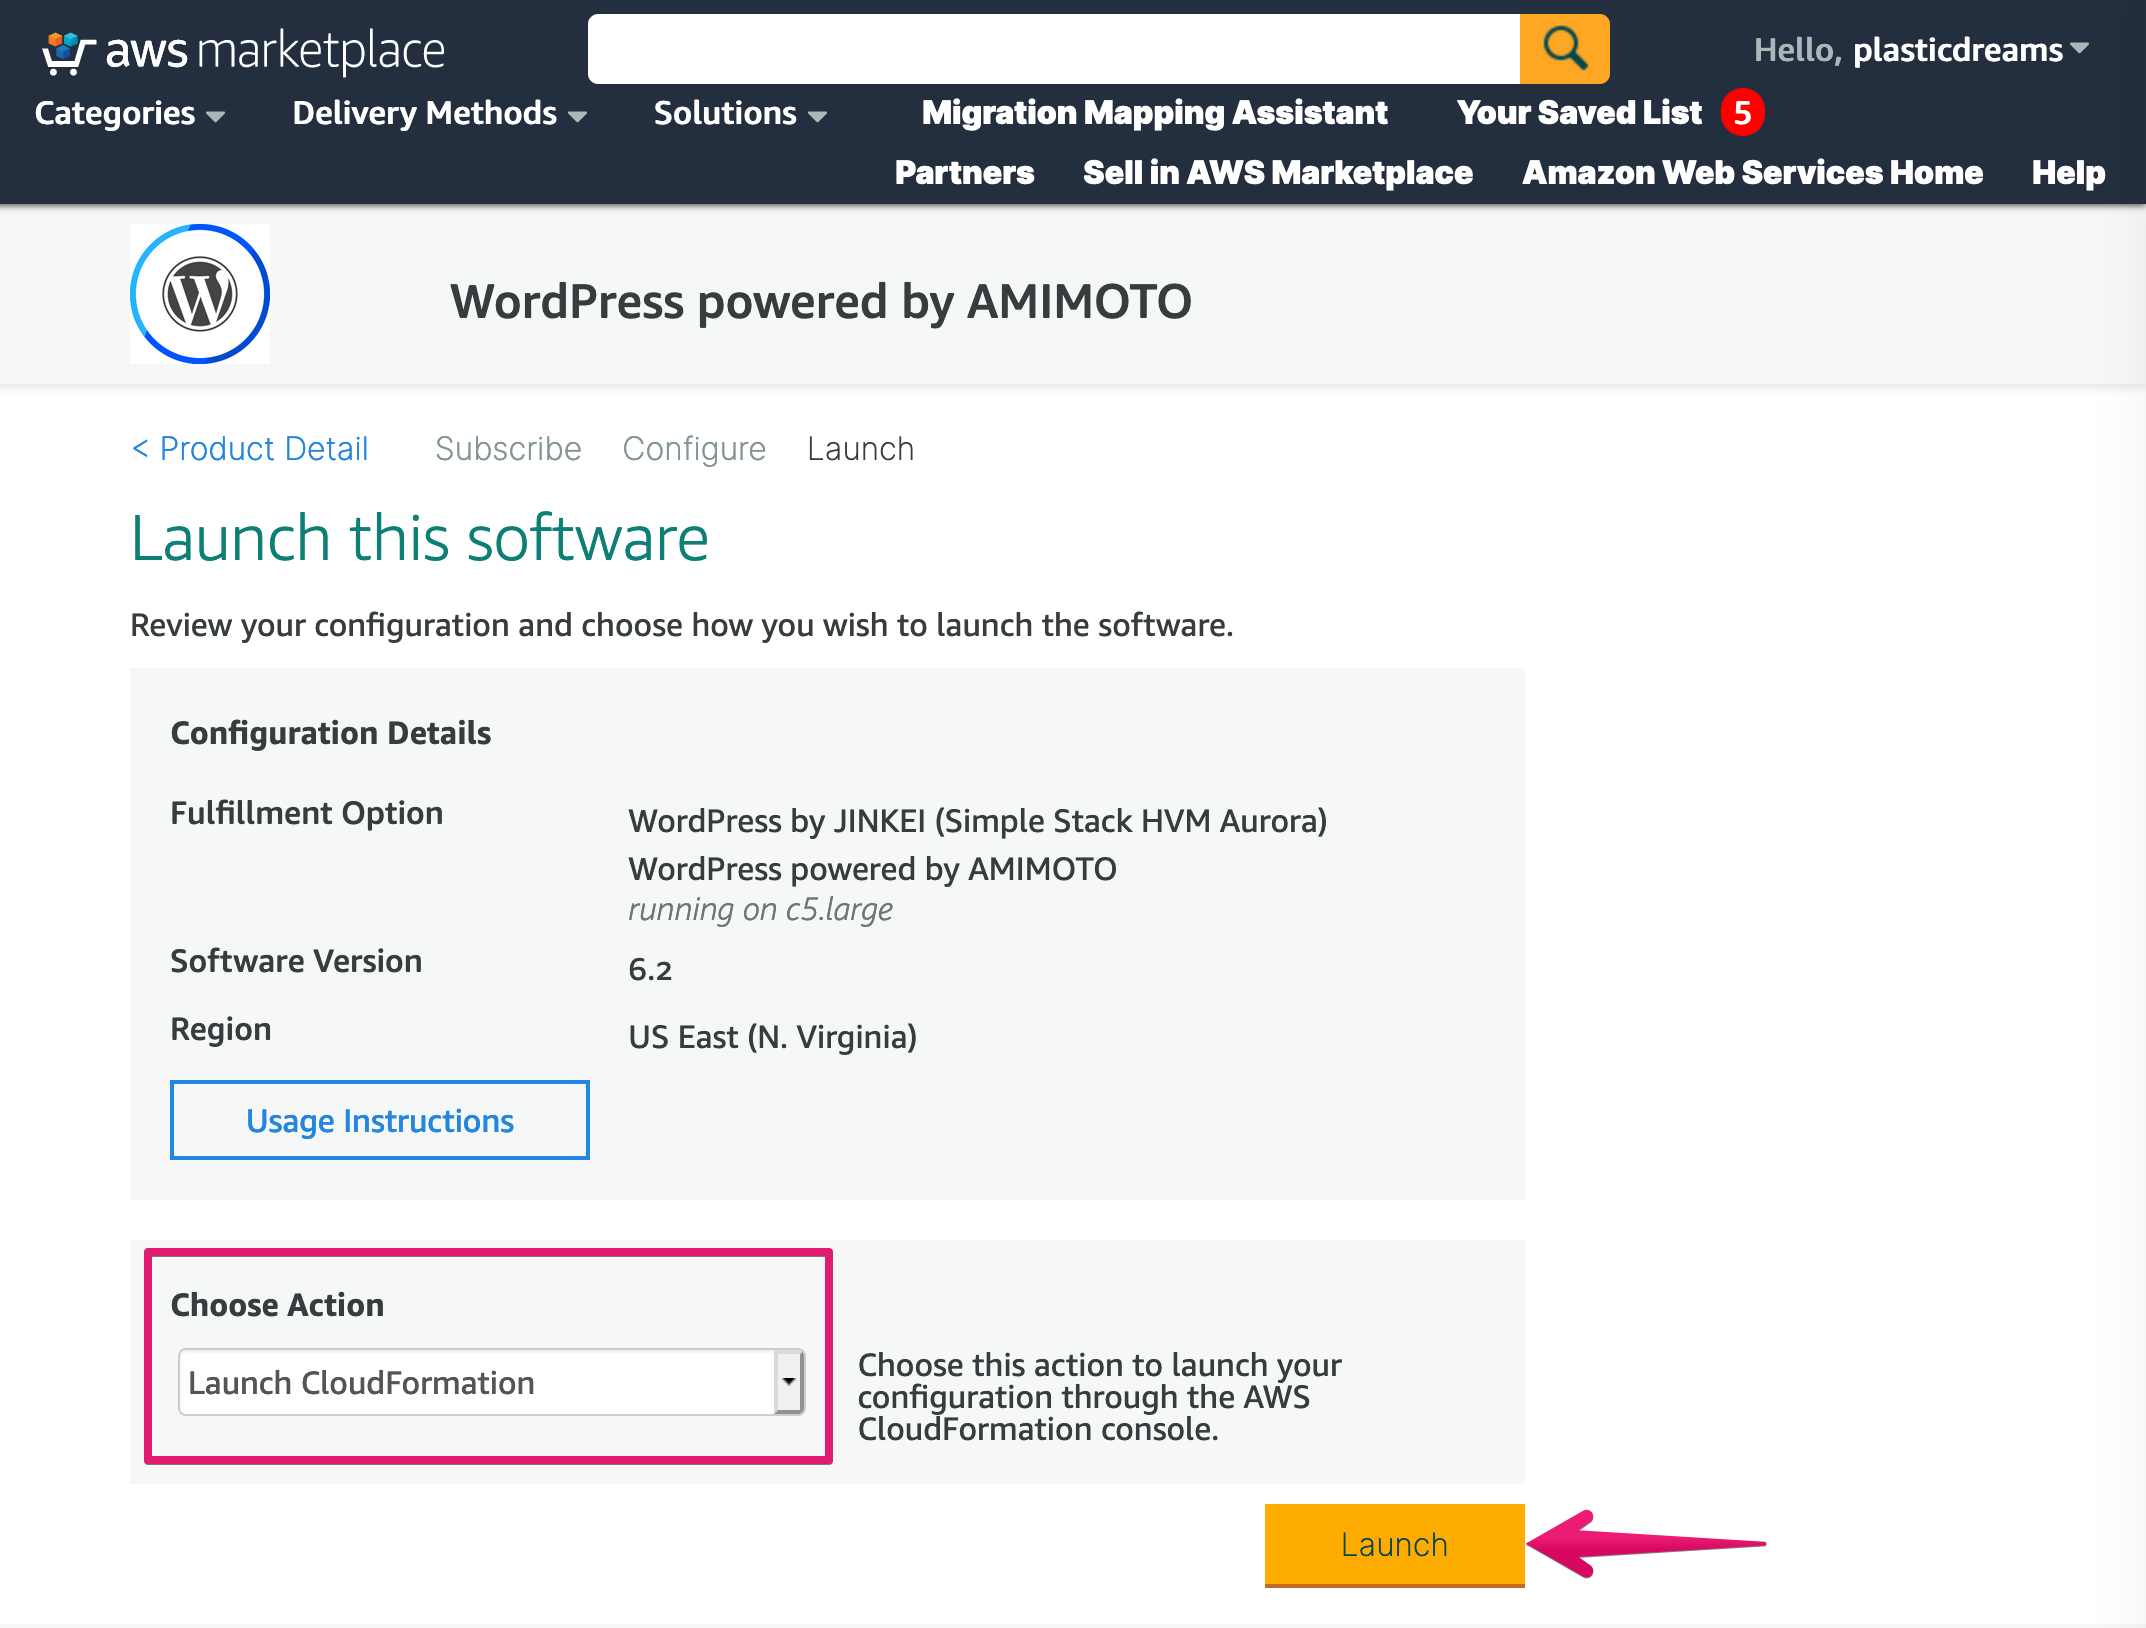
Select action and launching software
Choose [Launch CloudFormation] then click [Launch] button
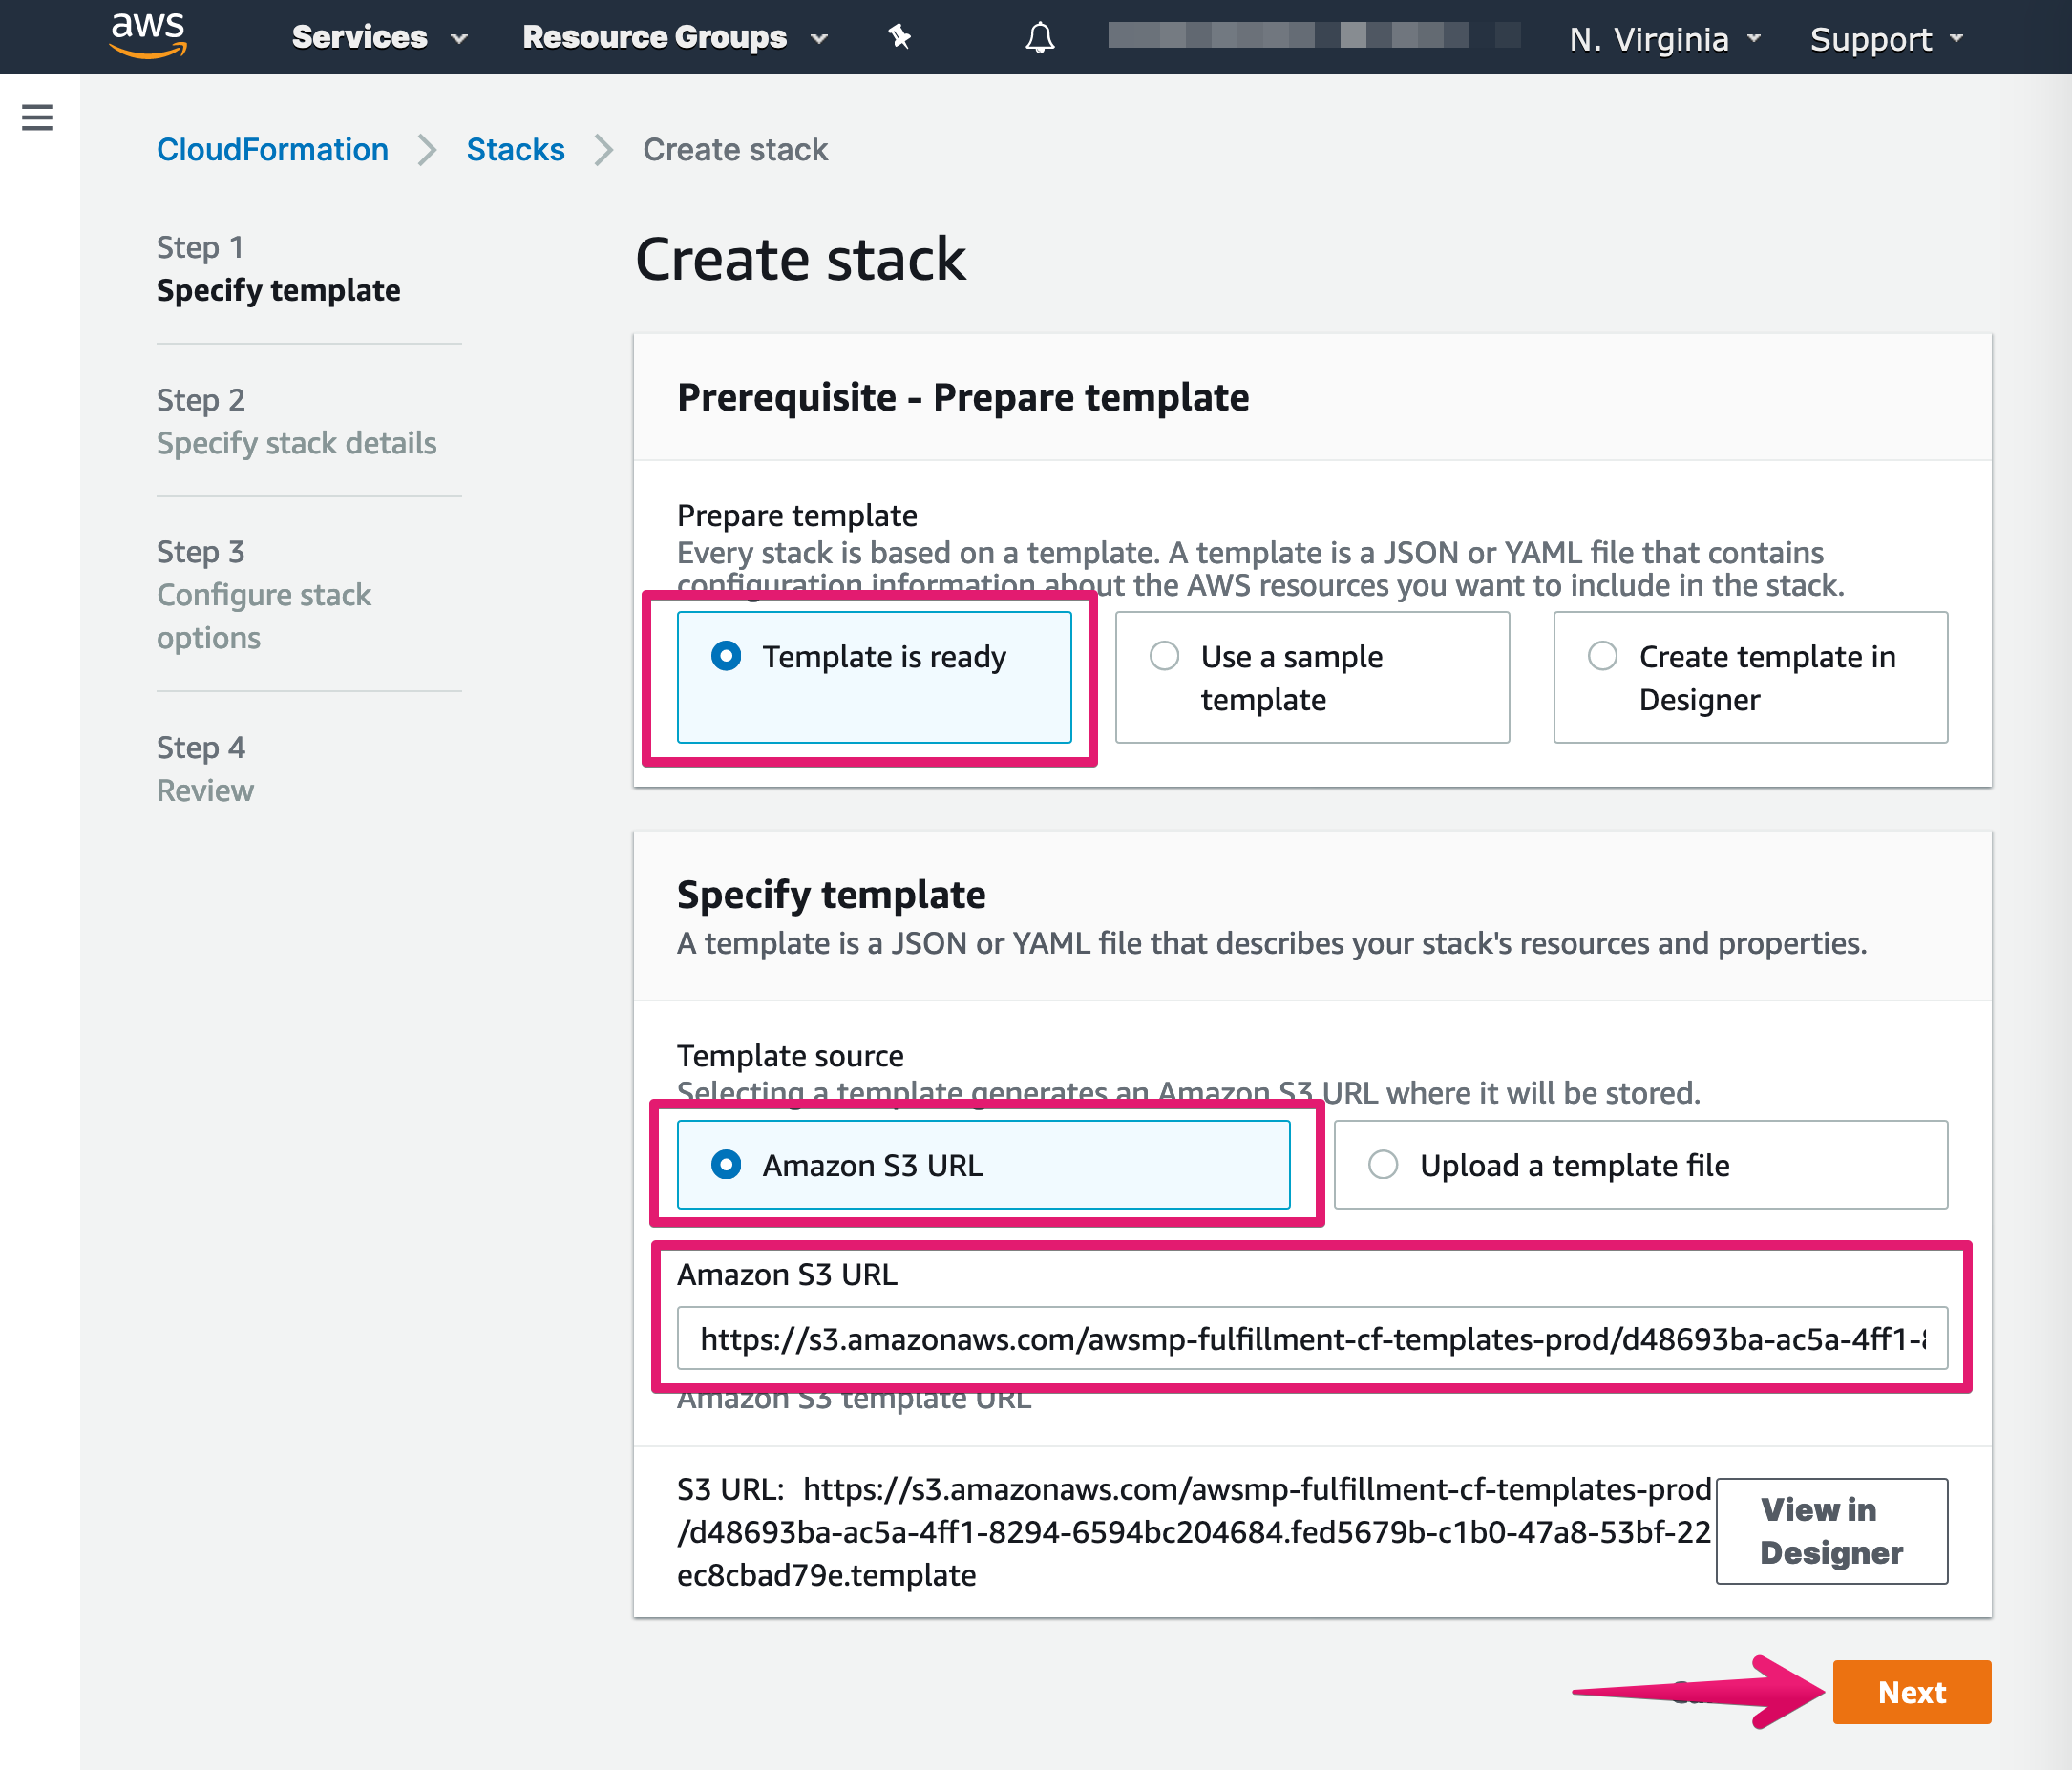
Phase 2. Create CloudFormation
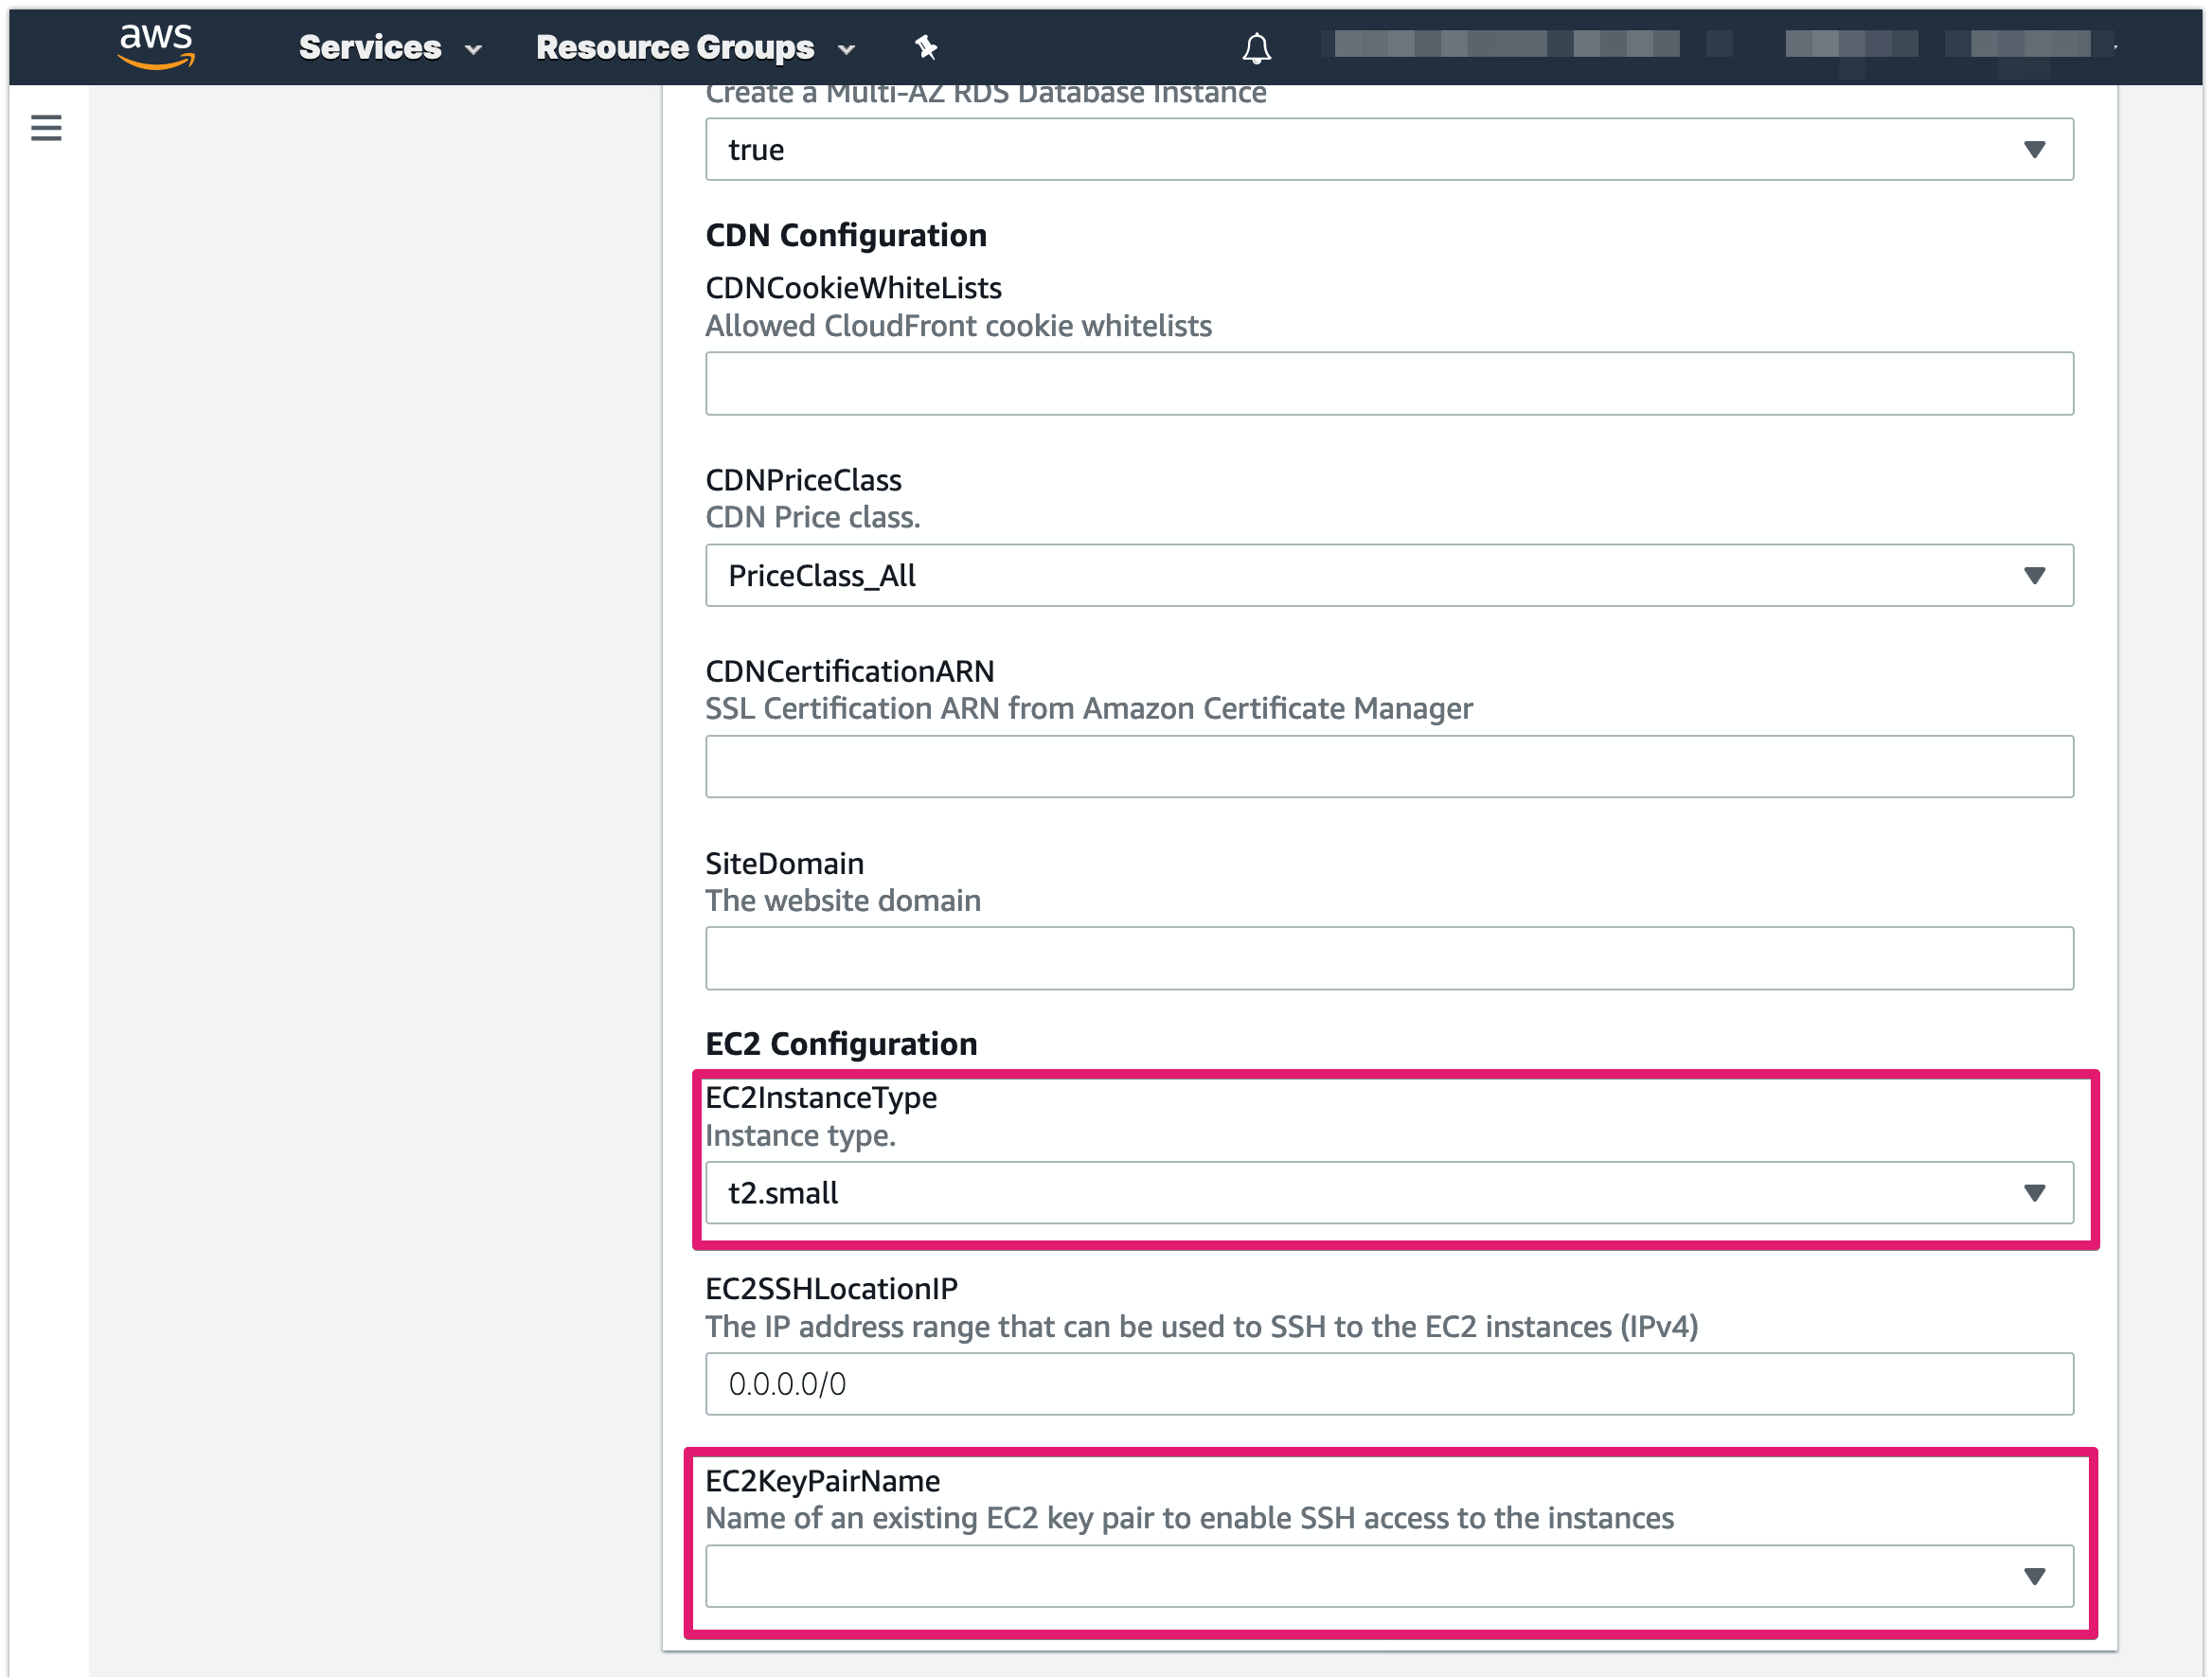
Set up JINKEI
Input or select field
- Stack name
- DBInstanceClass
- DBUsername
- DBPassword
- EC2InstanceType
- EC2KeyPairname
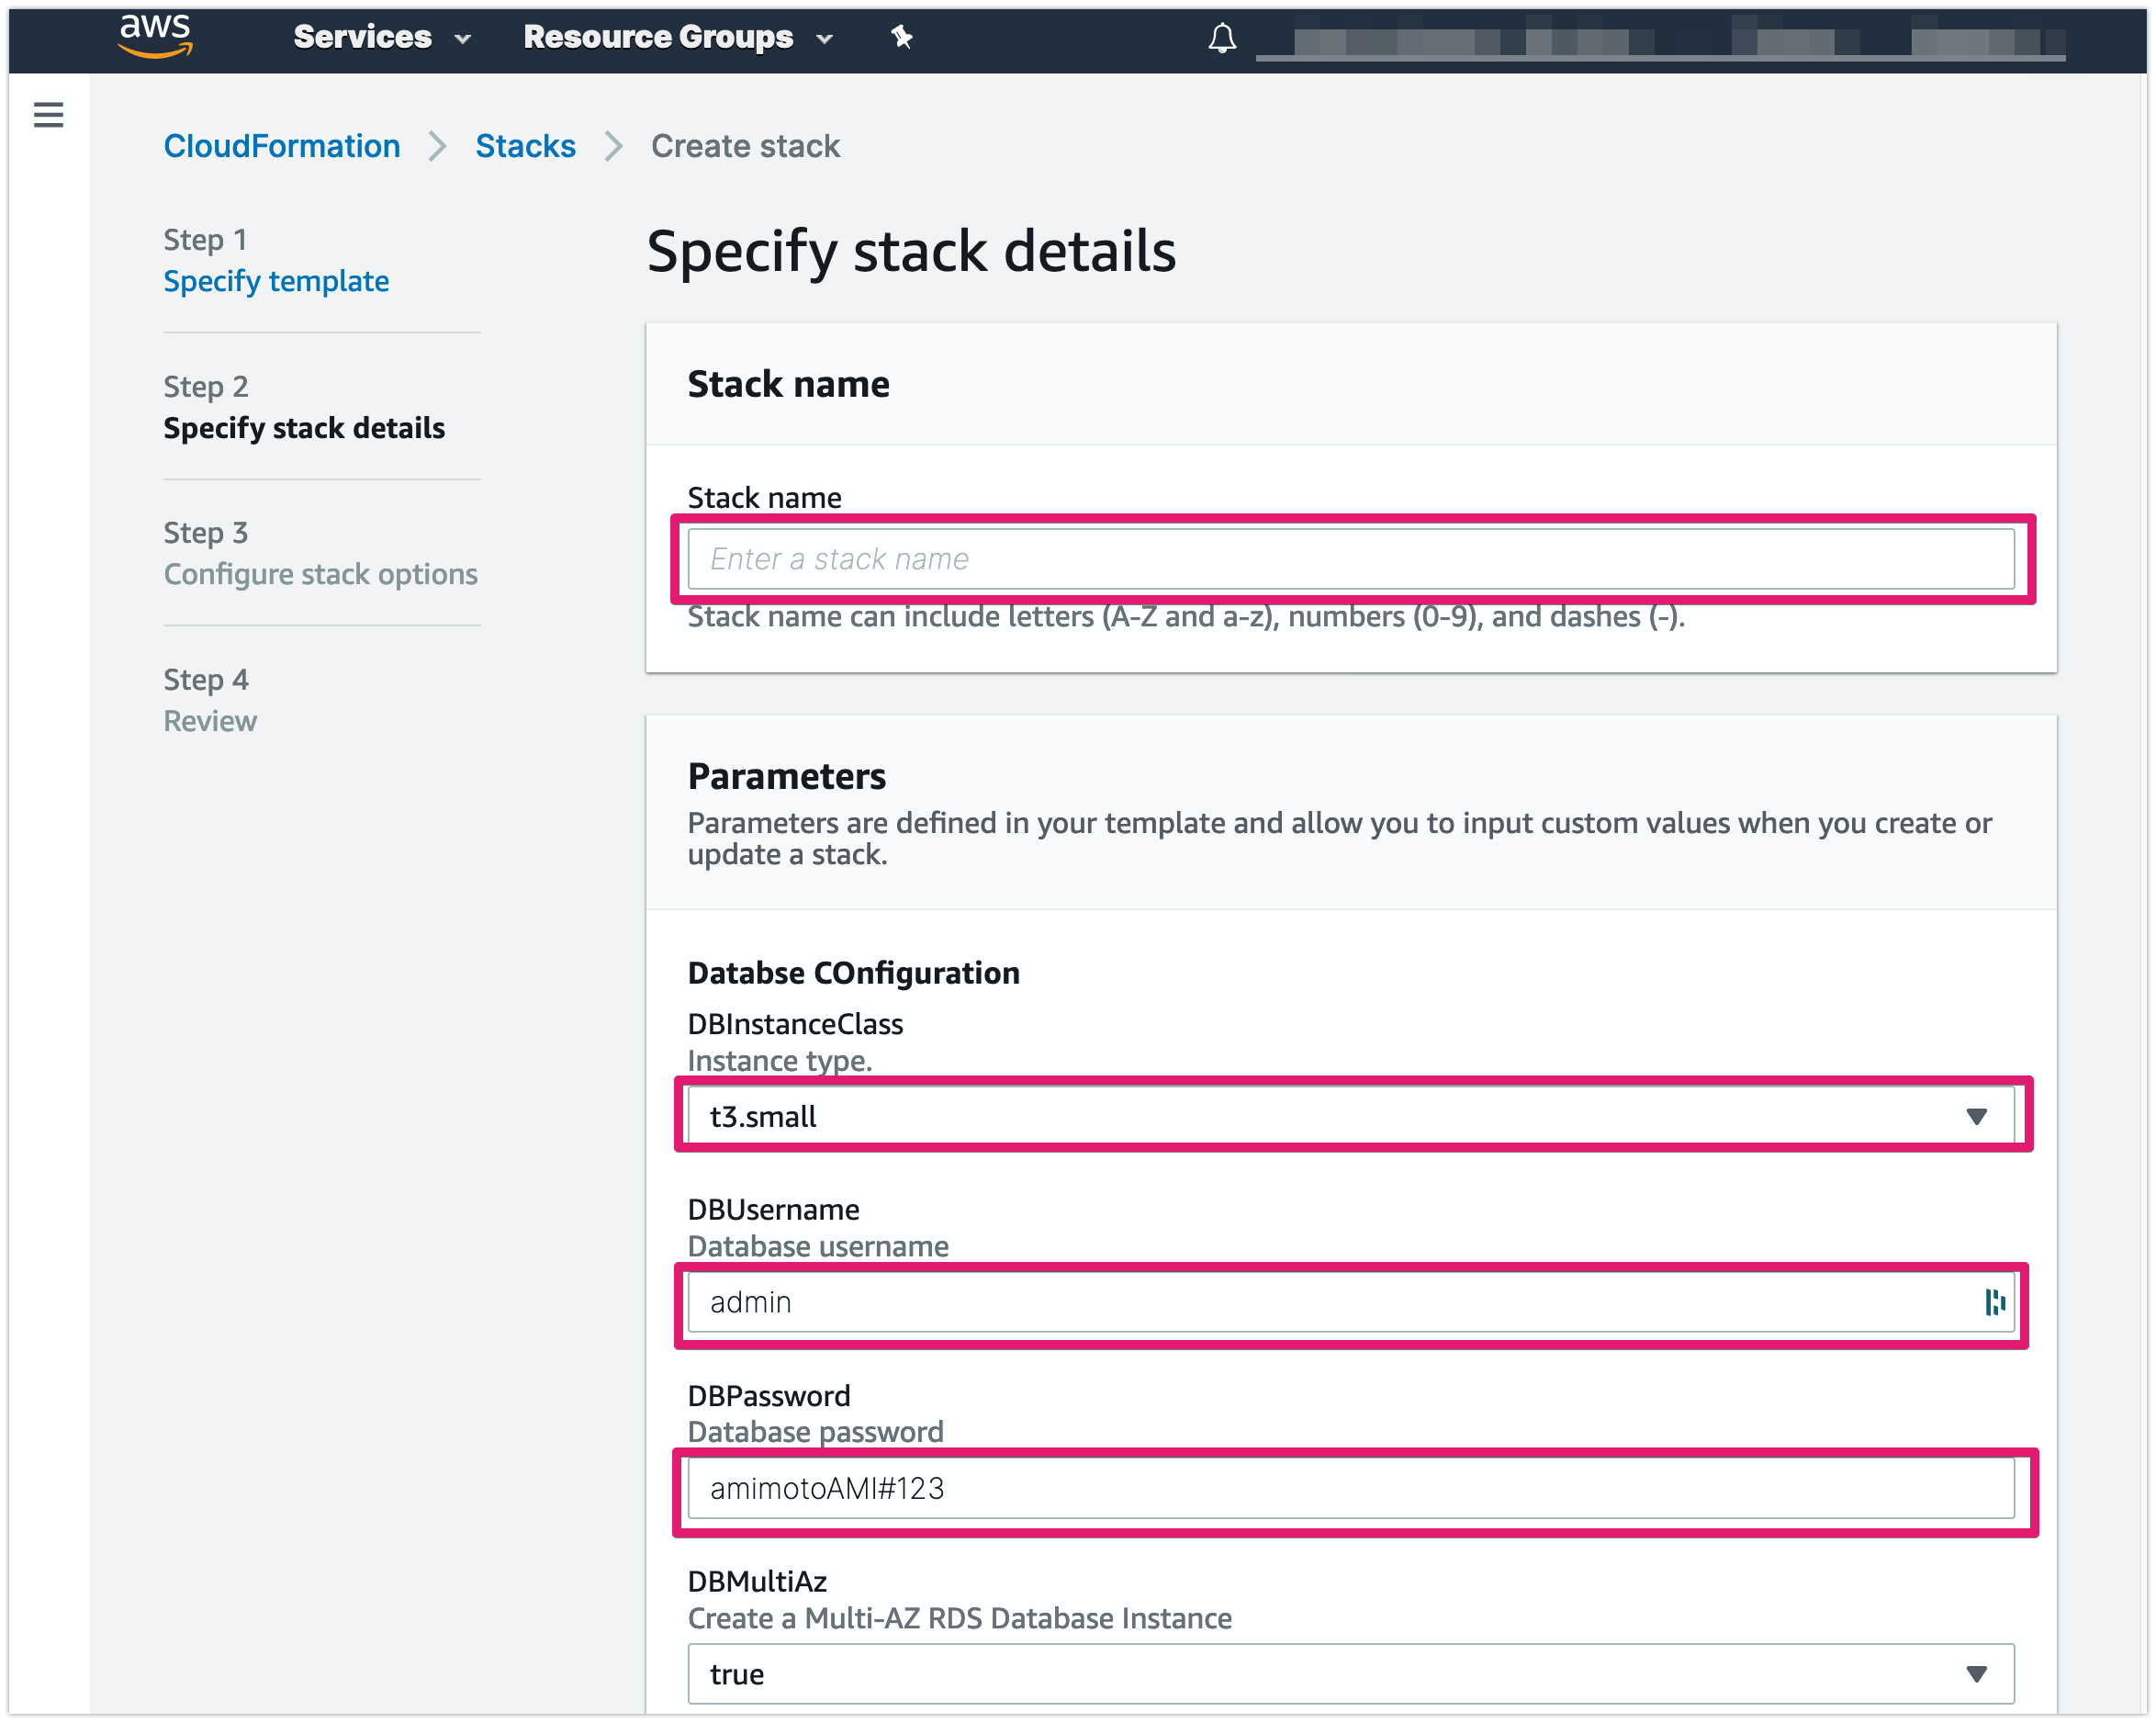
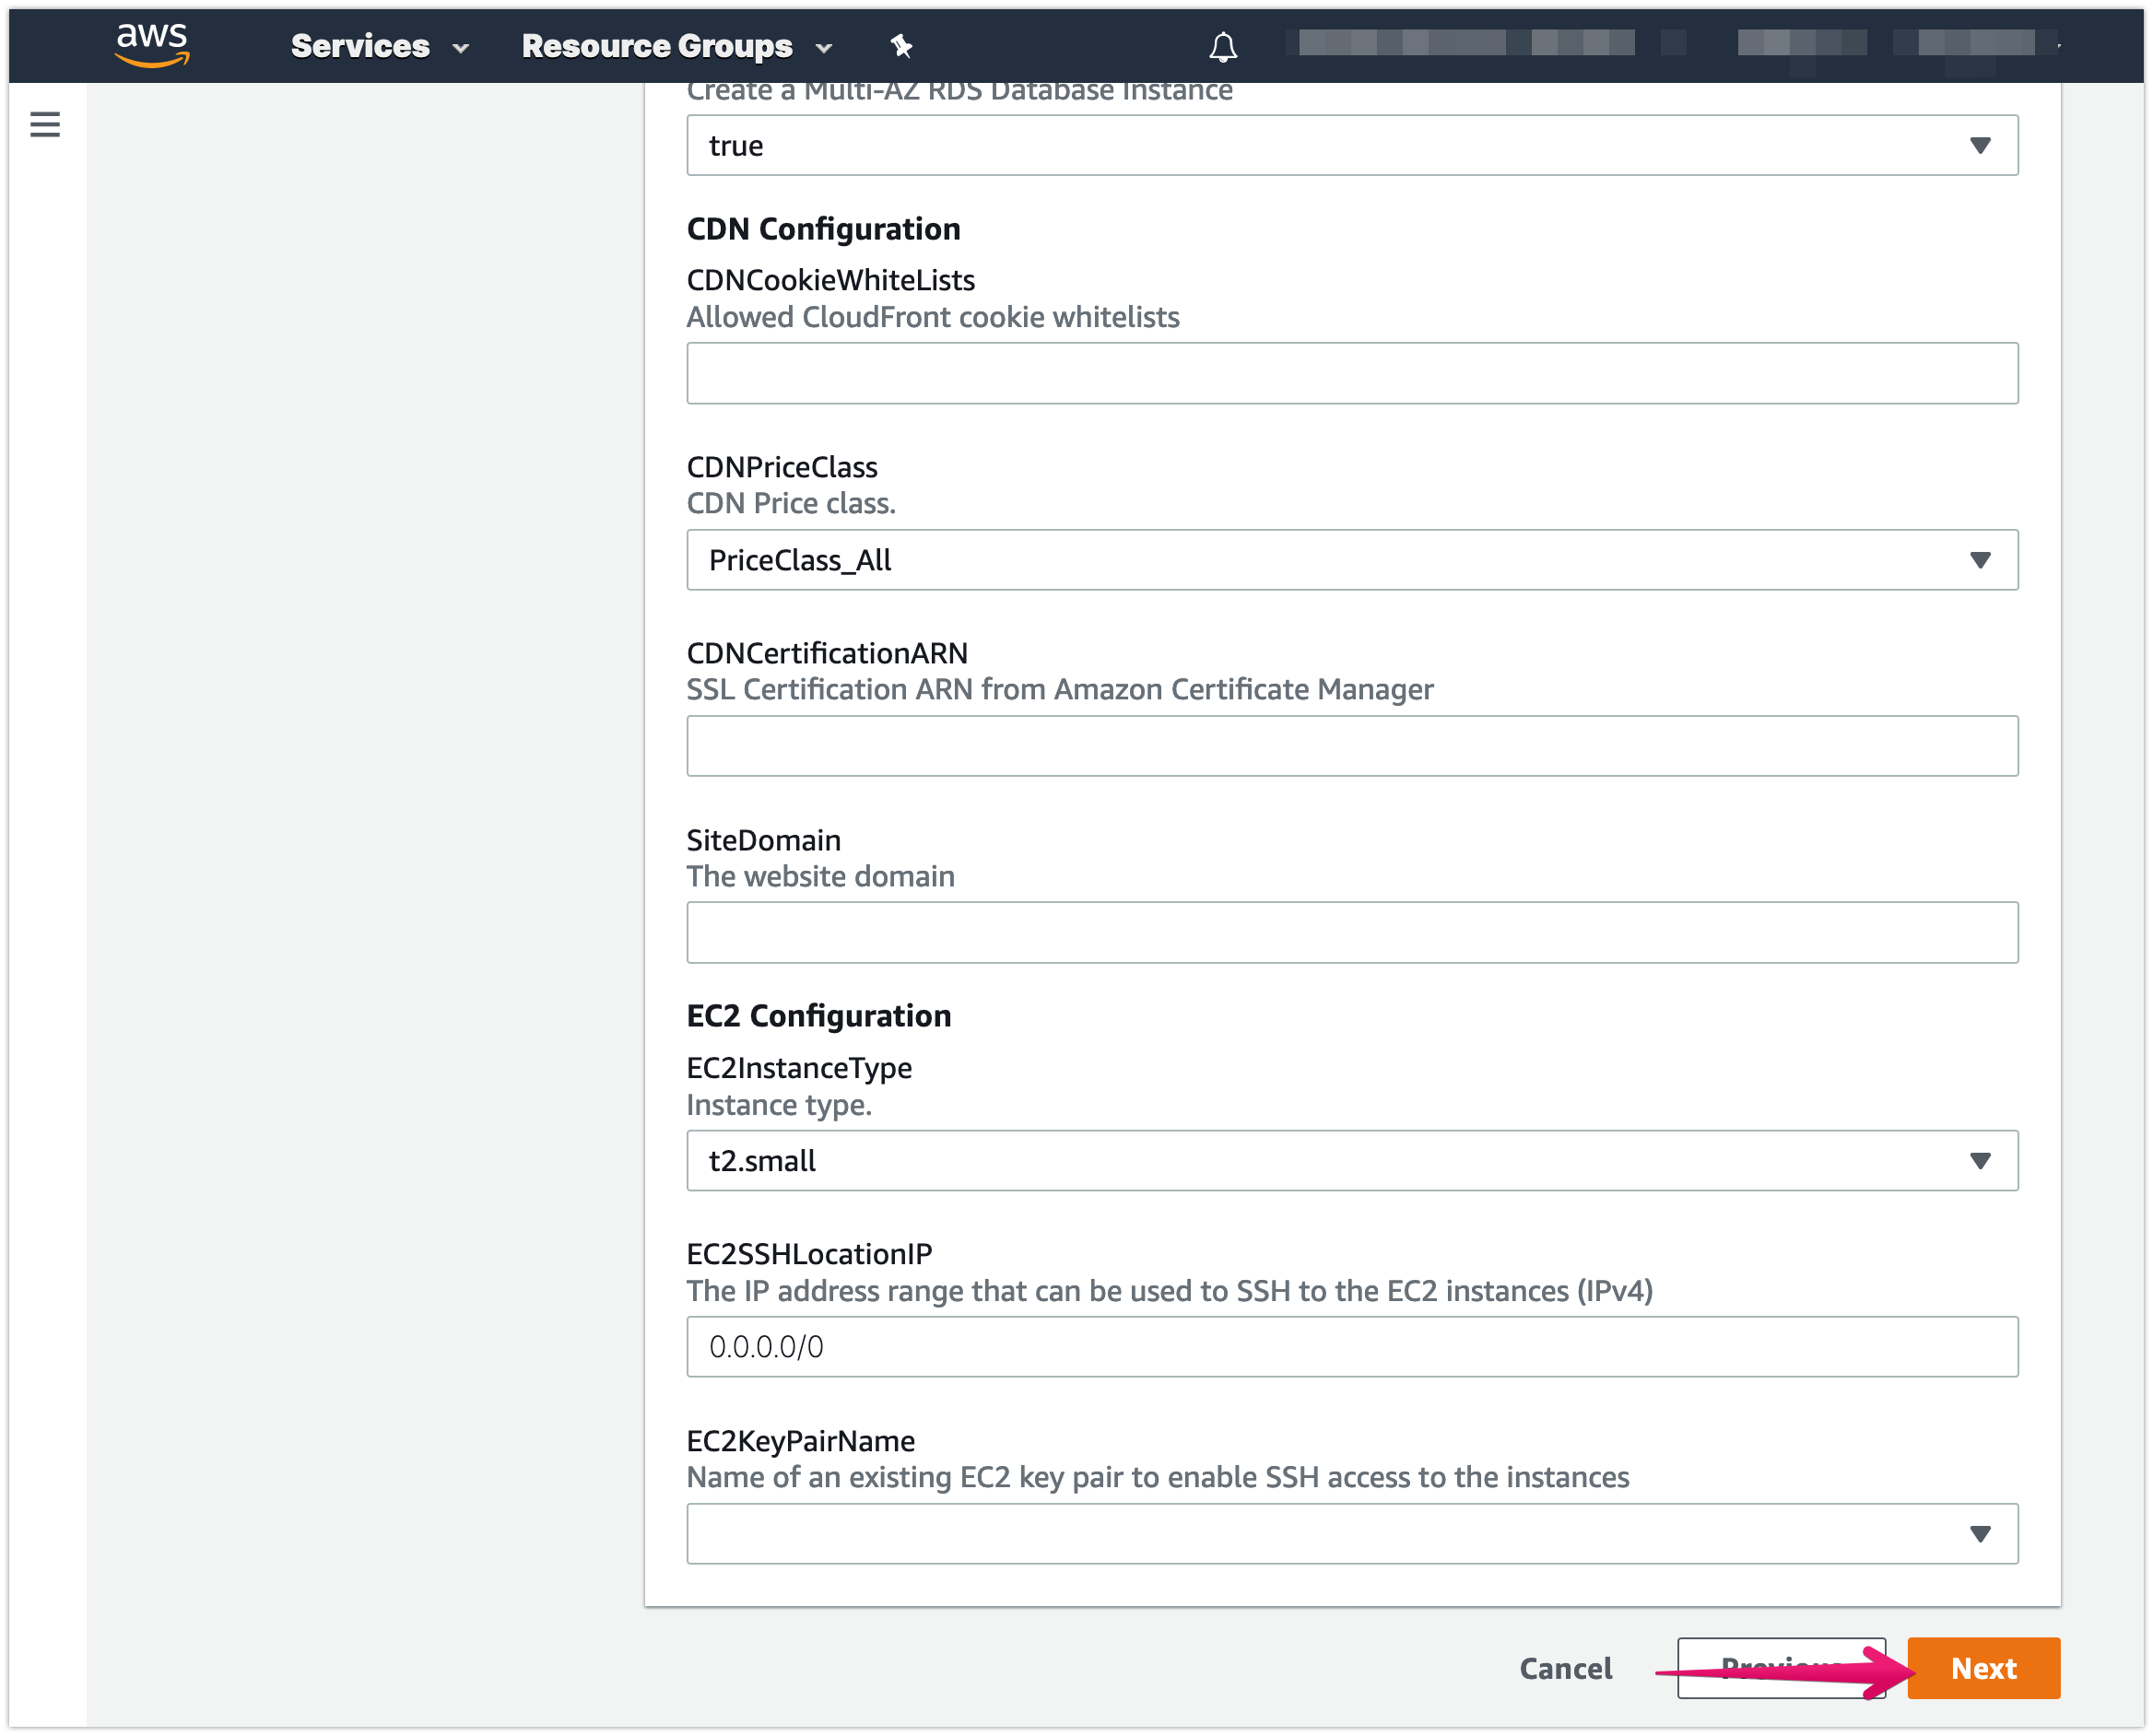
Click [Next] button
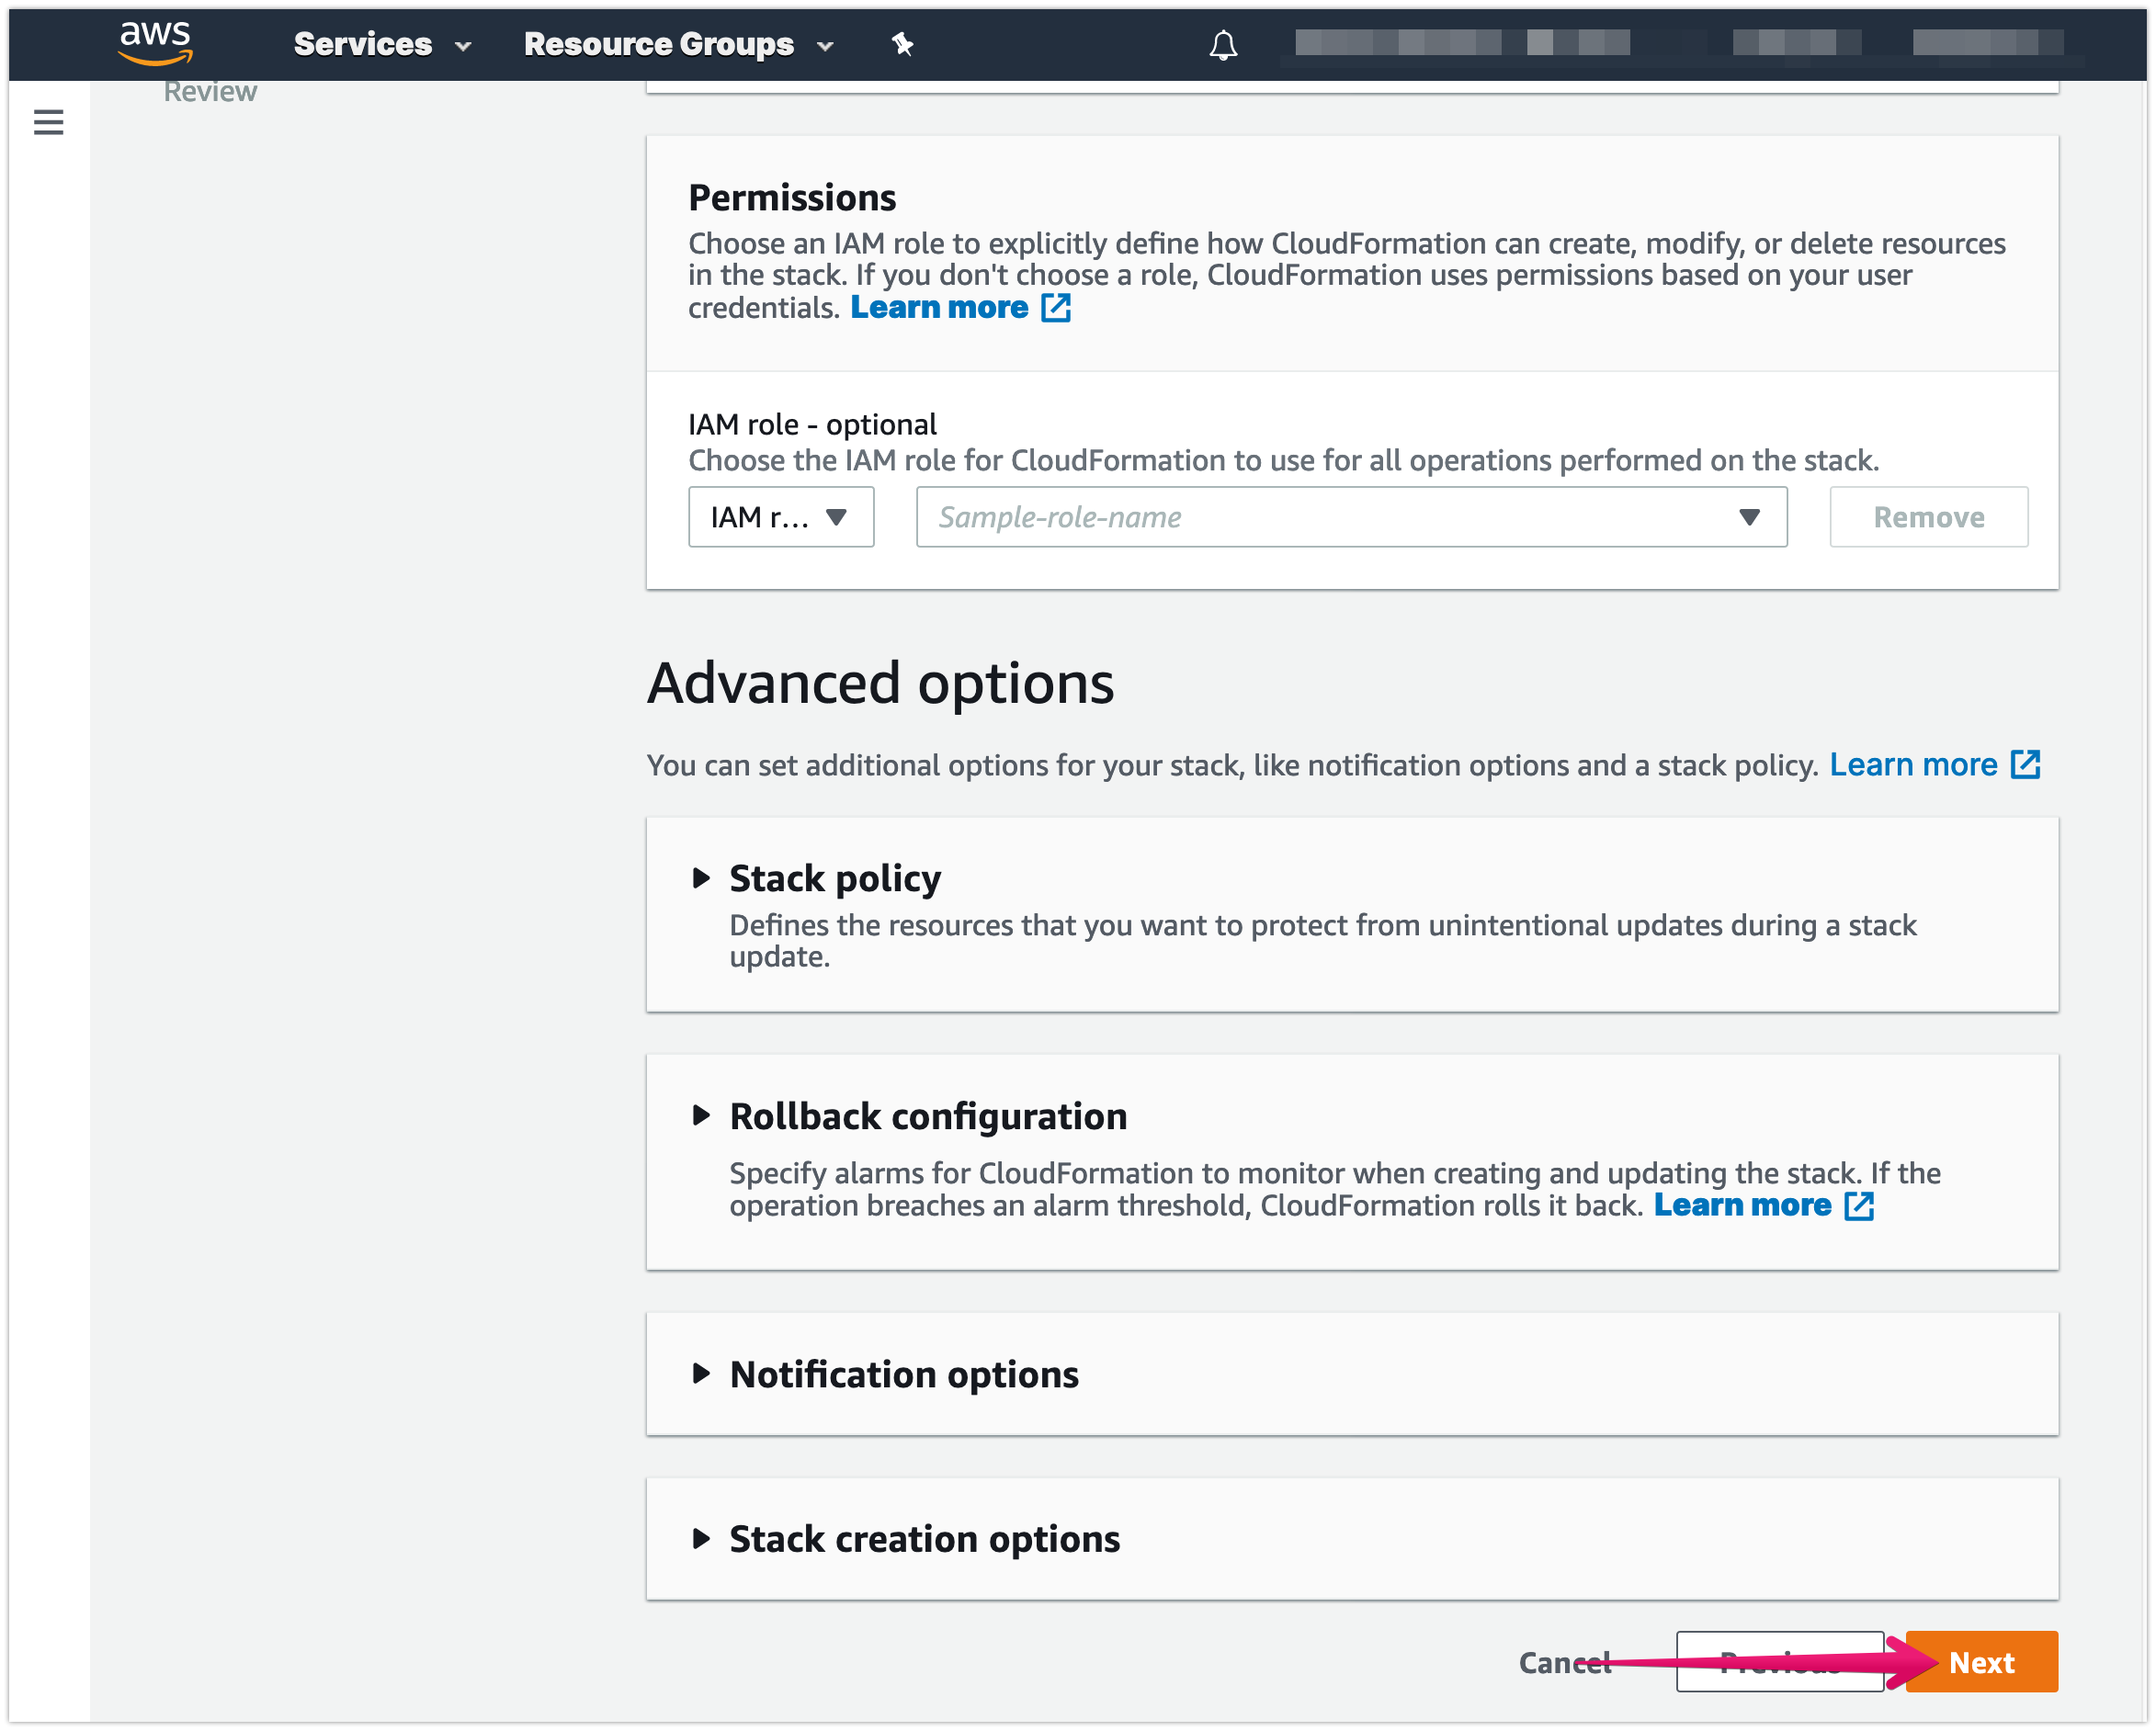
Click [Next] button on Advanced Options
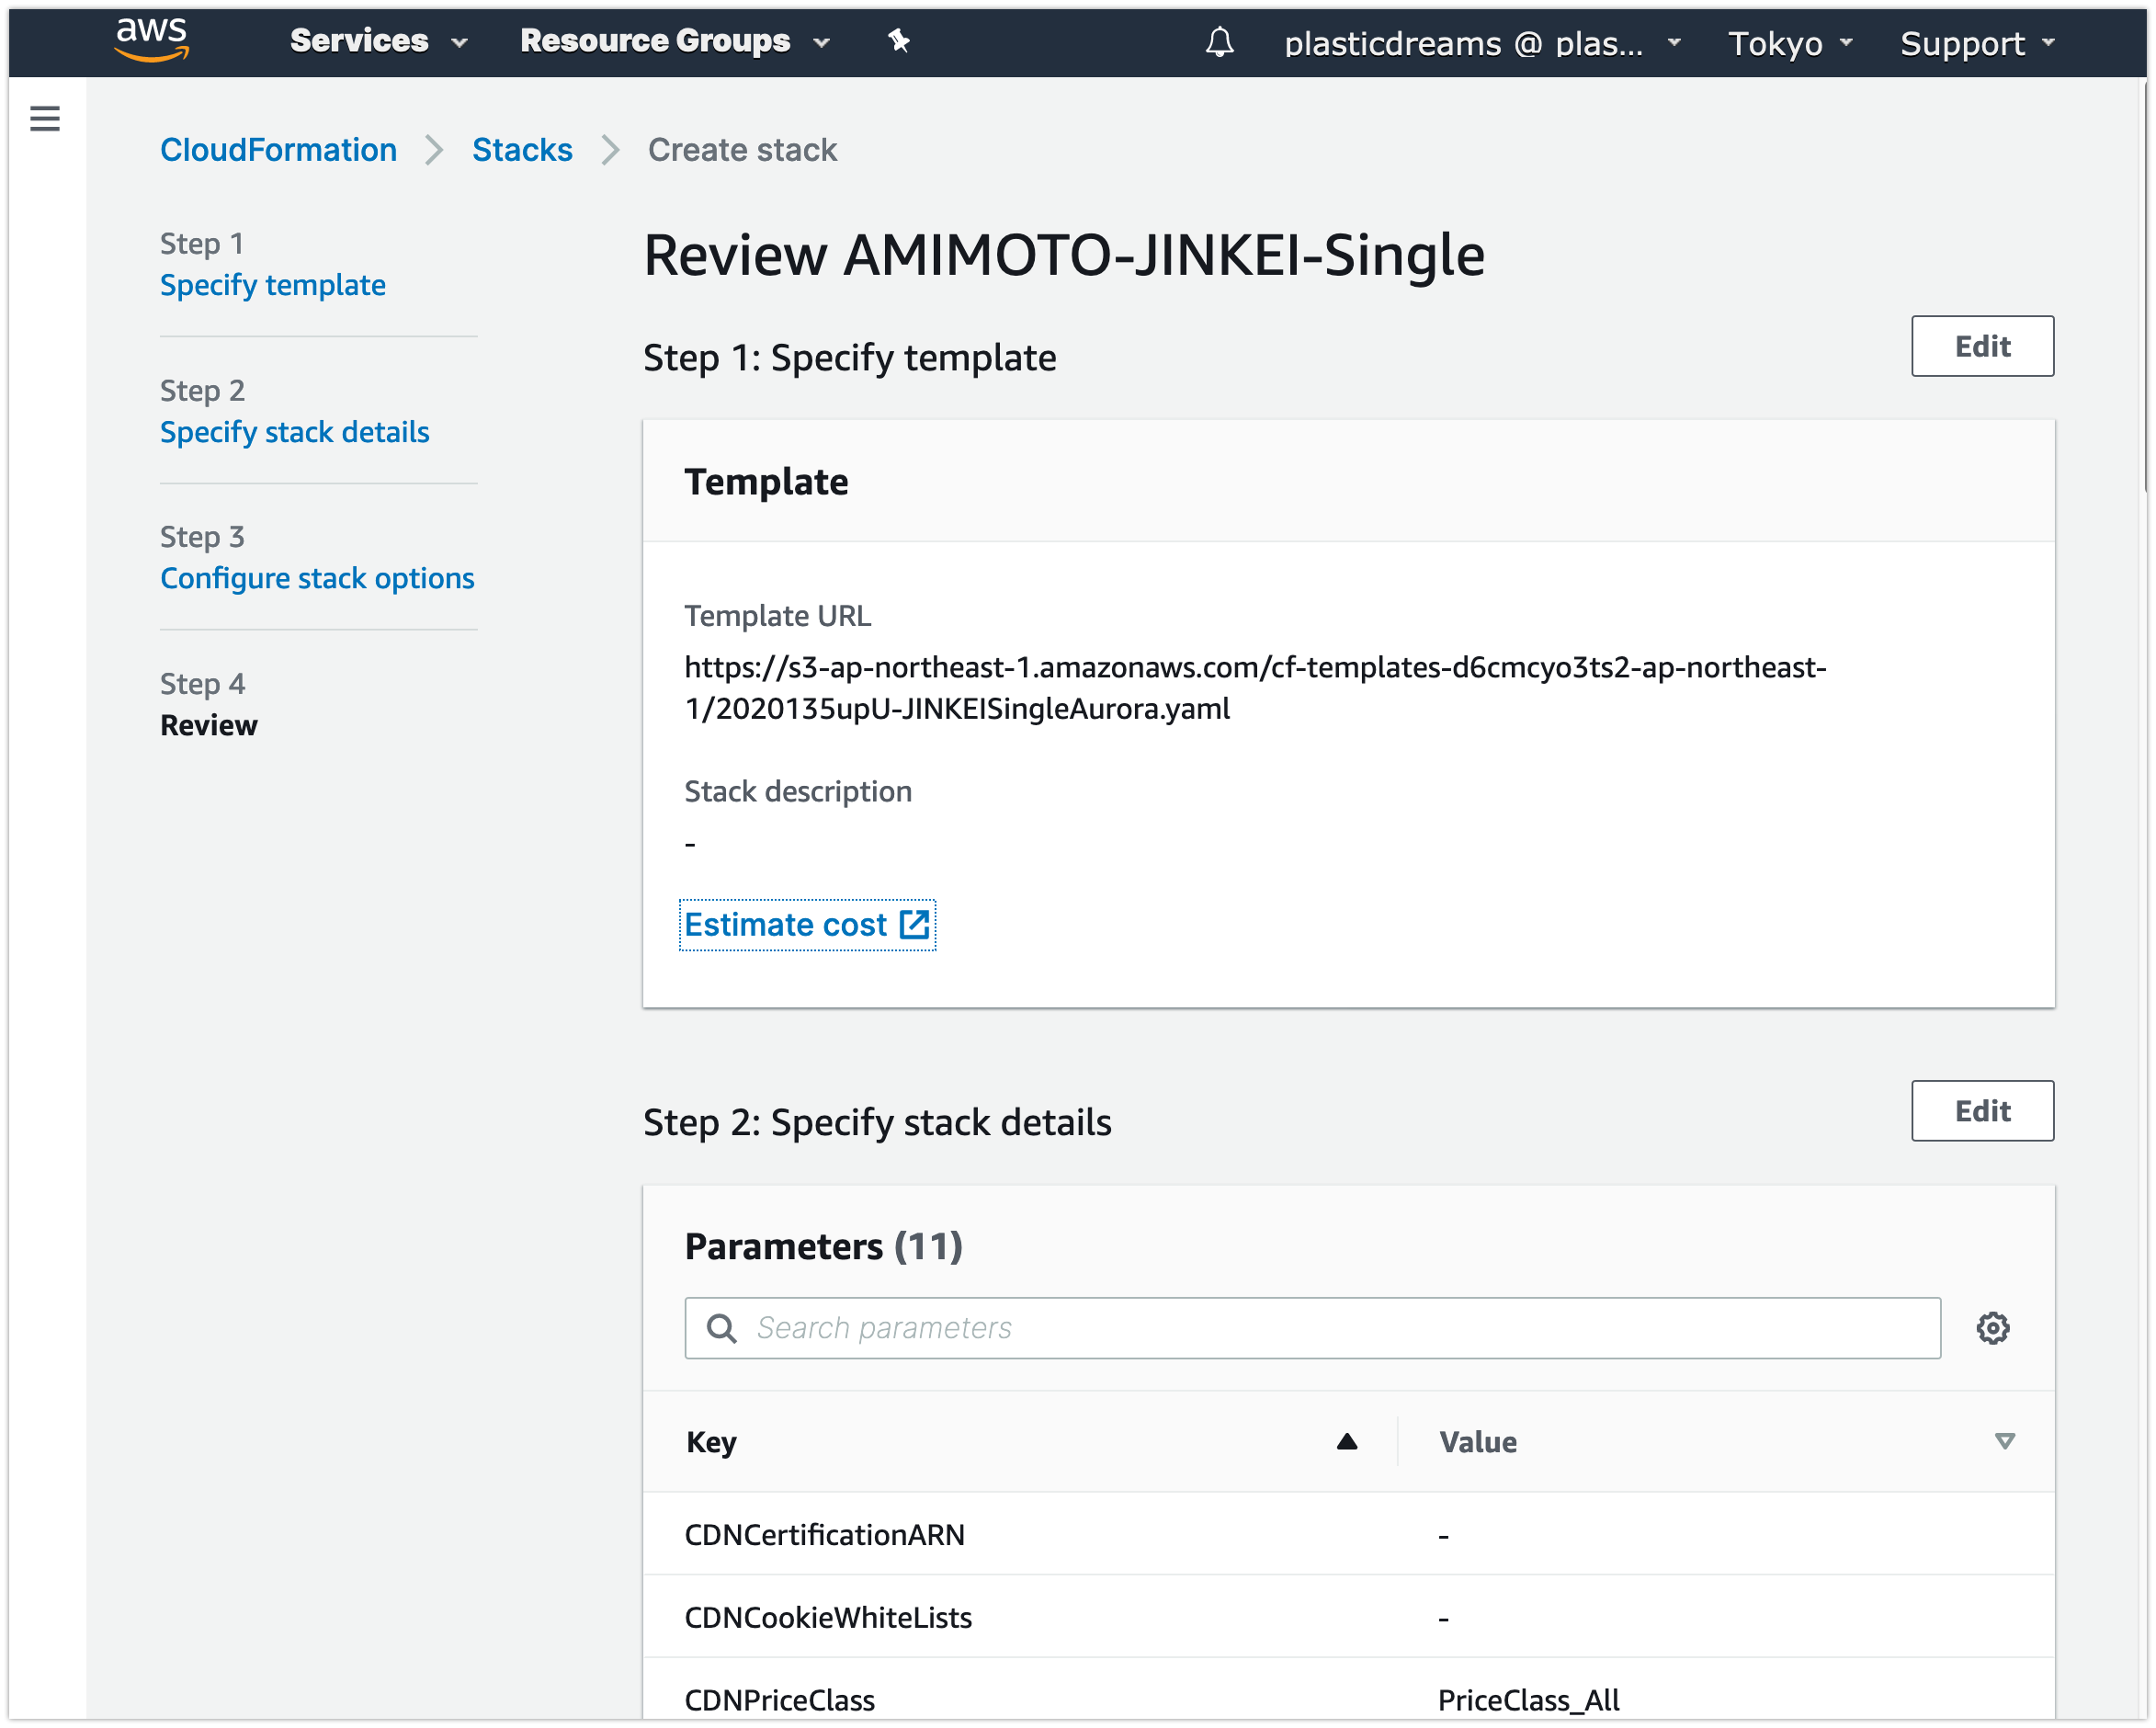
Review settings
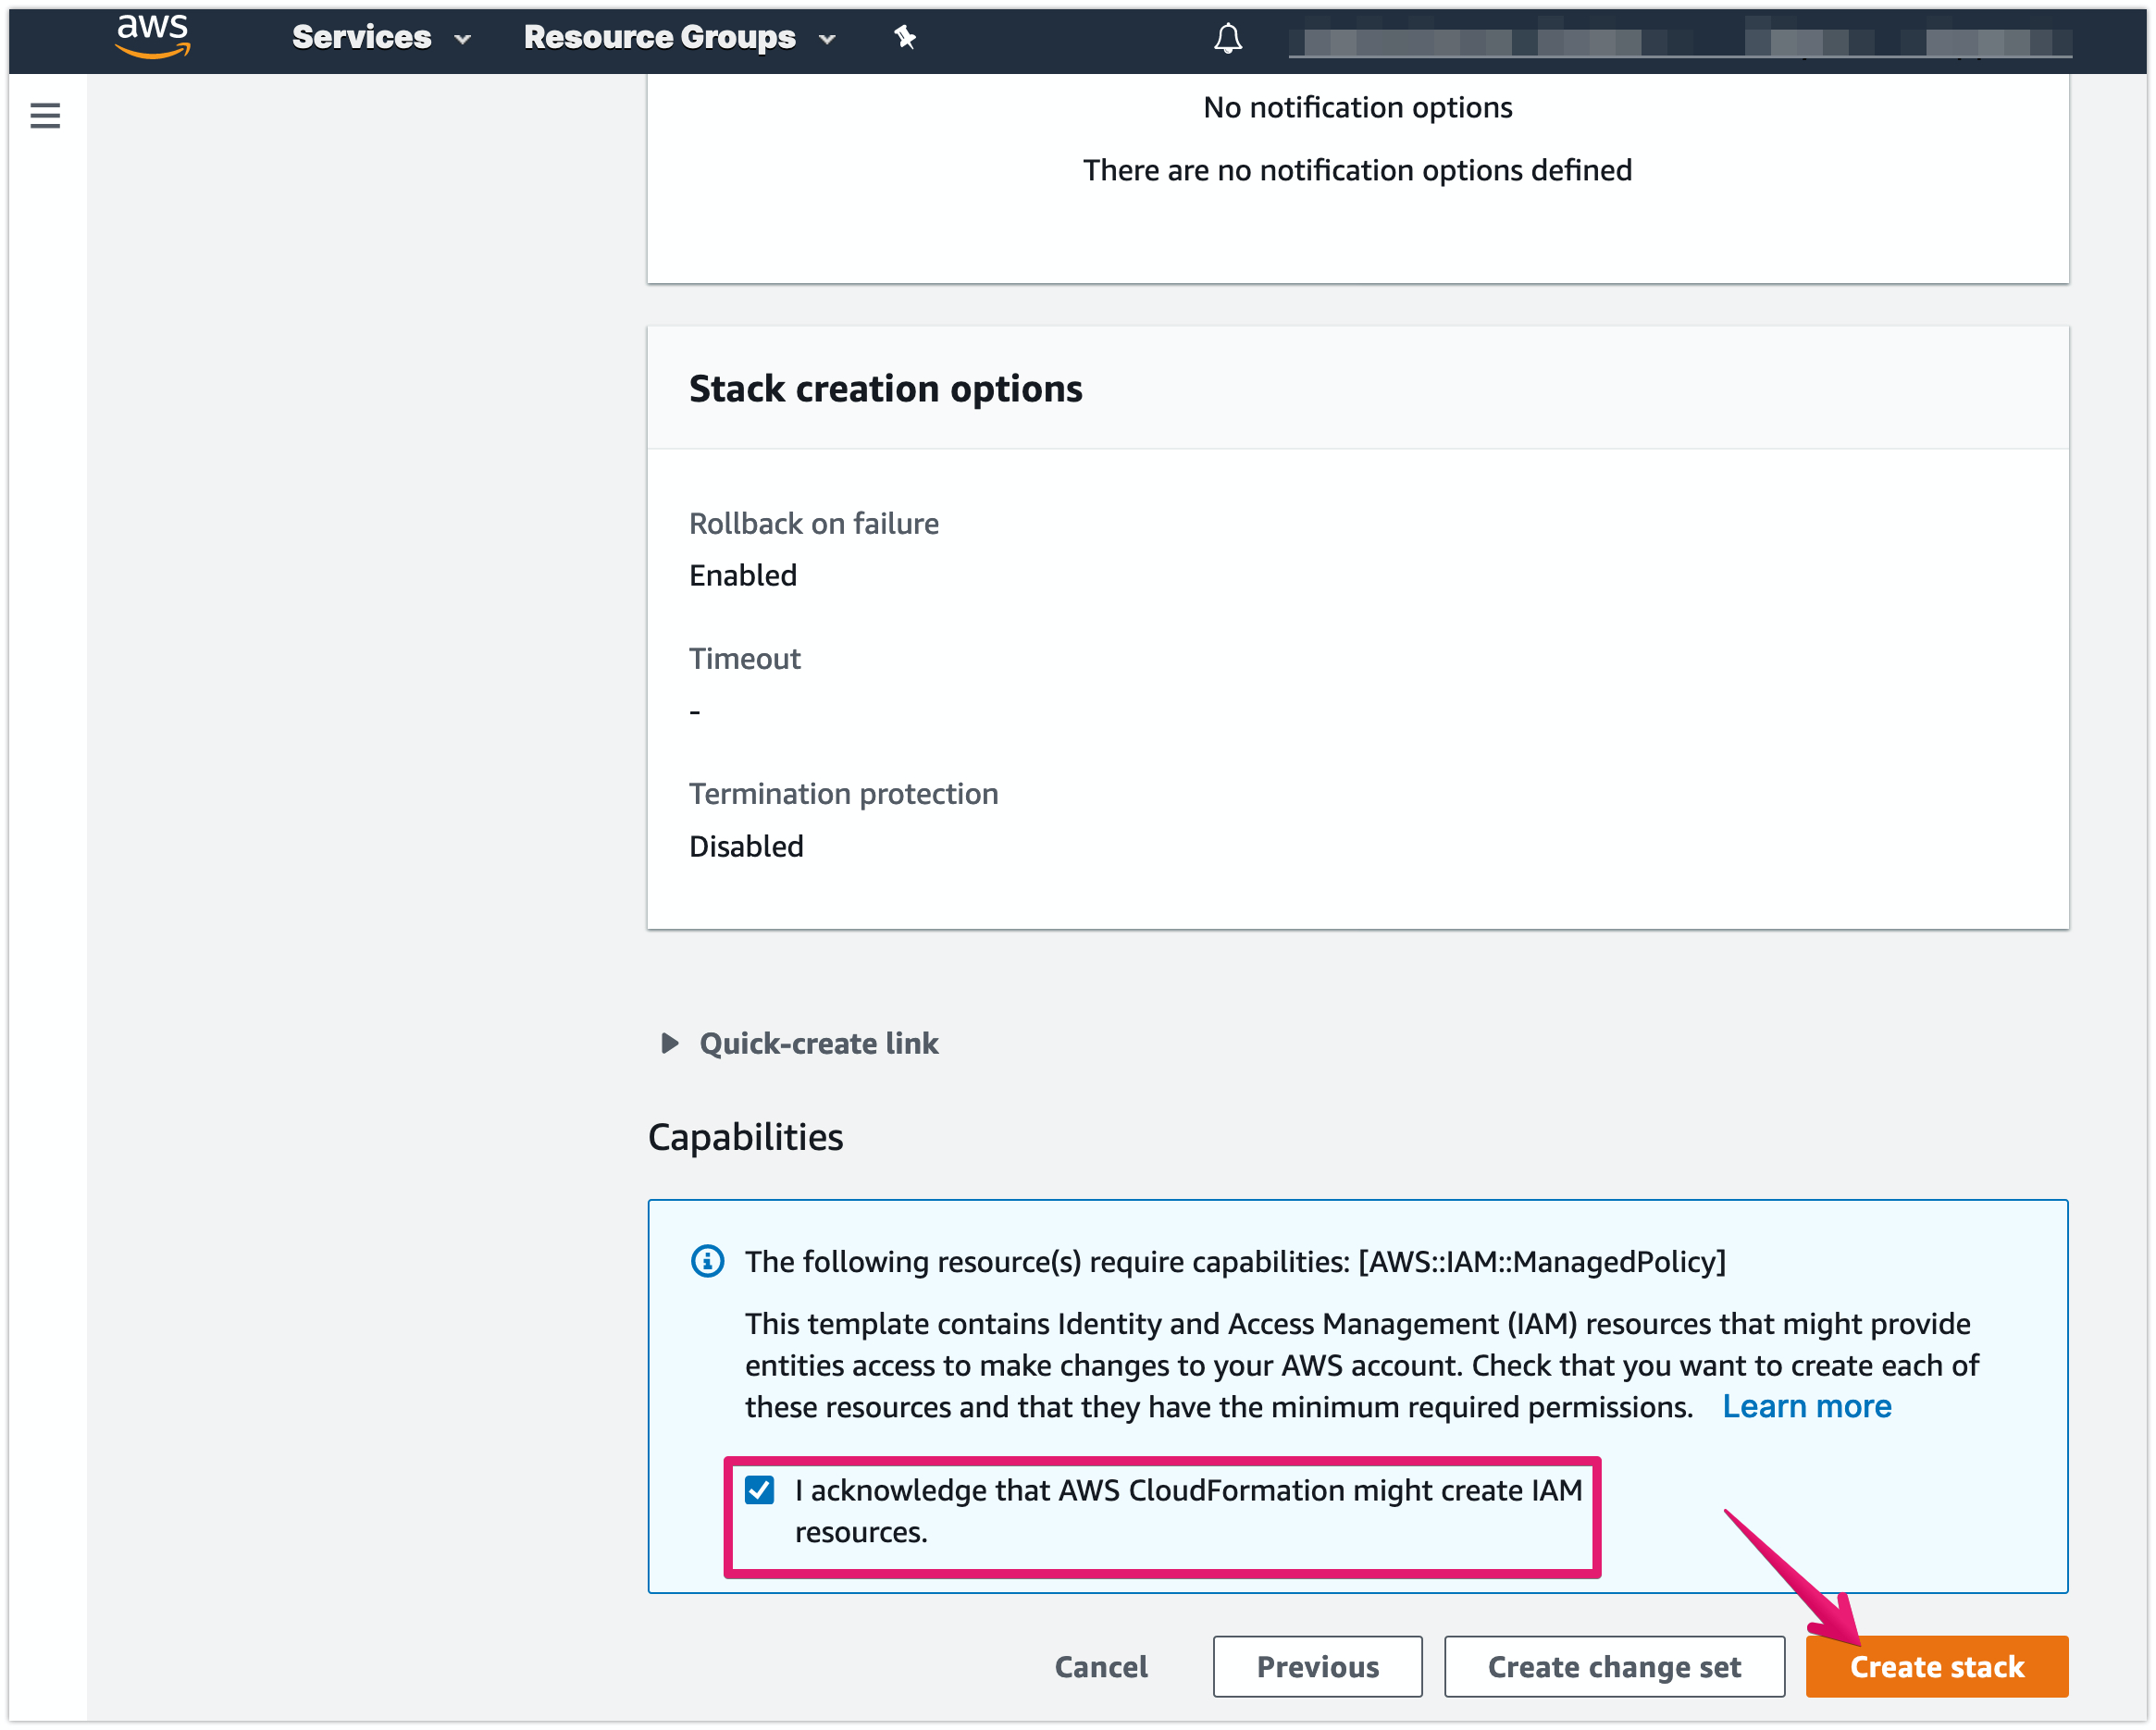
Check the checkbox under Capabilities then click [Create stack]
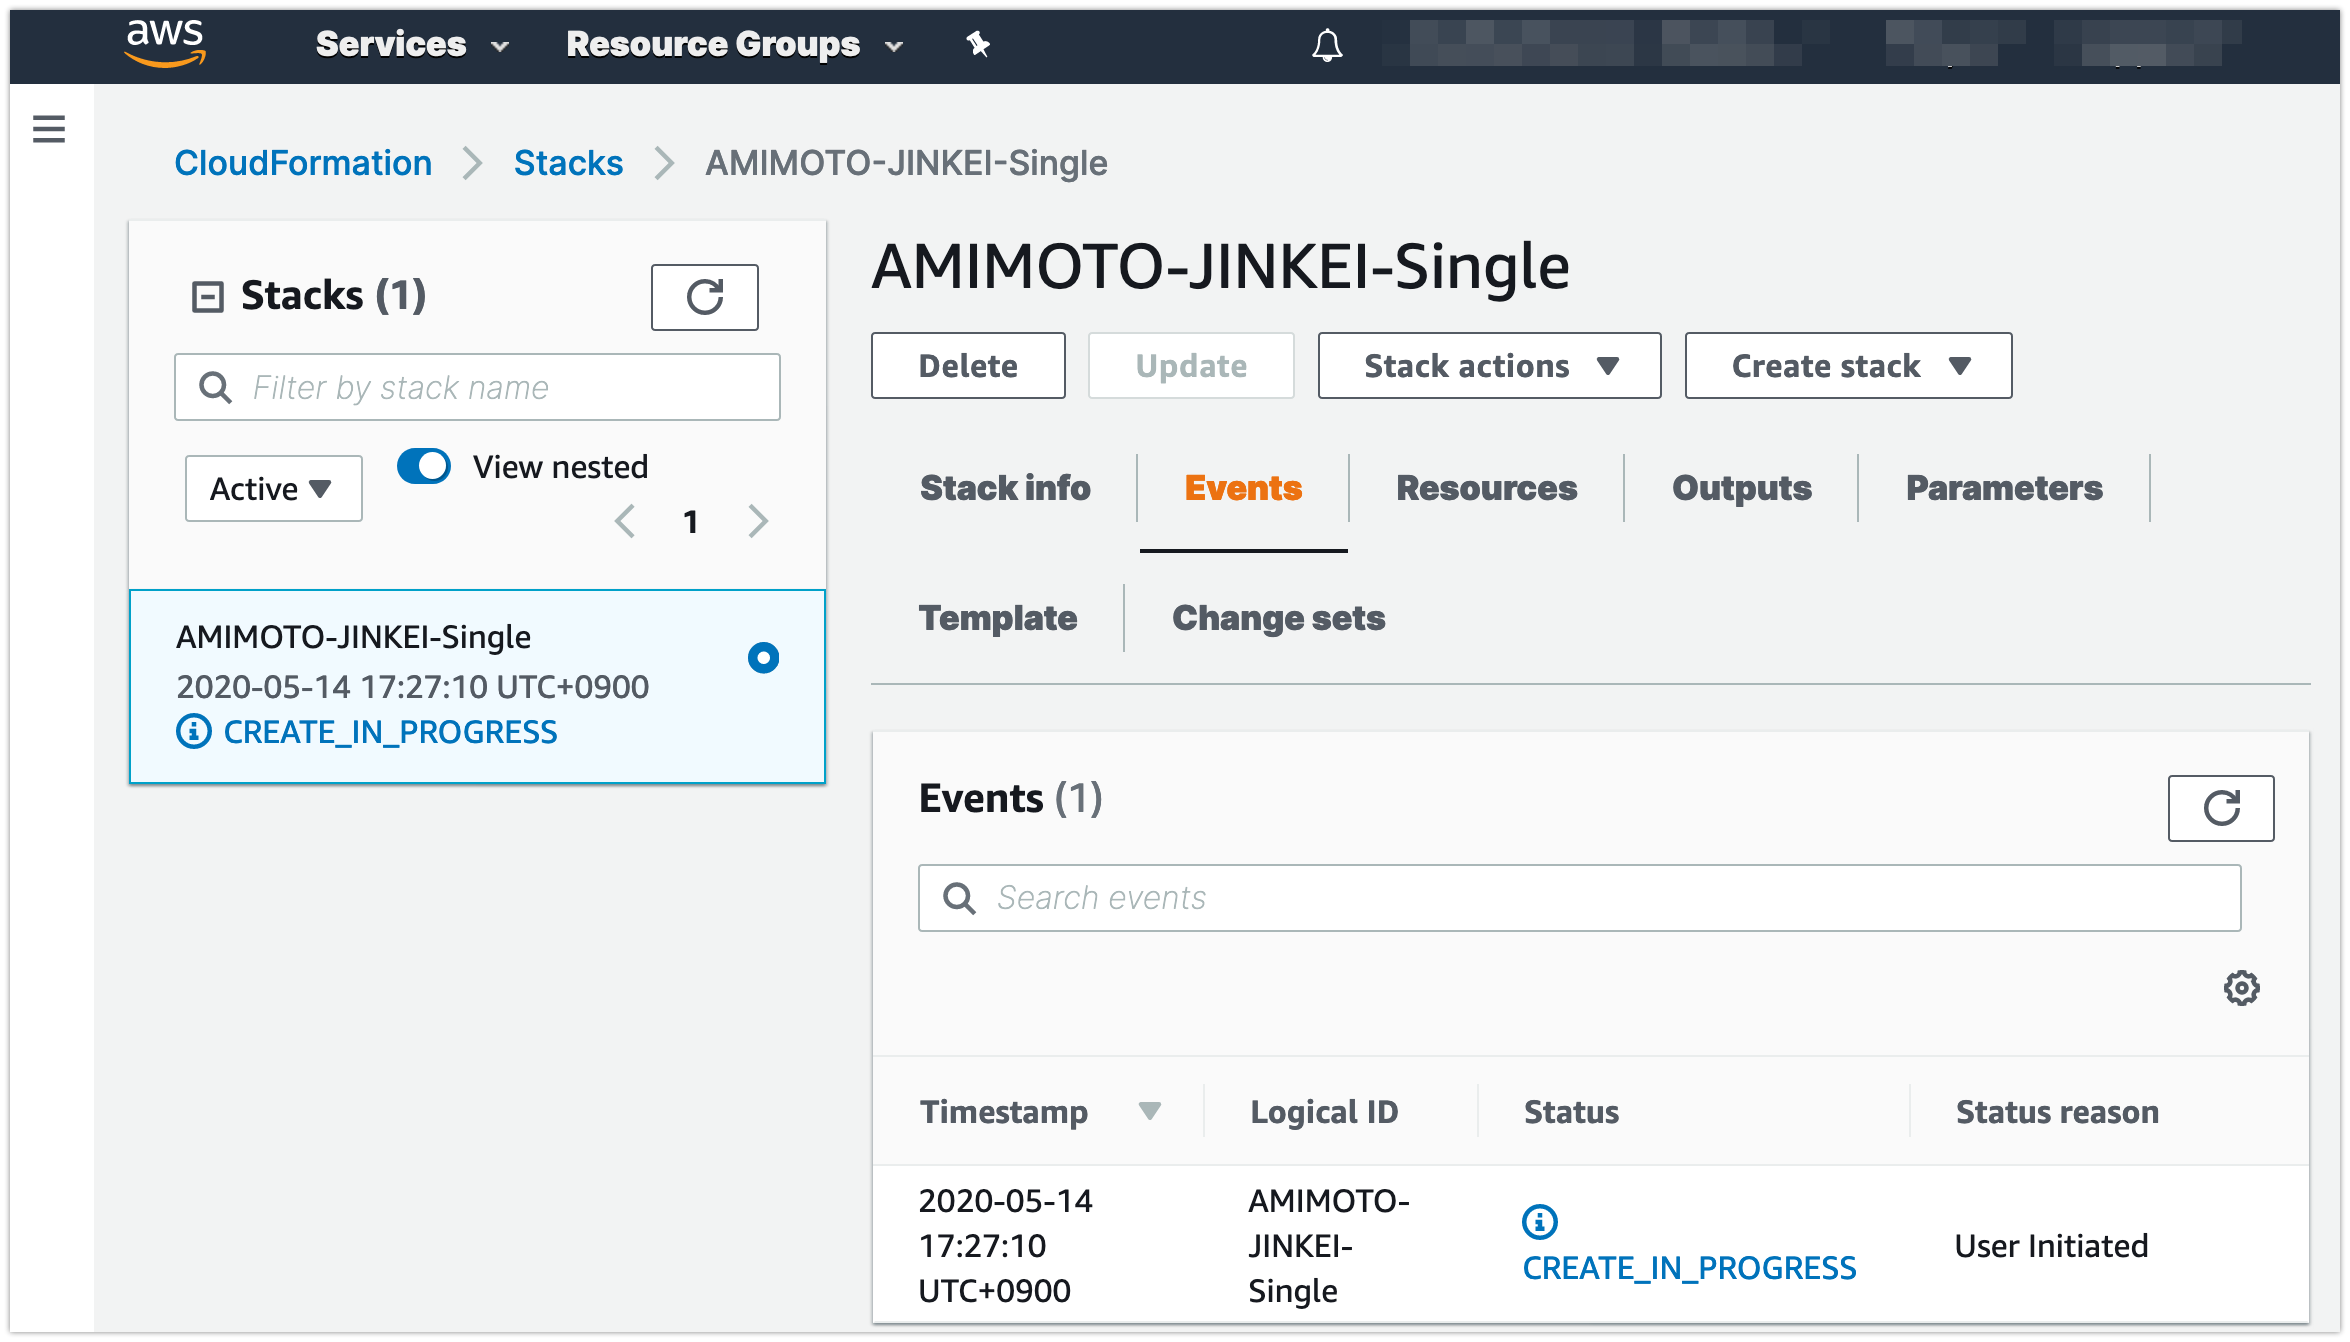
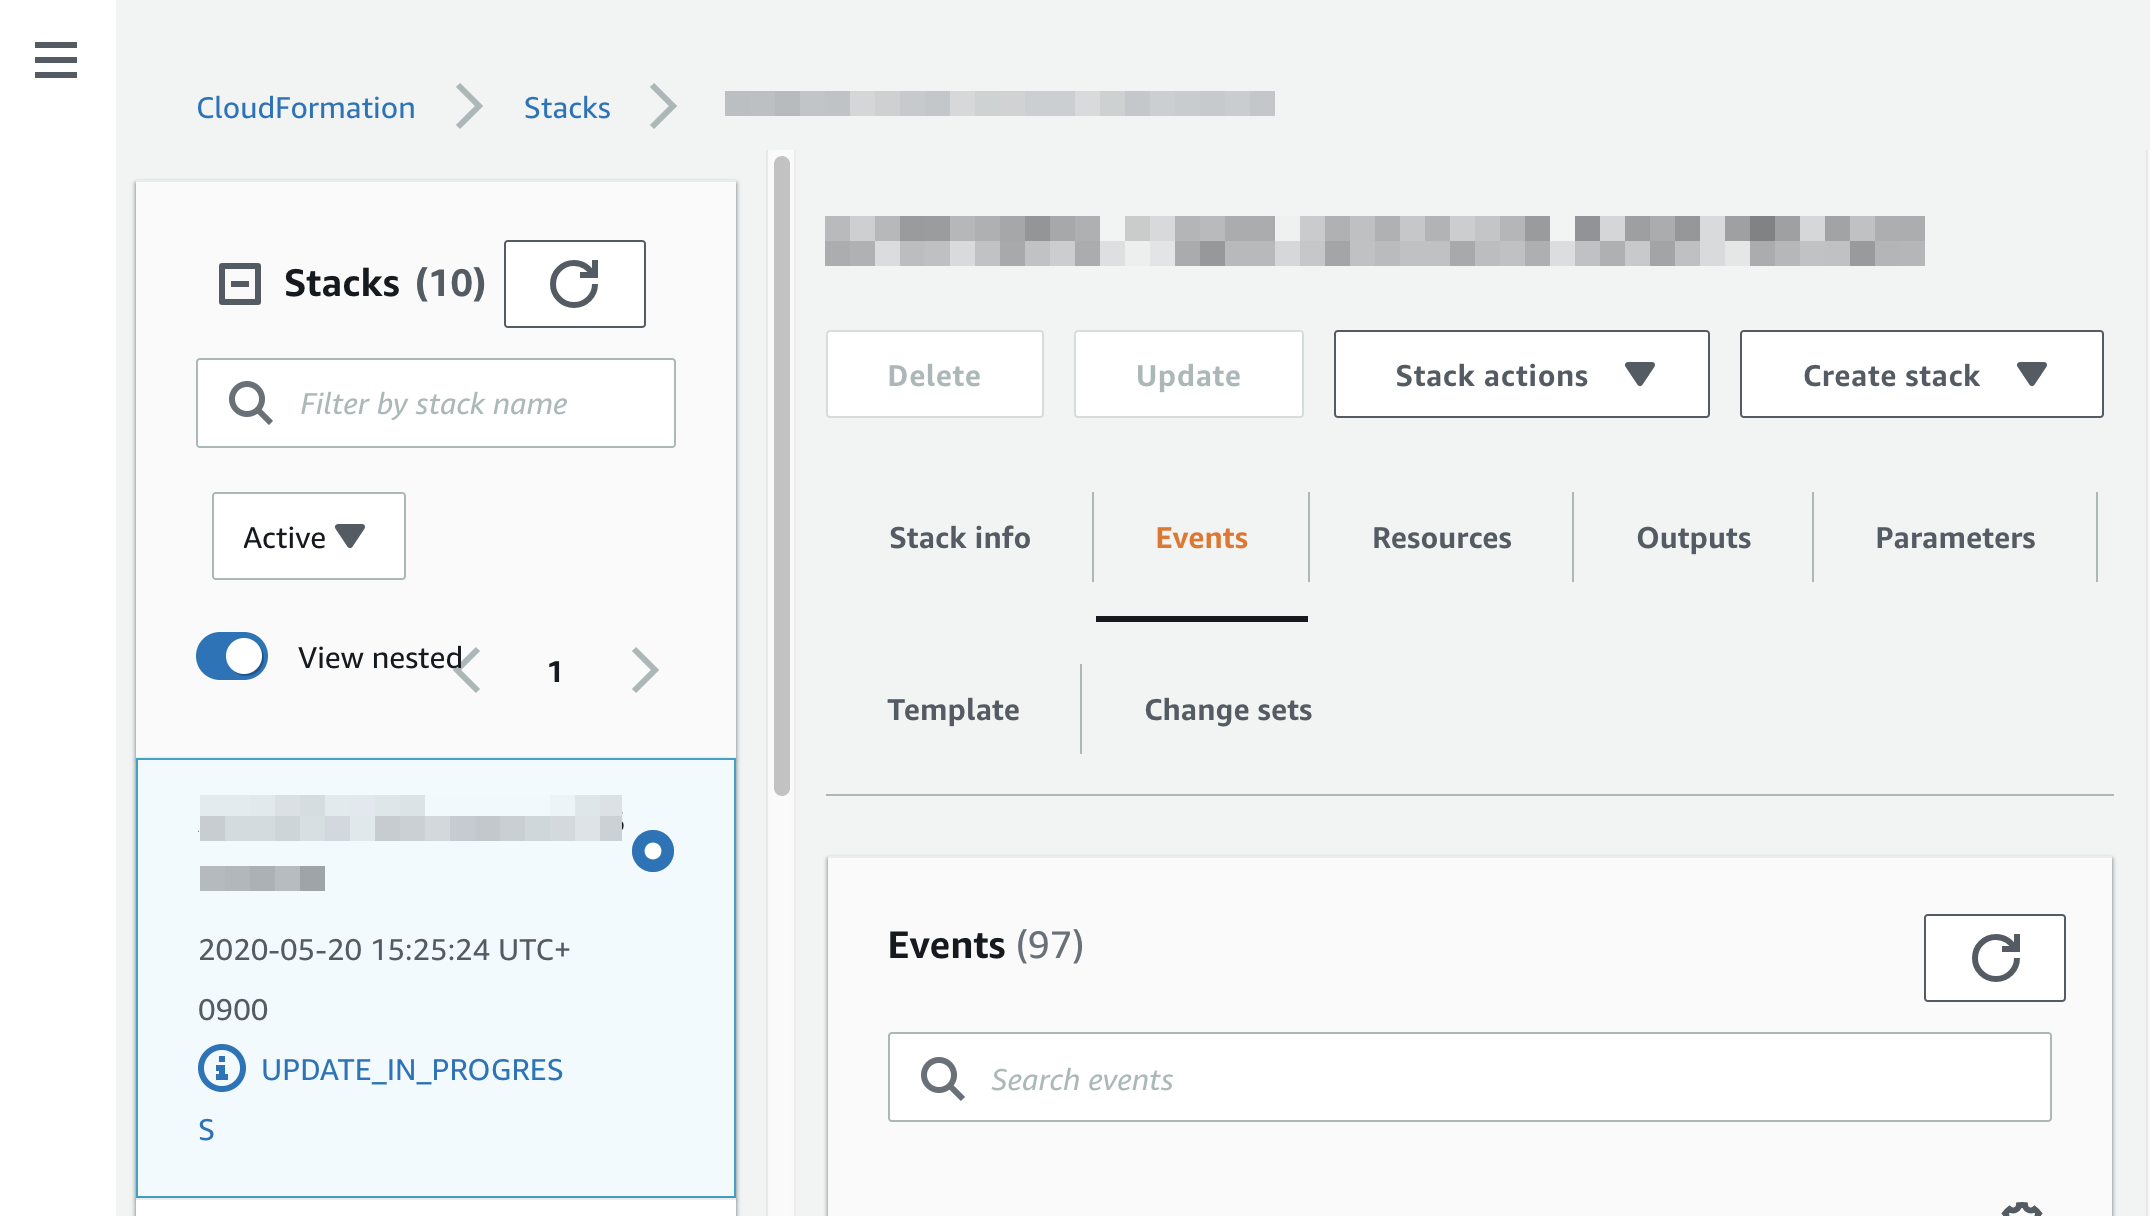
Now processing
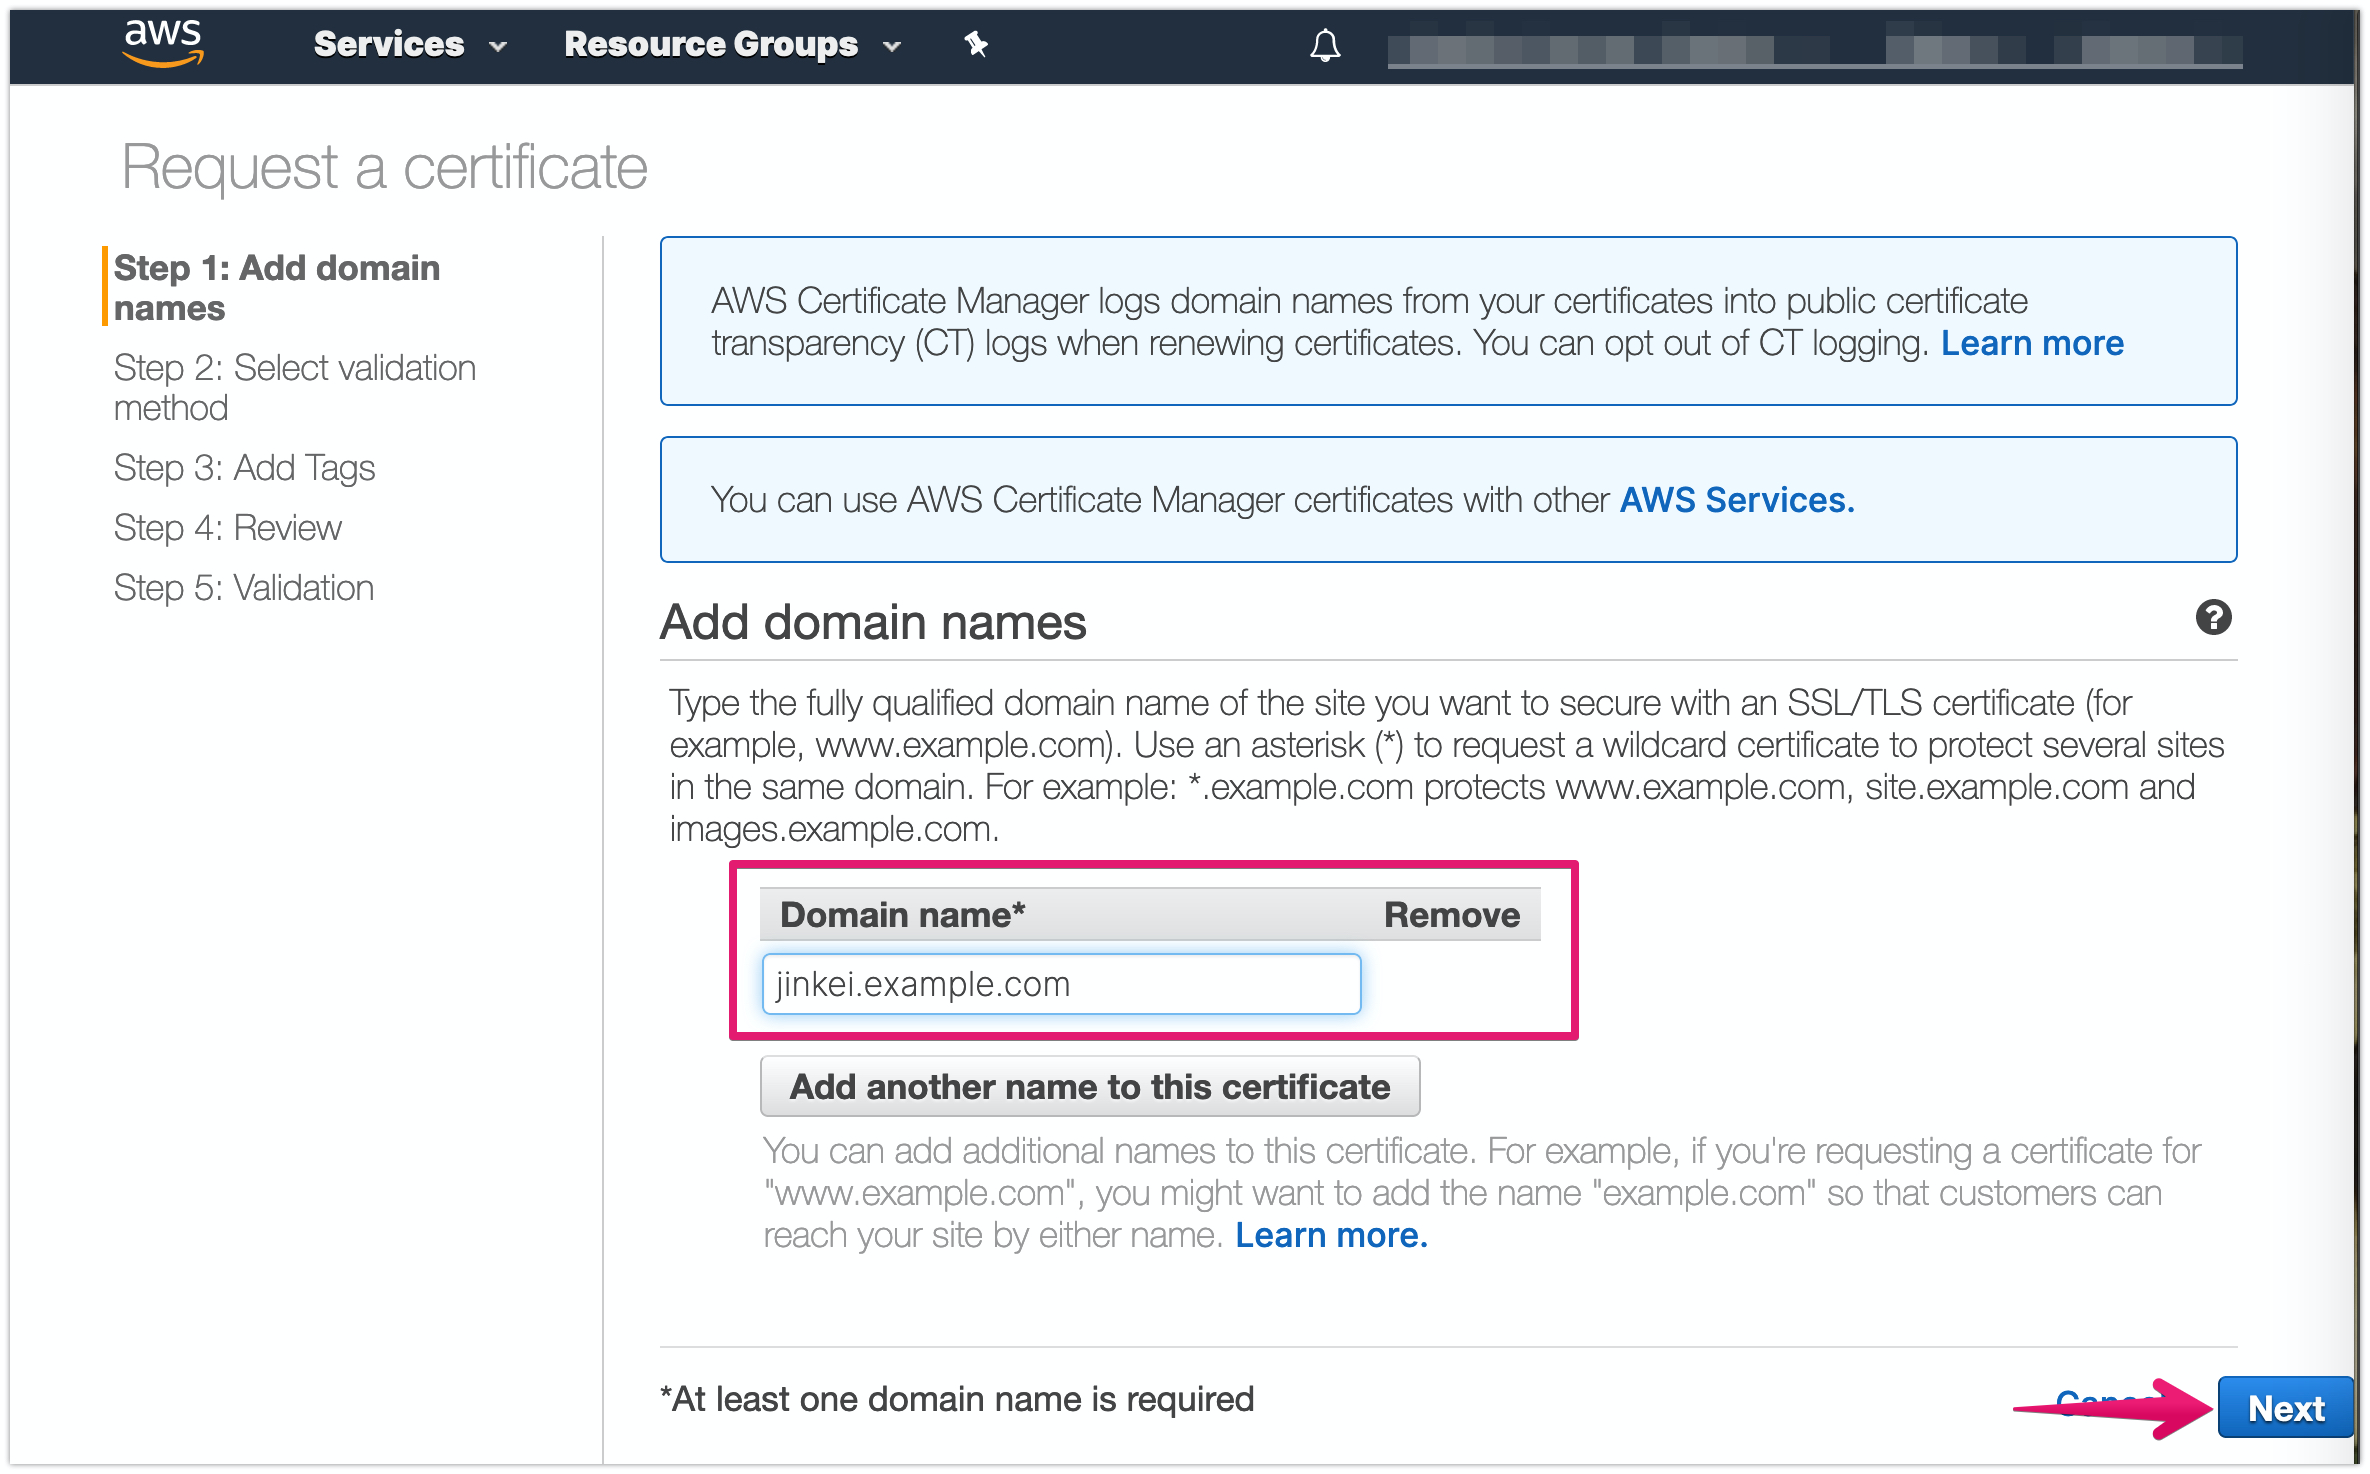
Request and get the certificate
Input the domain name and click [Next] button
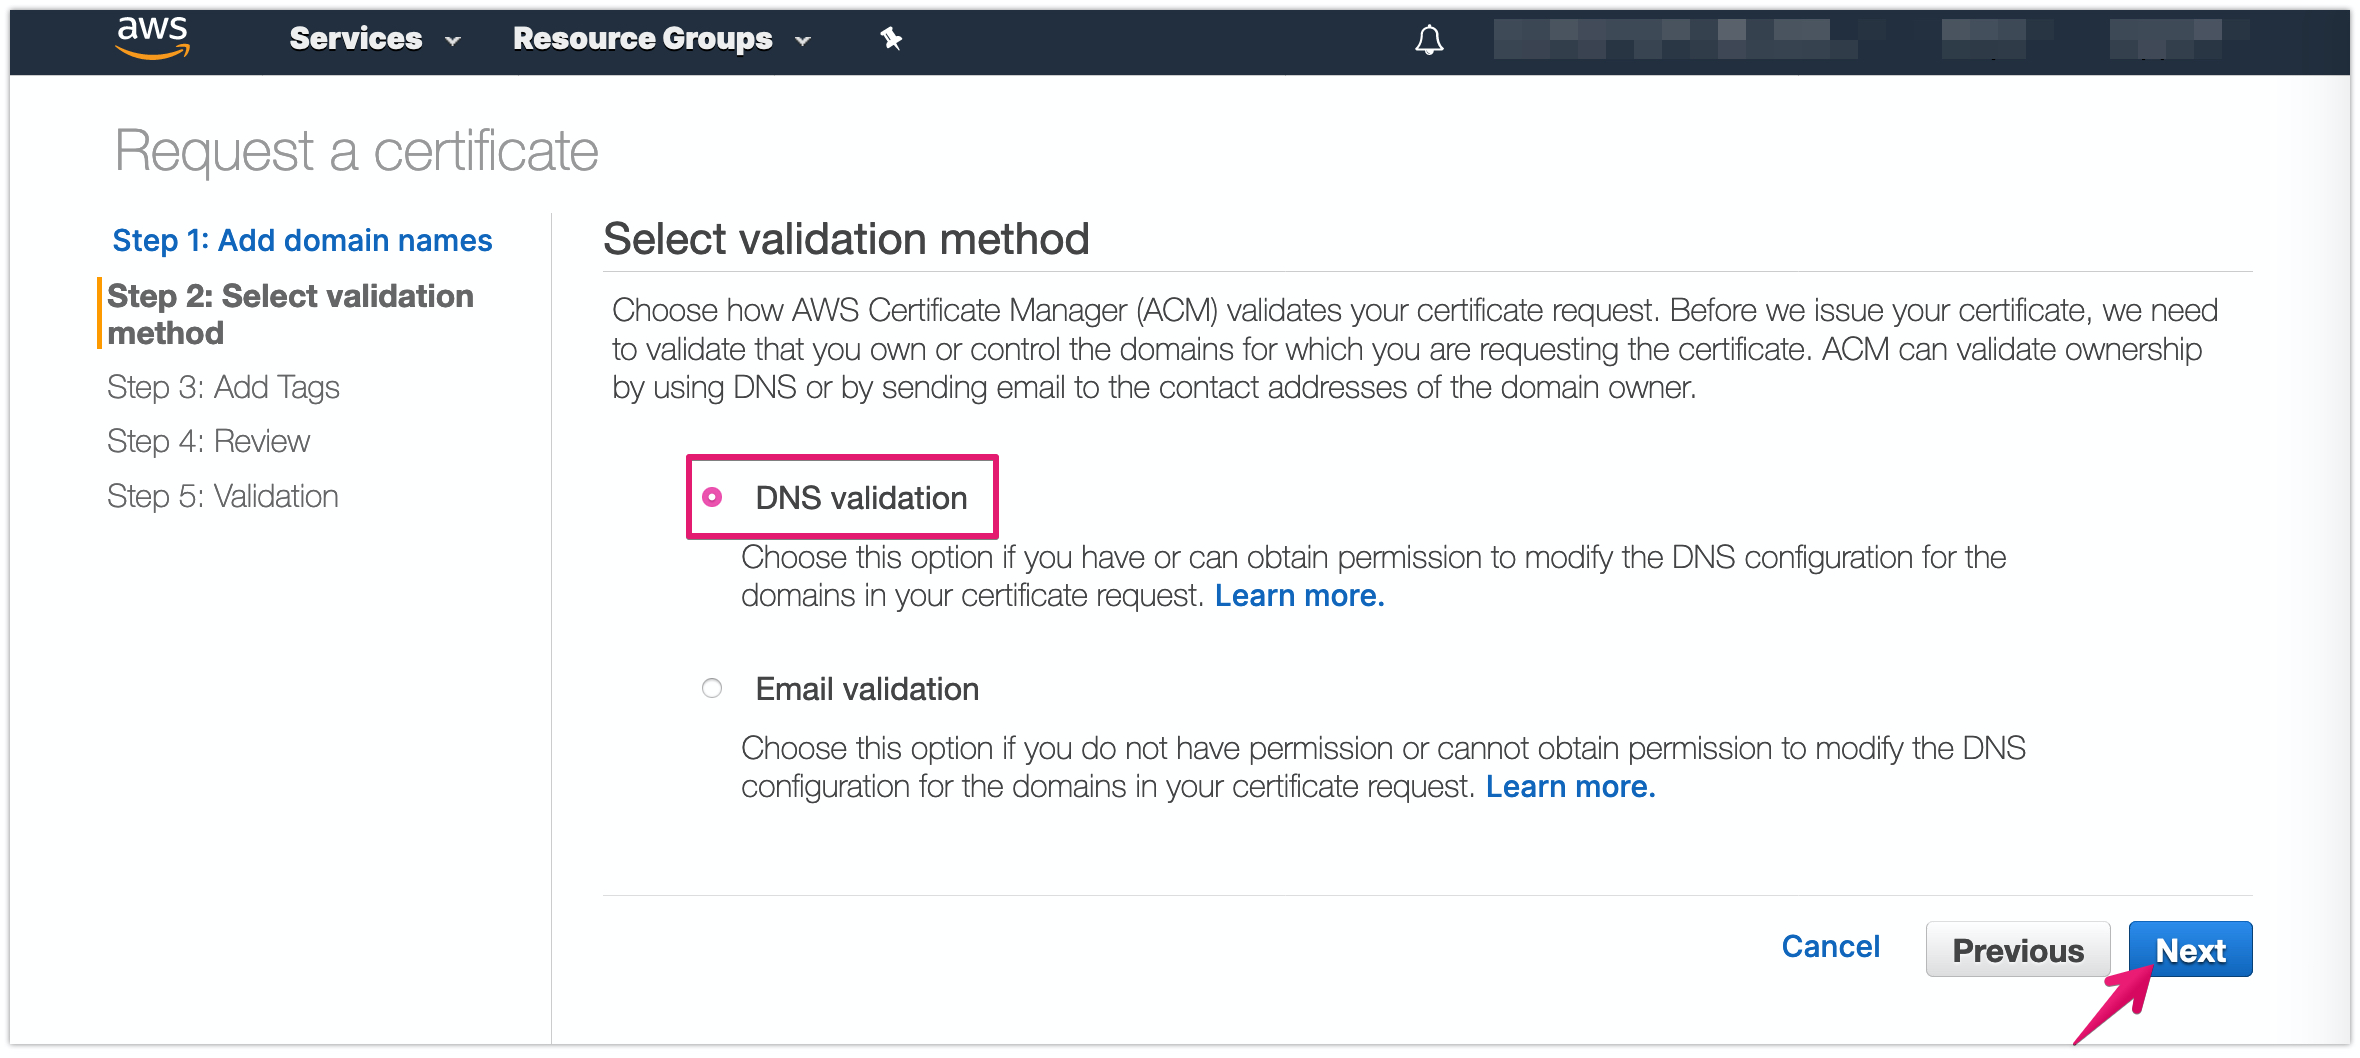
Choose DNS validation
Set Tag Name and its value
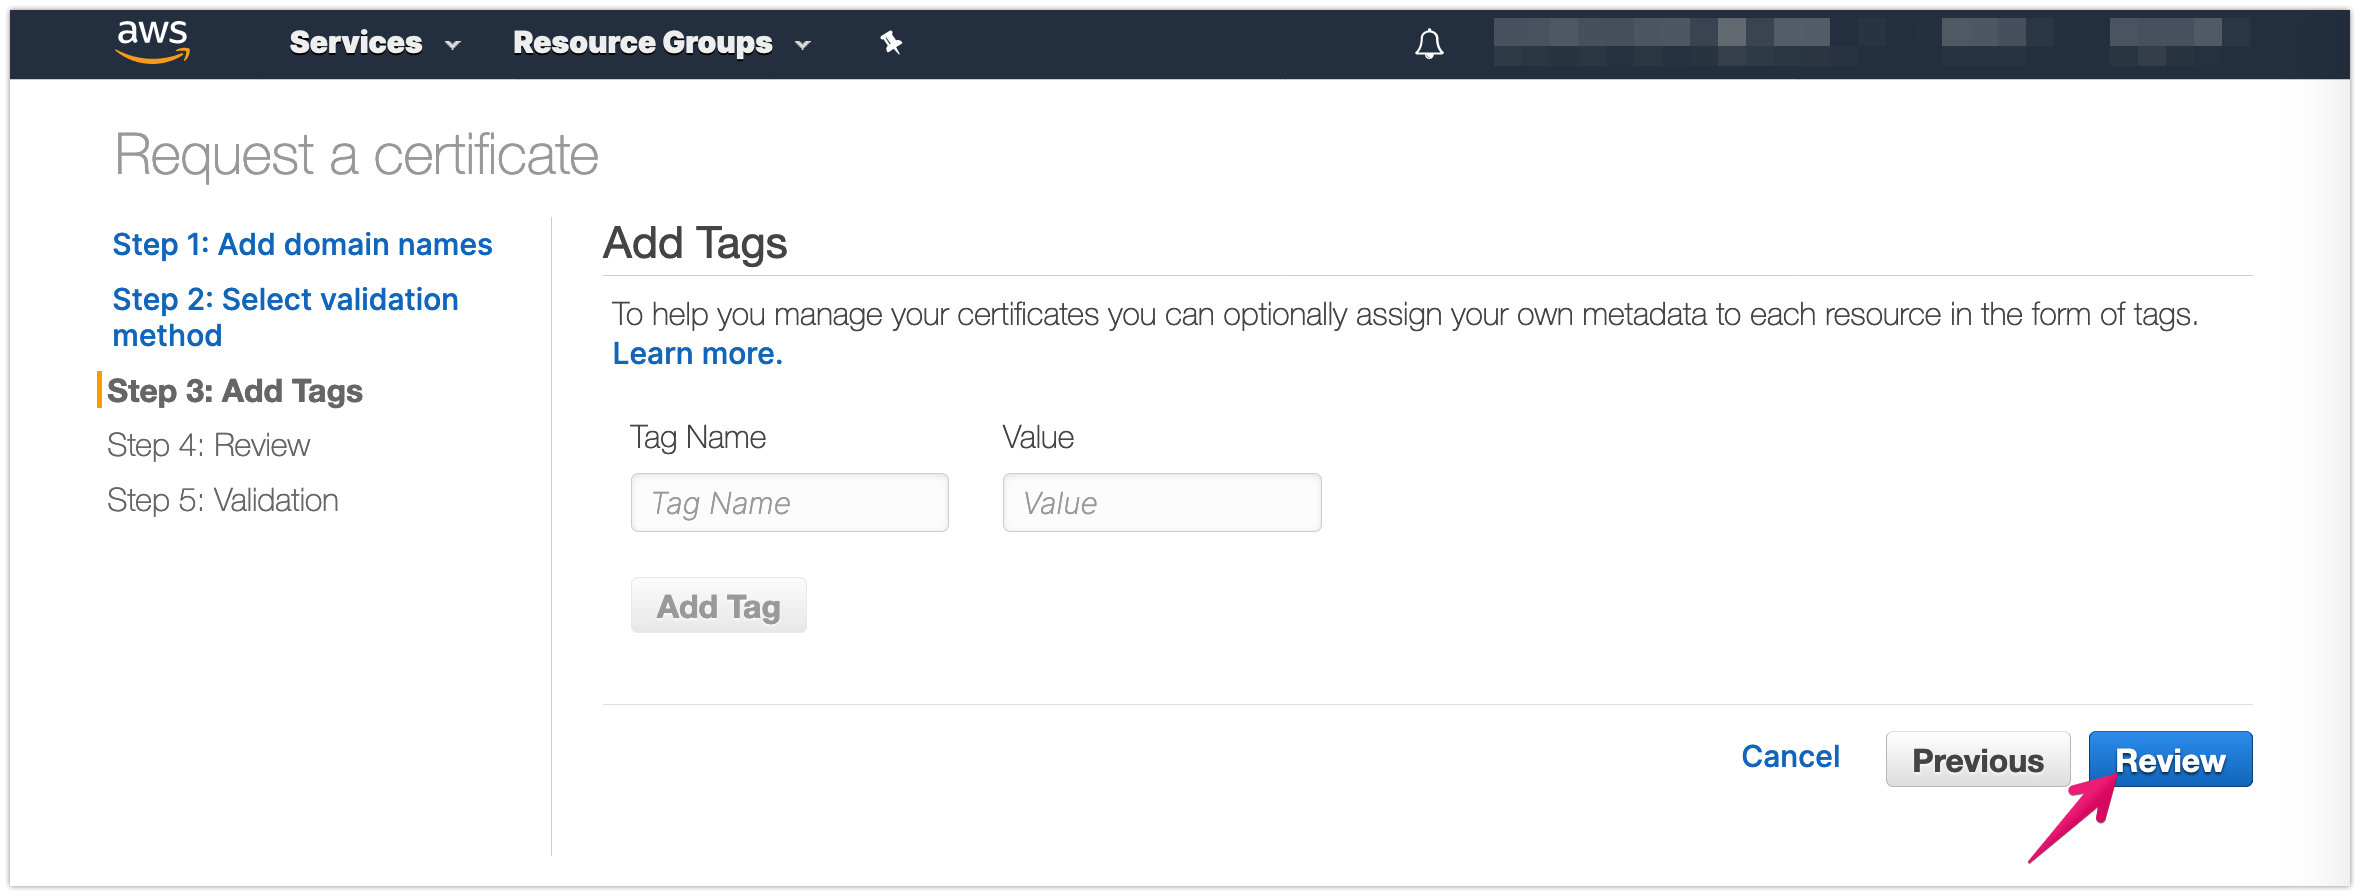
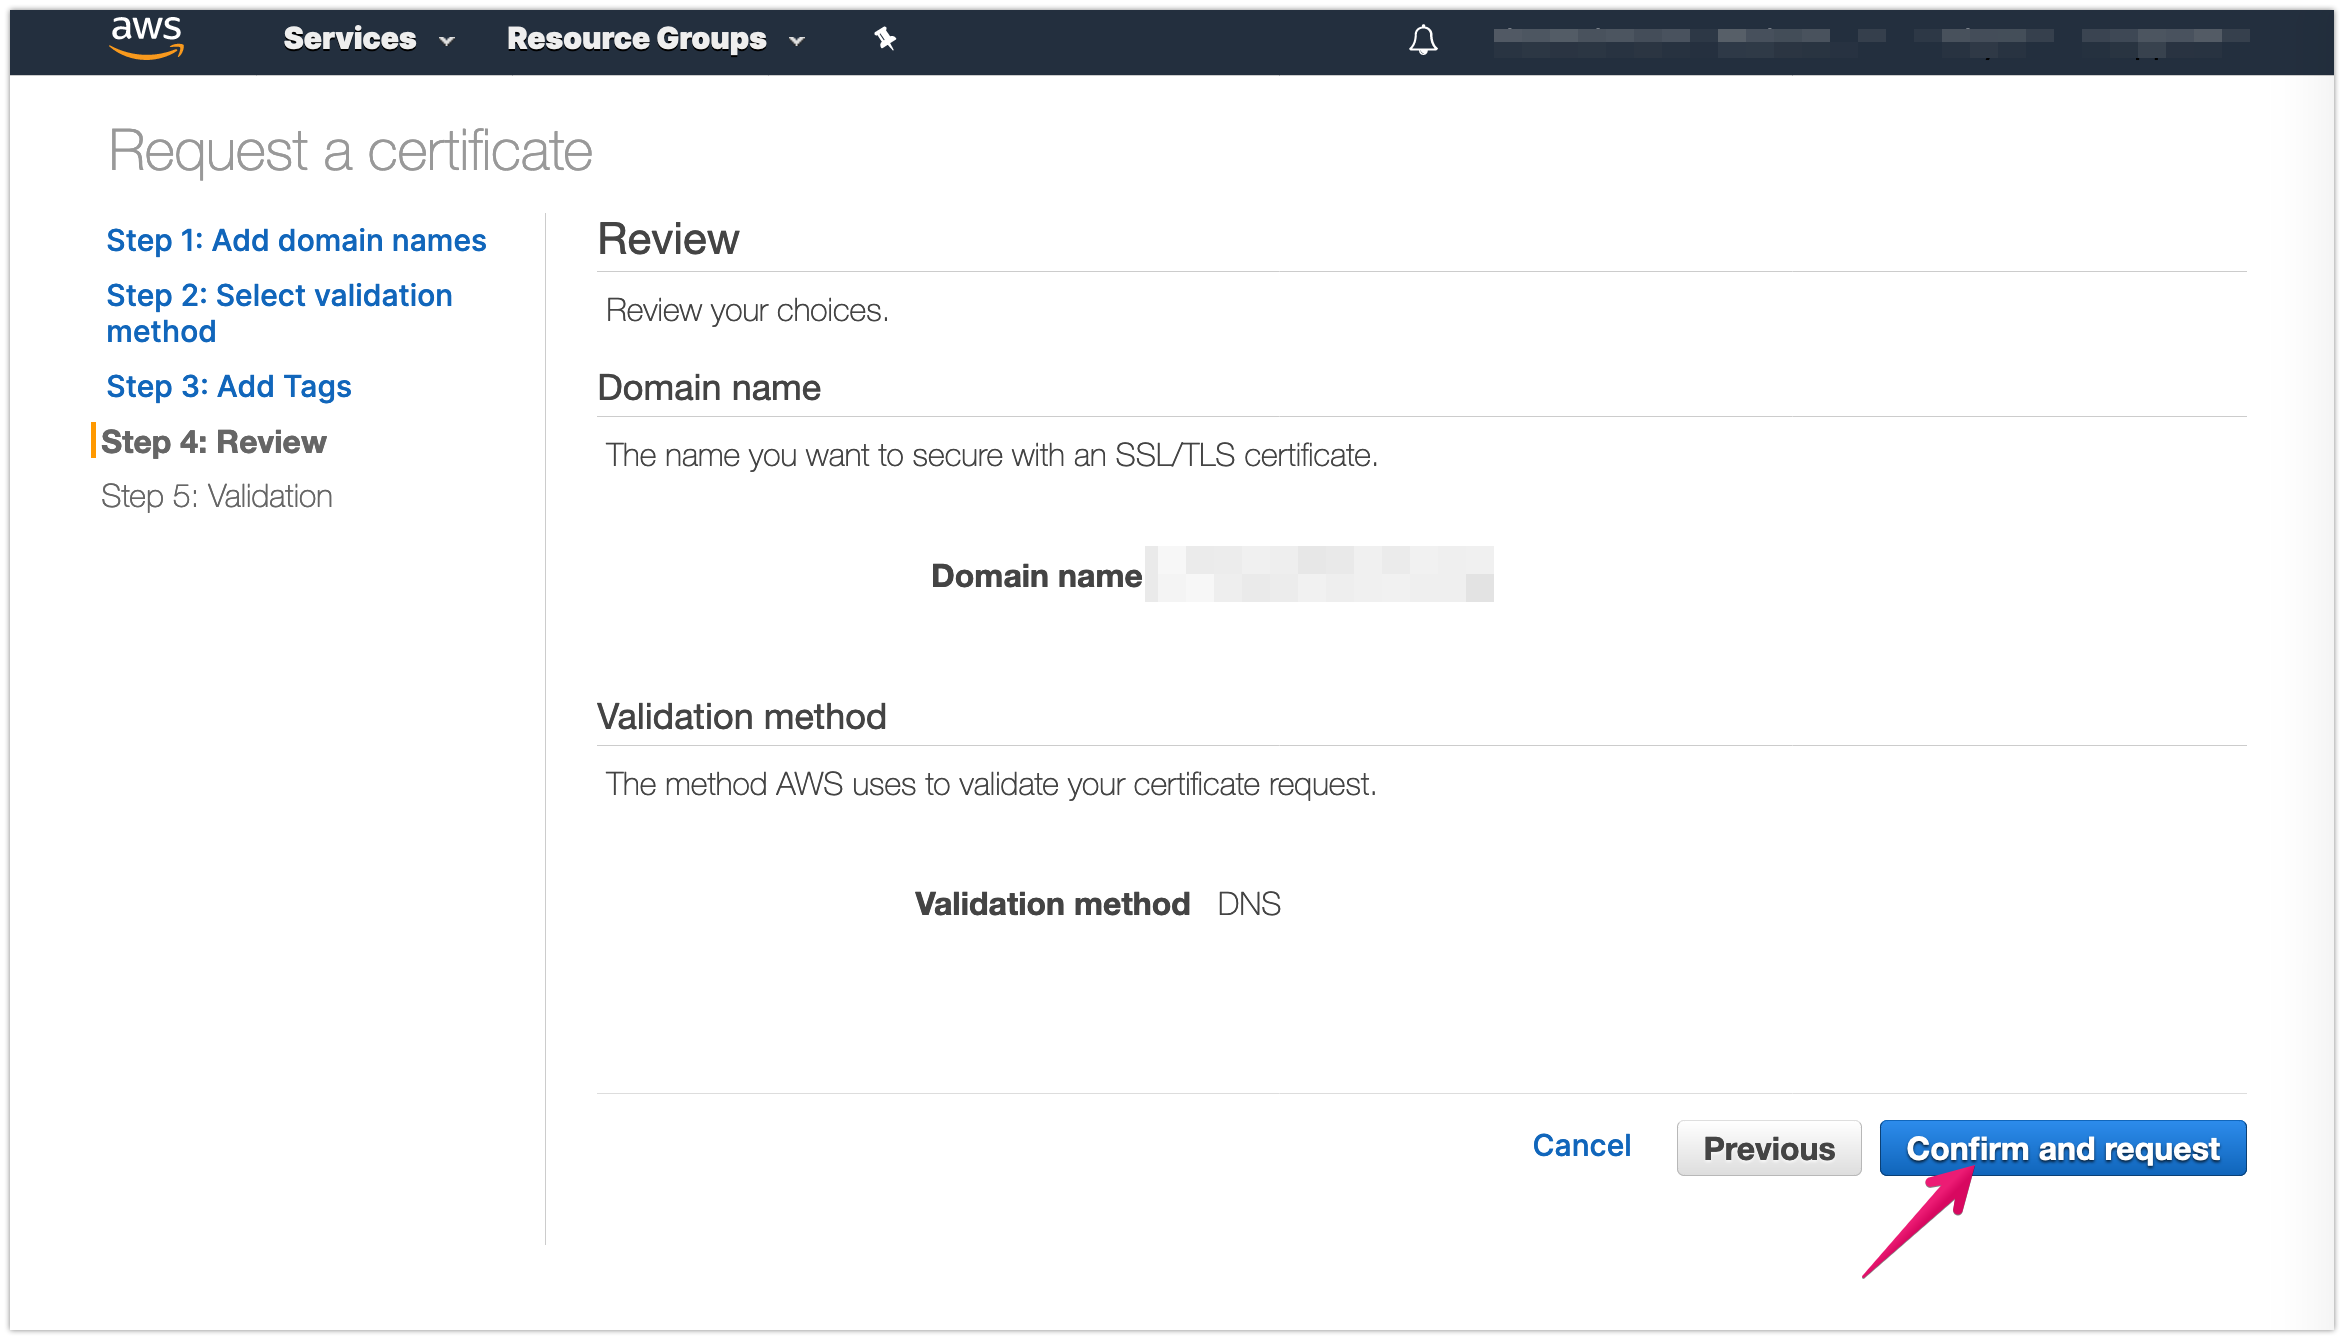
Review settings
Copy DNS validation record
For the sample it will be like below:
Name: _908e1340c4a44f368073b947ee8456e9.jinkei.example.com
Type: CNAME
Value: _269db6d0f3f65608589acb36a4173506.auiqqraehs.acm-validations.aws.
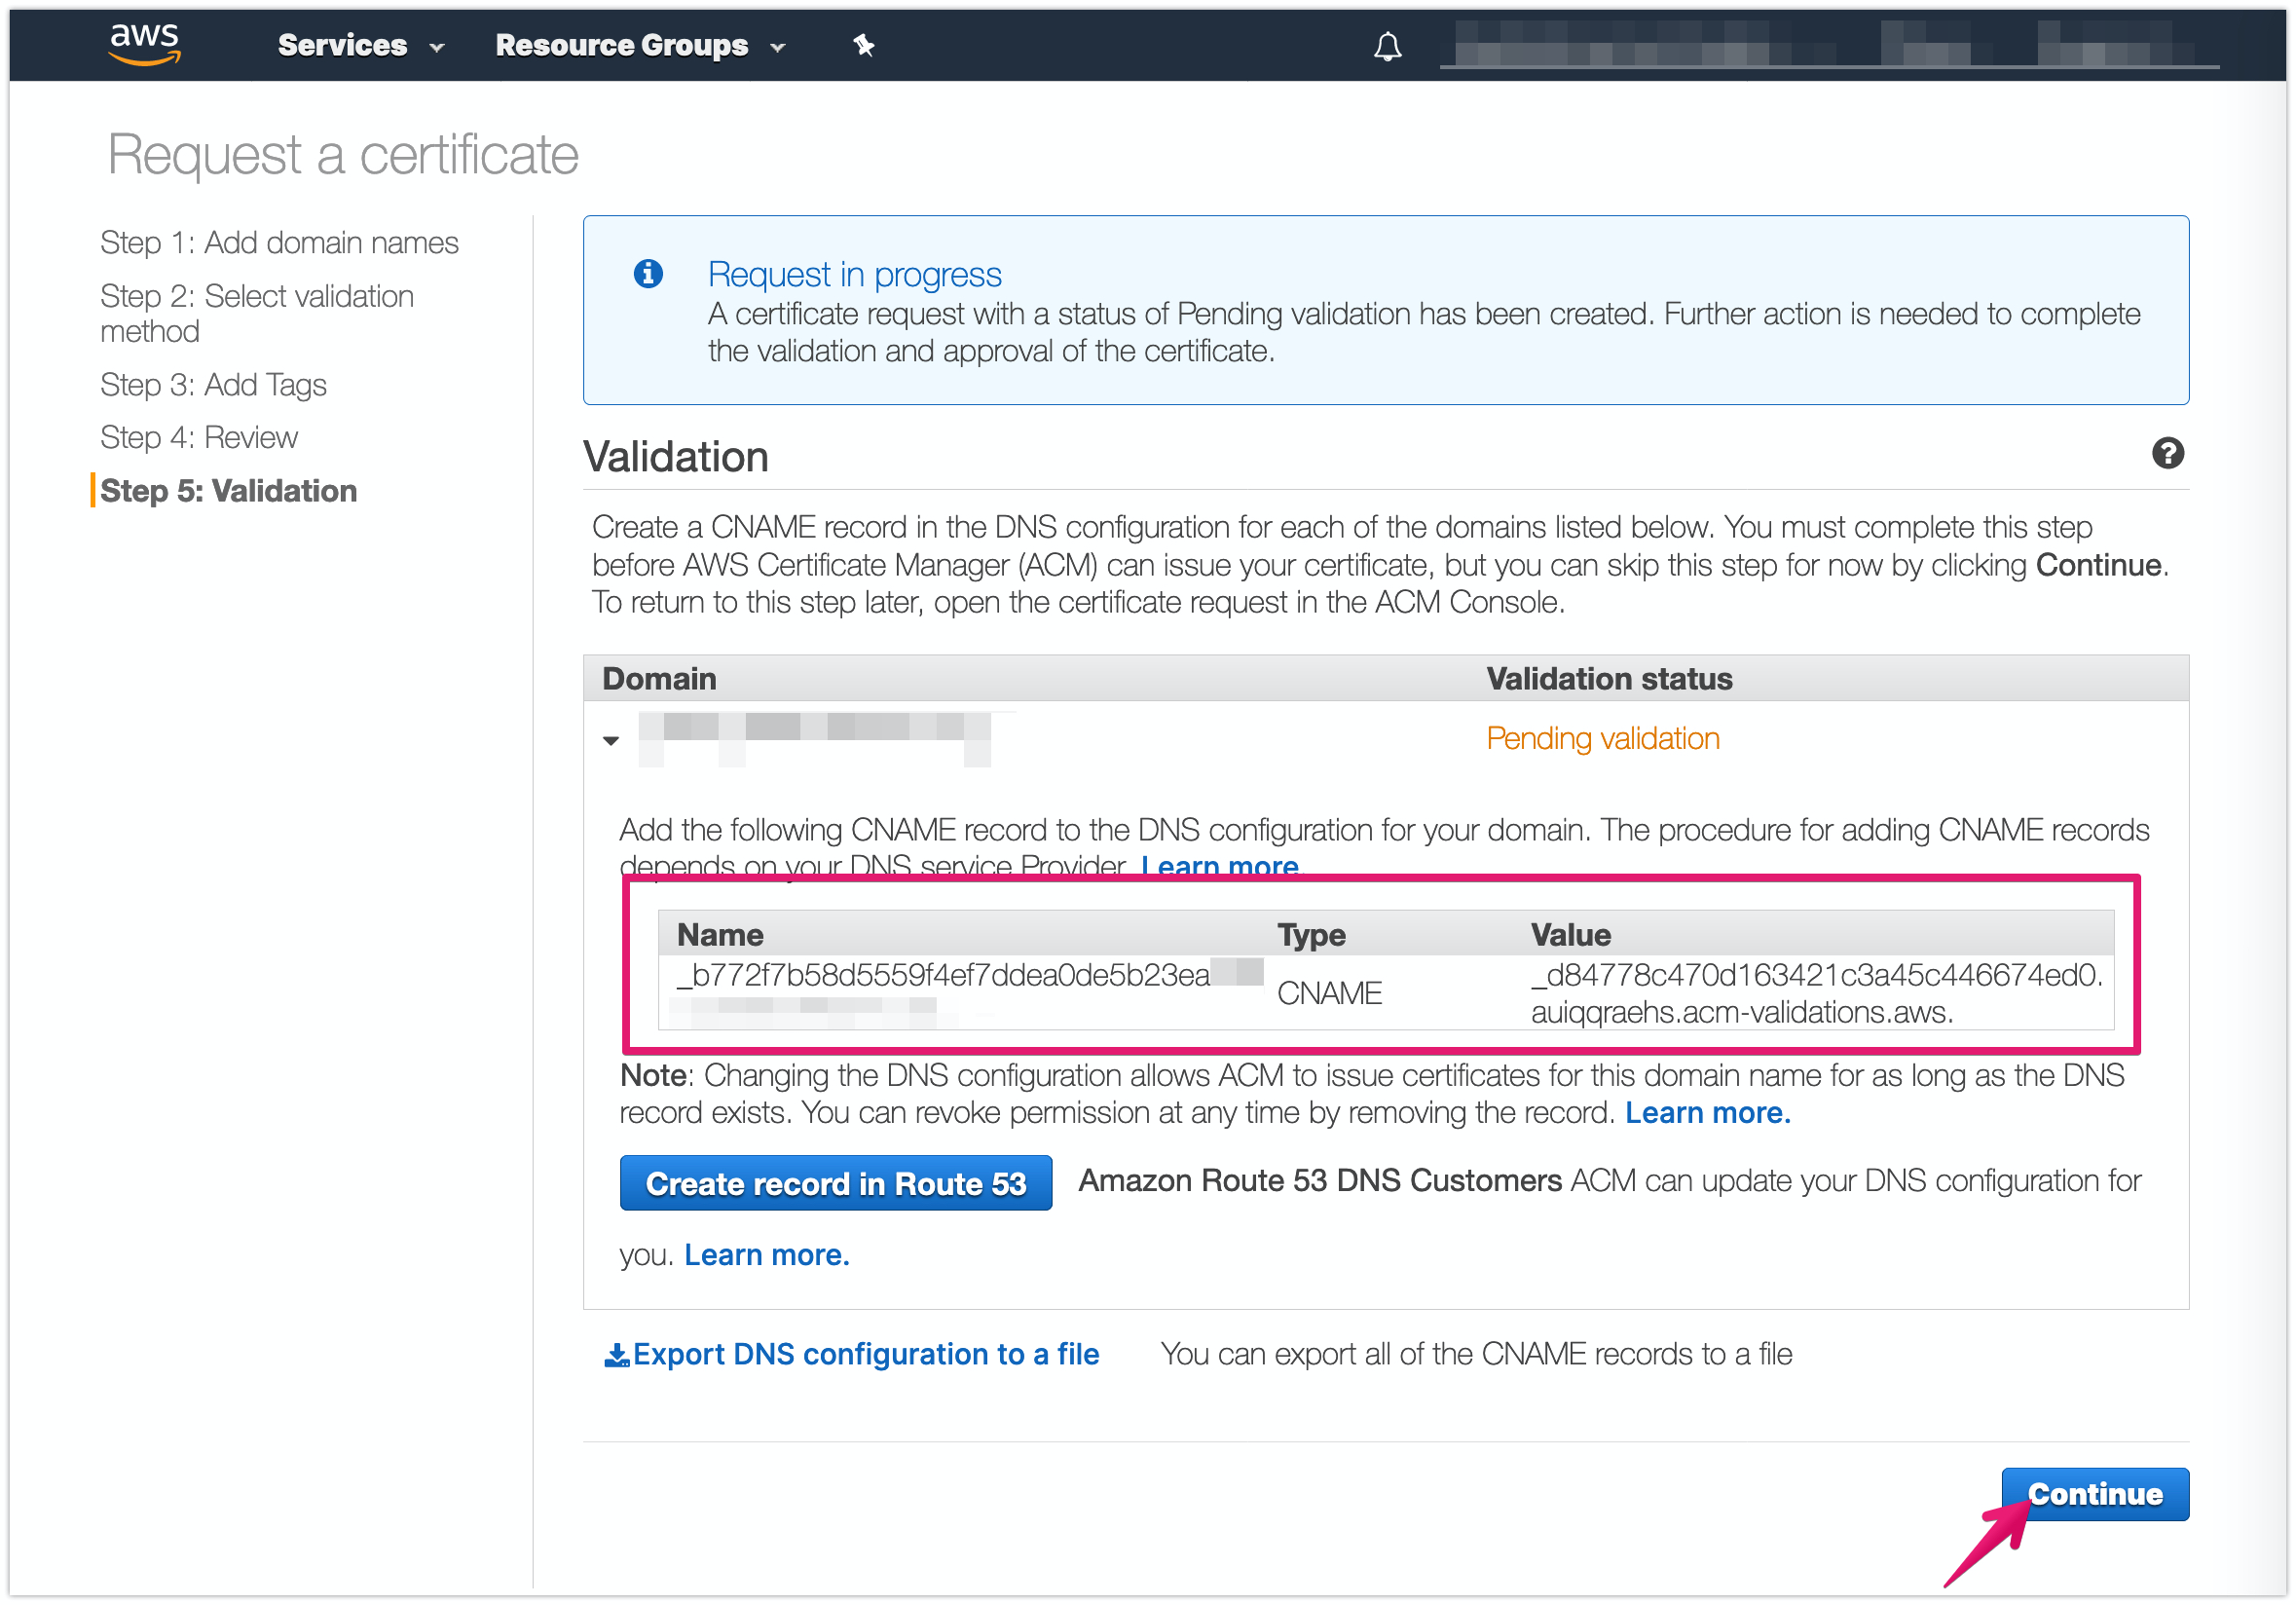
Add DNS records to DNS server to complete domain verification
Note:
Domain validation should be done within 72 hours since your request. If you could not, you should make a request again.
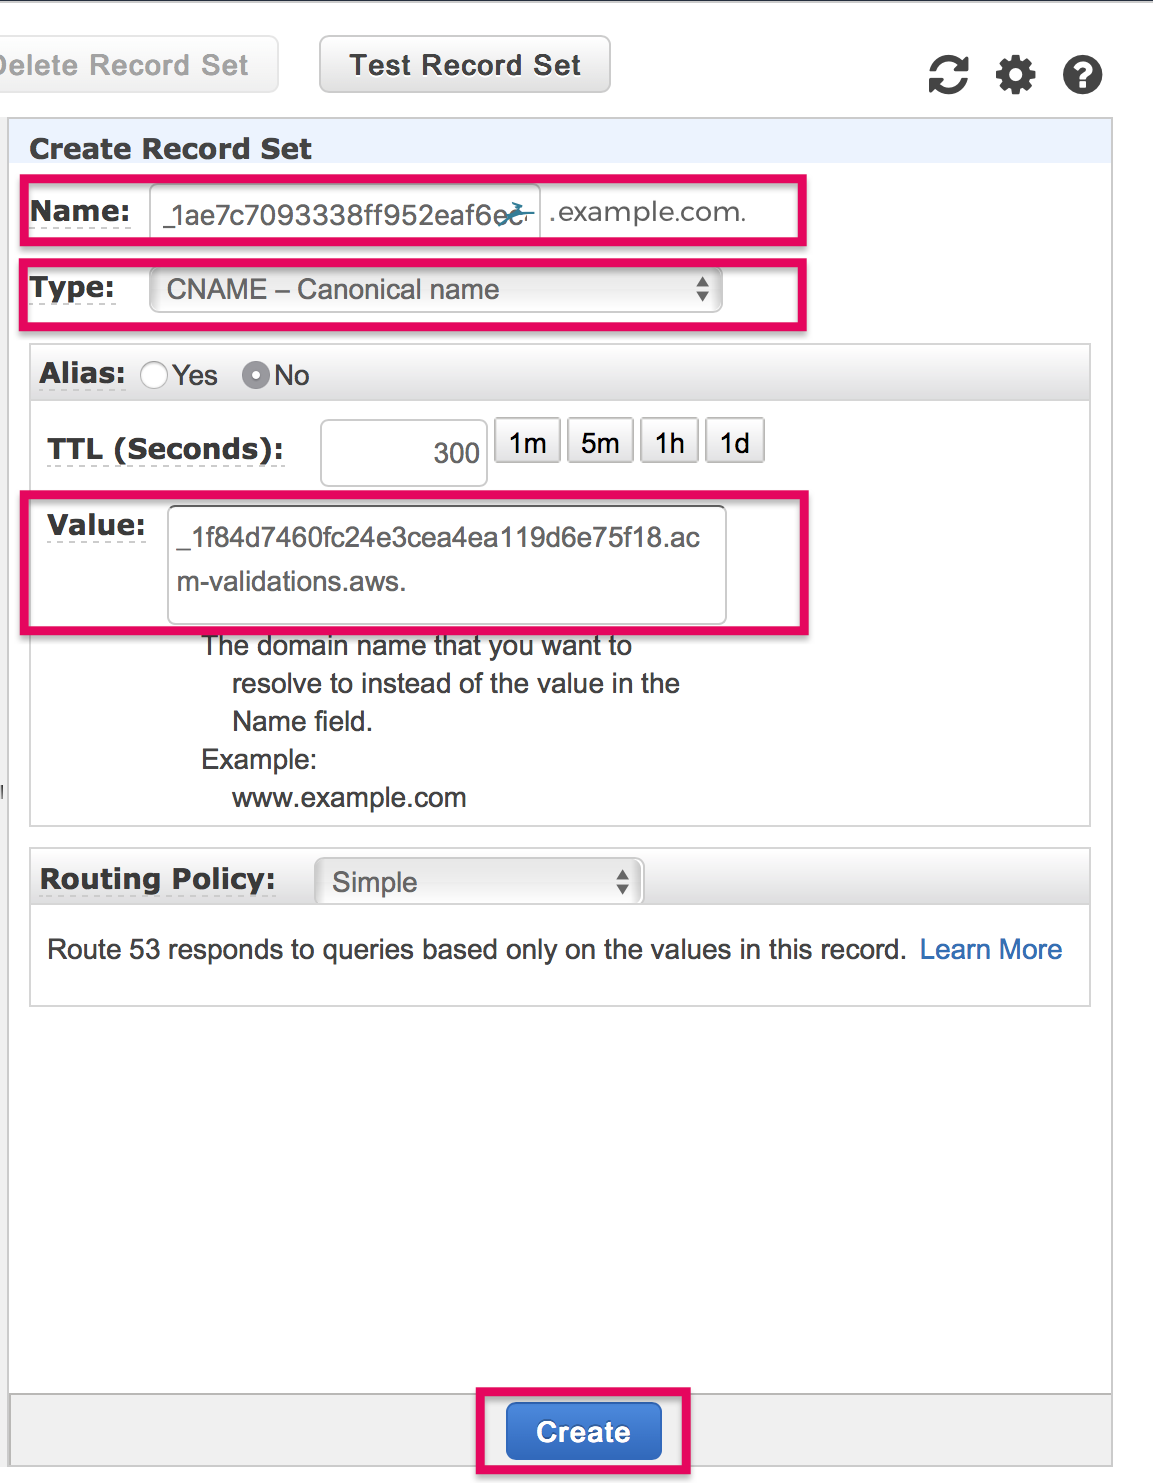
Goto ControlPanel of your DNS provider, and set up DNS records for DNS authentication.
Here is example for Route 53 of AWS.
Create record and input value of DNS record you copied above, then click [Create]
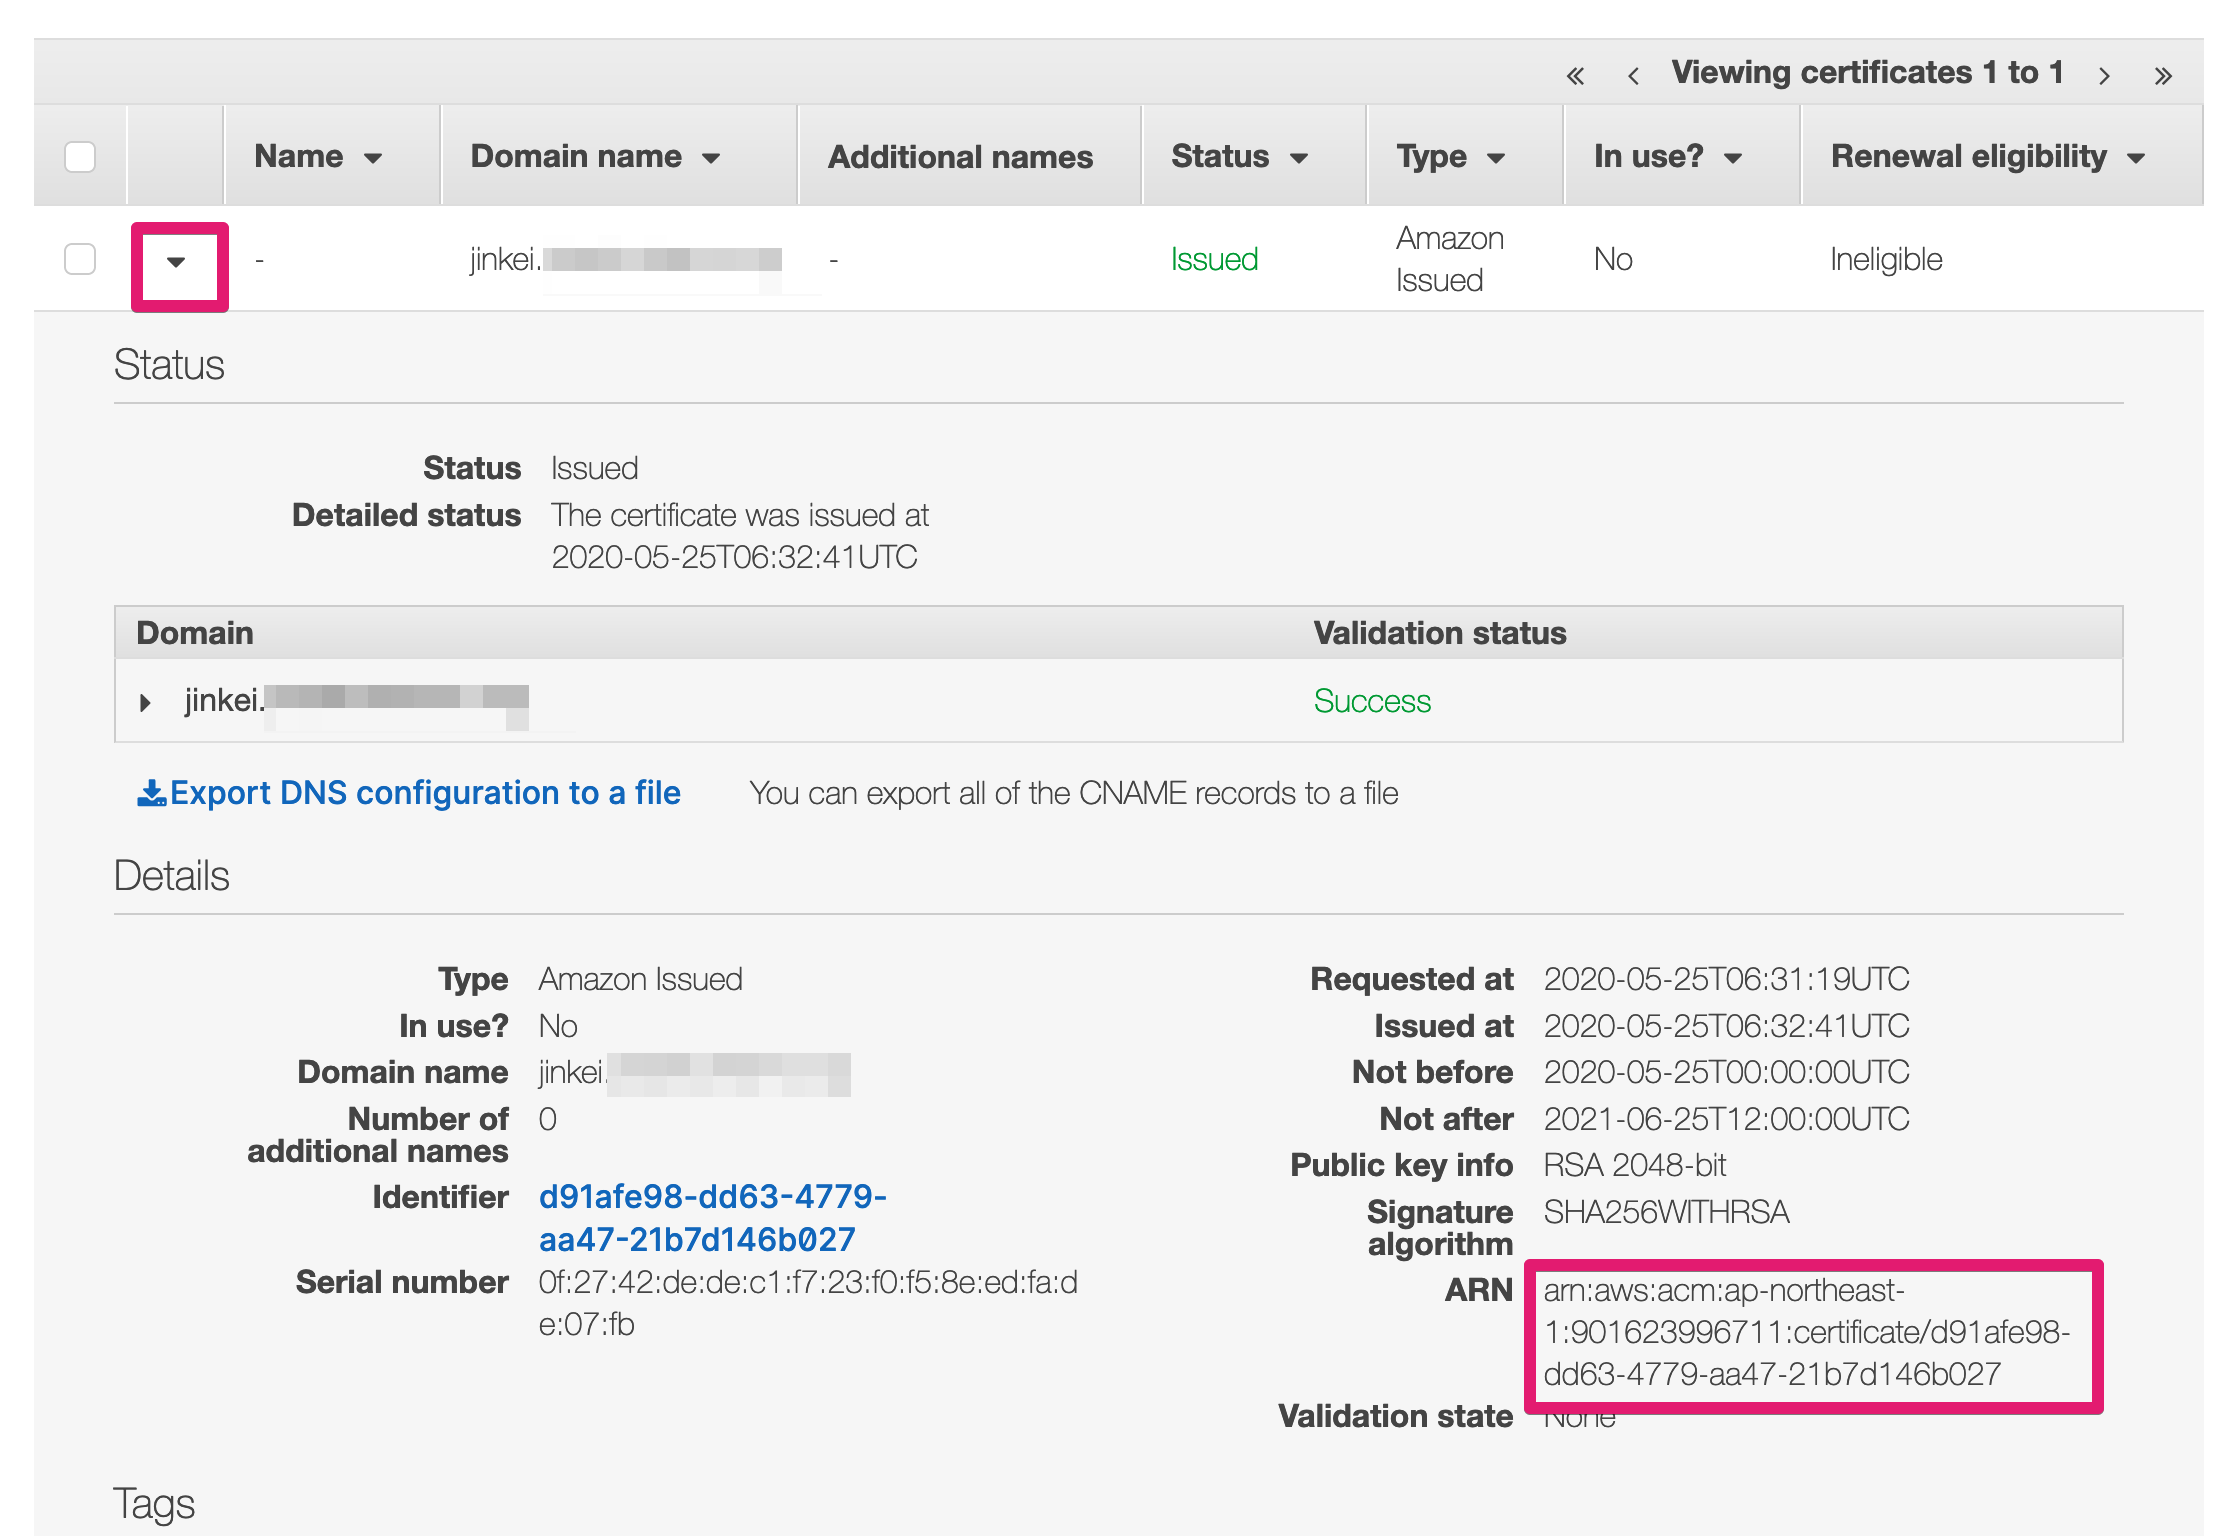
Certificate status turns to "Issued"
After adding validation DNS record, the Certificate status turns to "Issued"
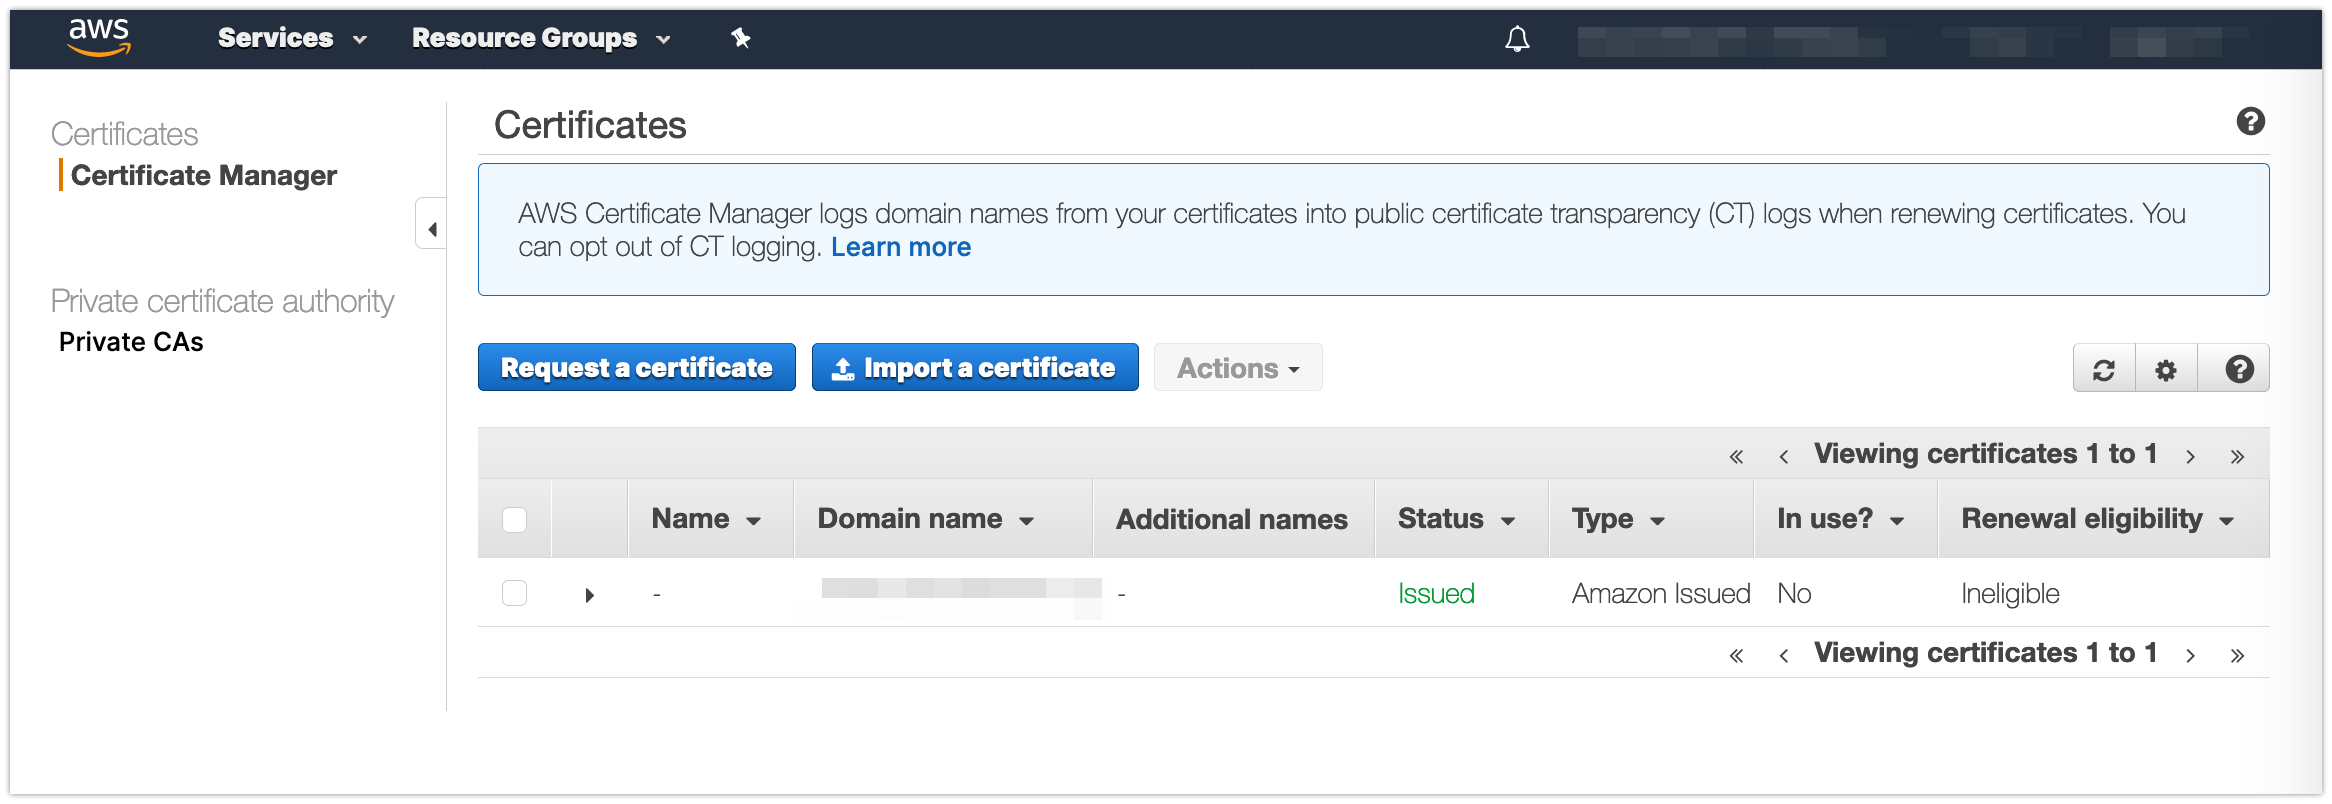
Copy ARN
Phase 3. Update CloudFormation settings
To add ARN value and domain name to the created Stack
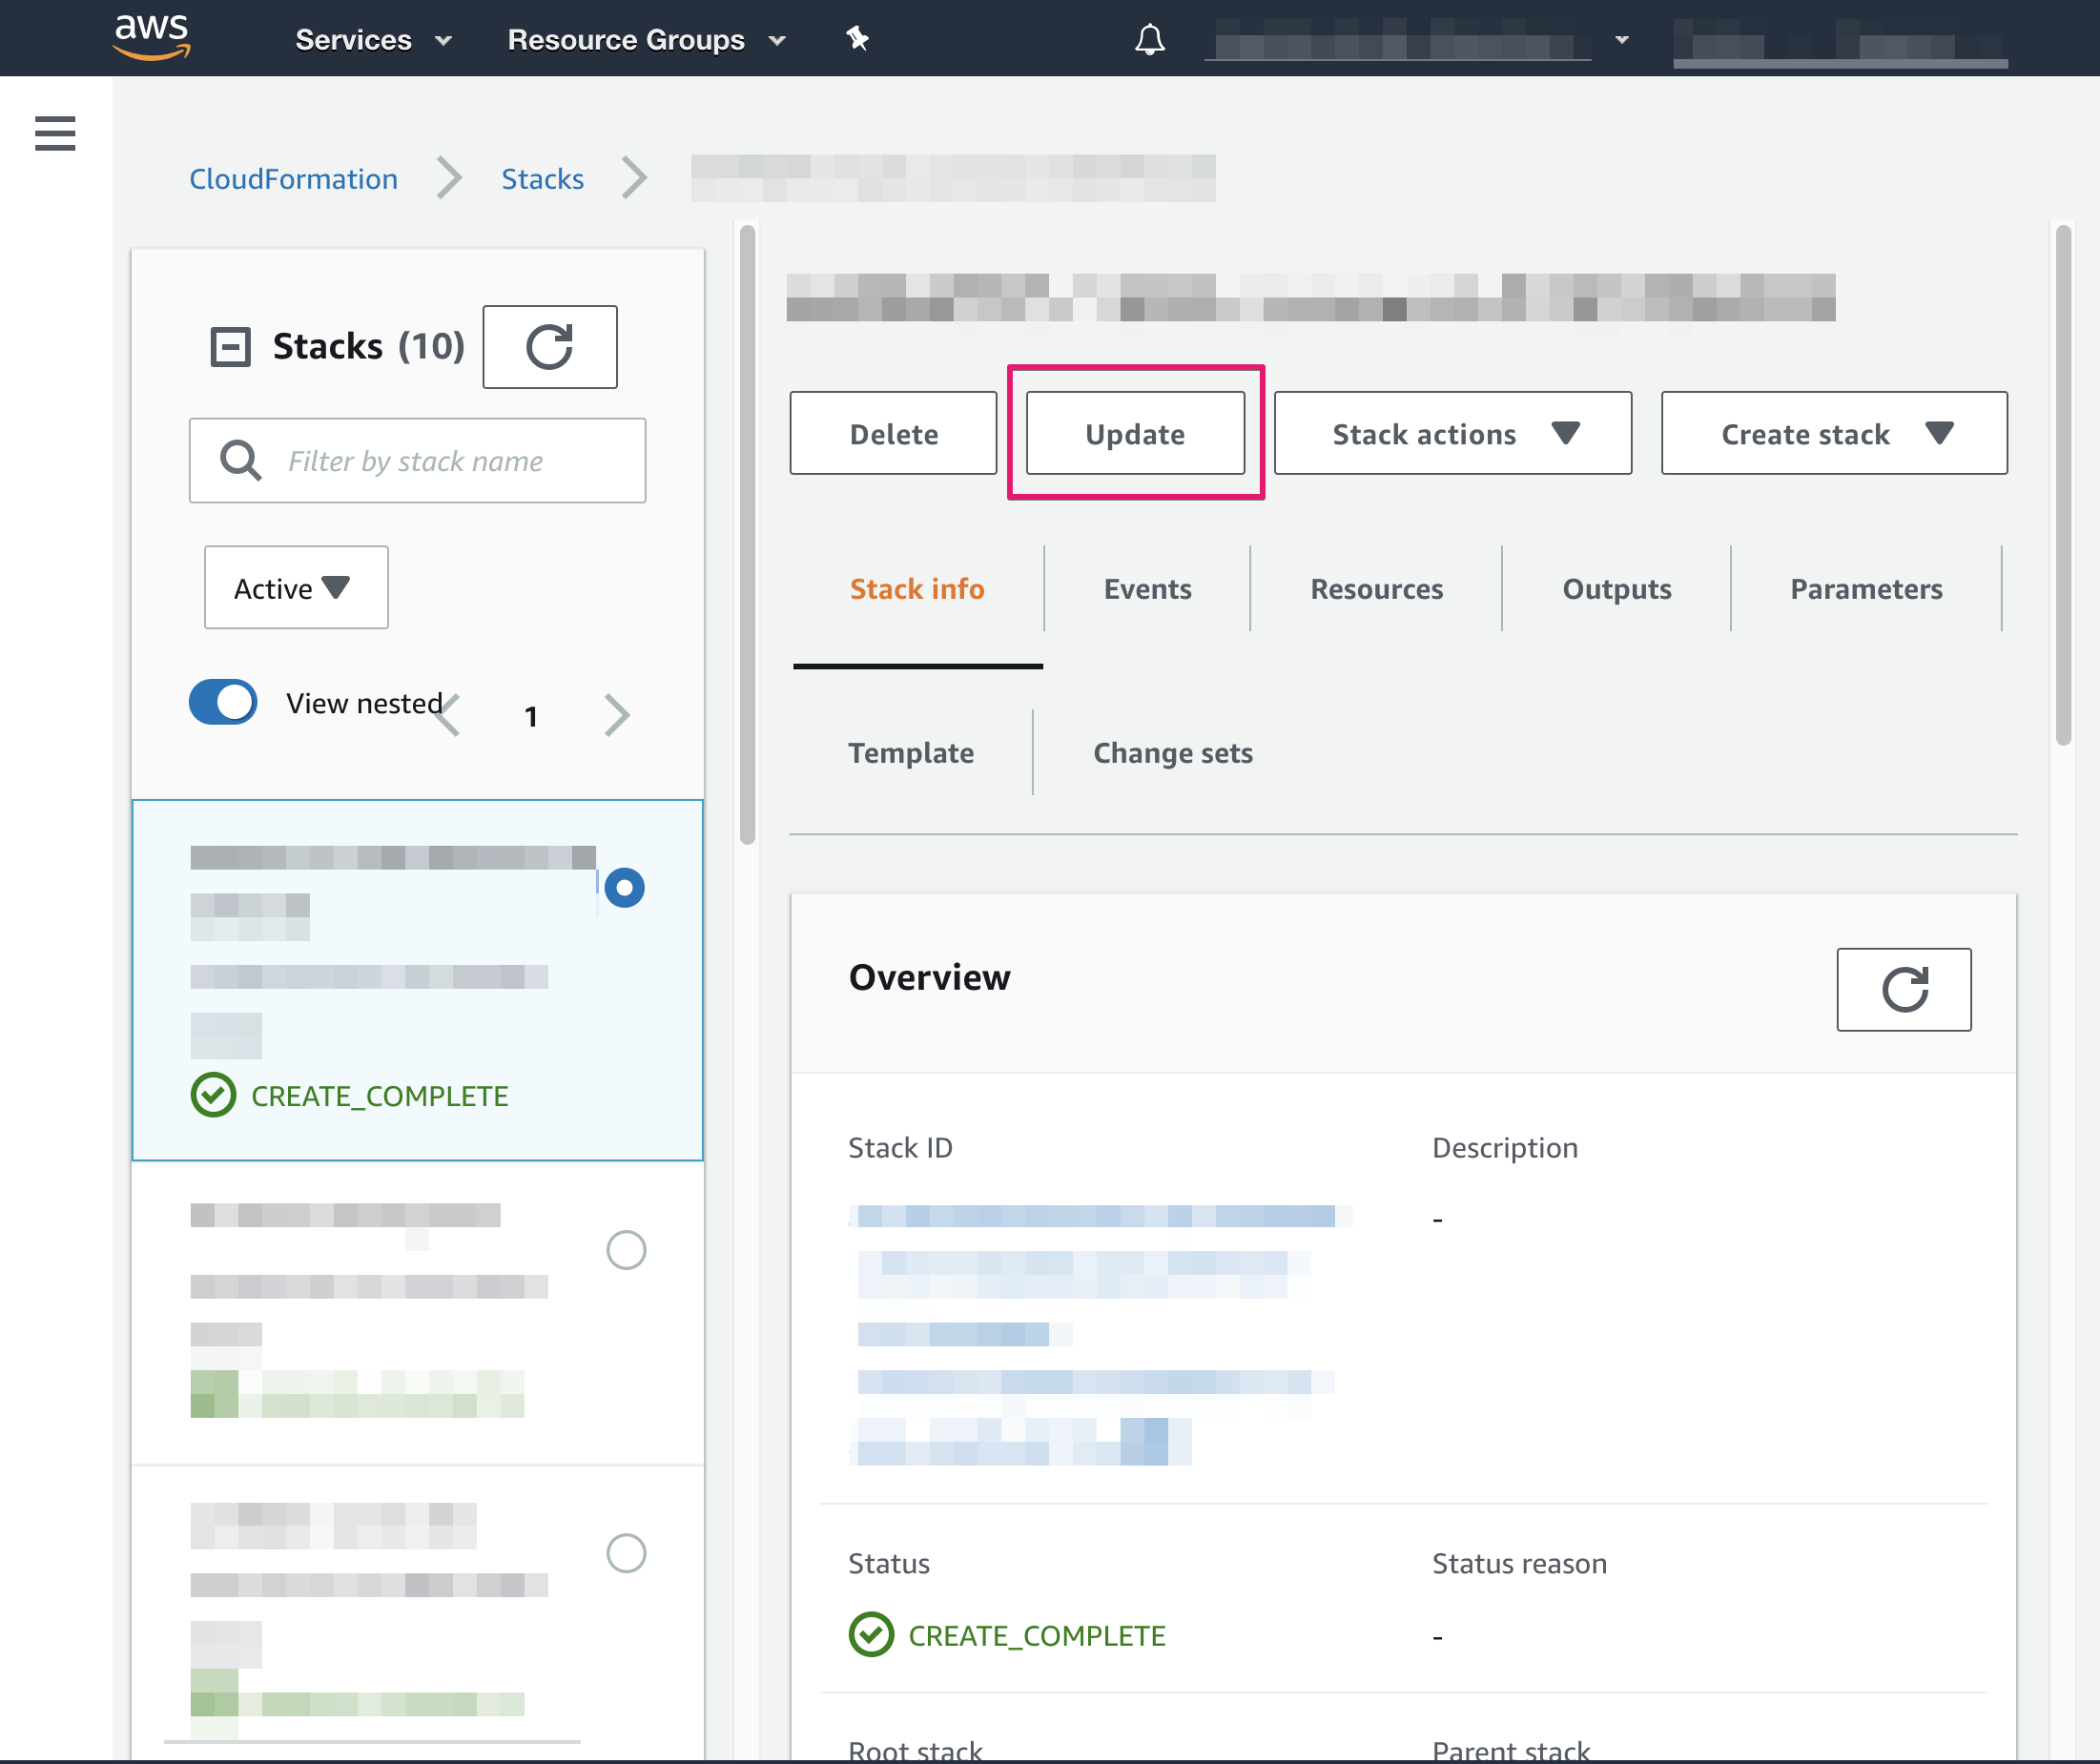
Navigate CloudFormation again
Click Update button
Choose [Use current template] and click [Next] button
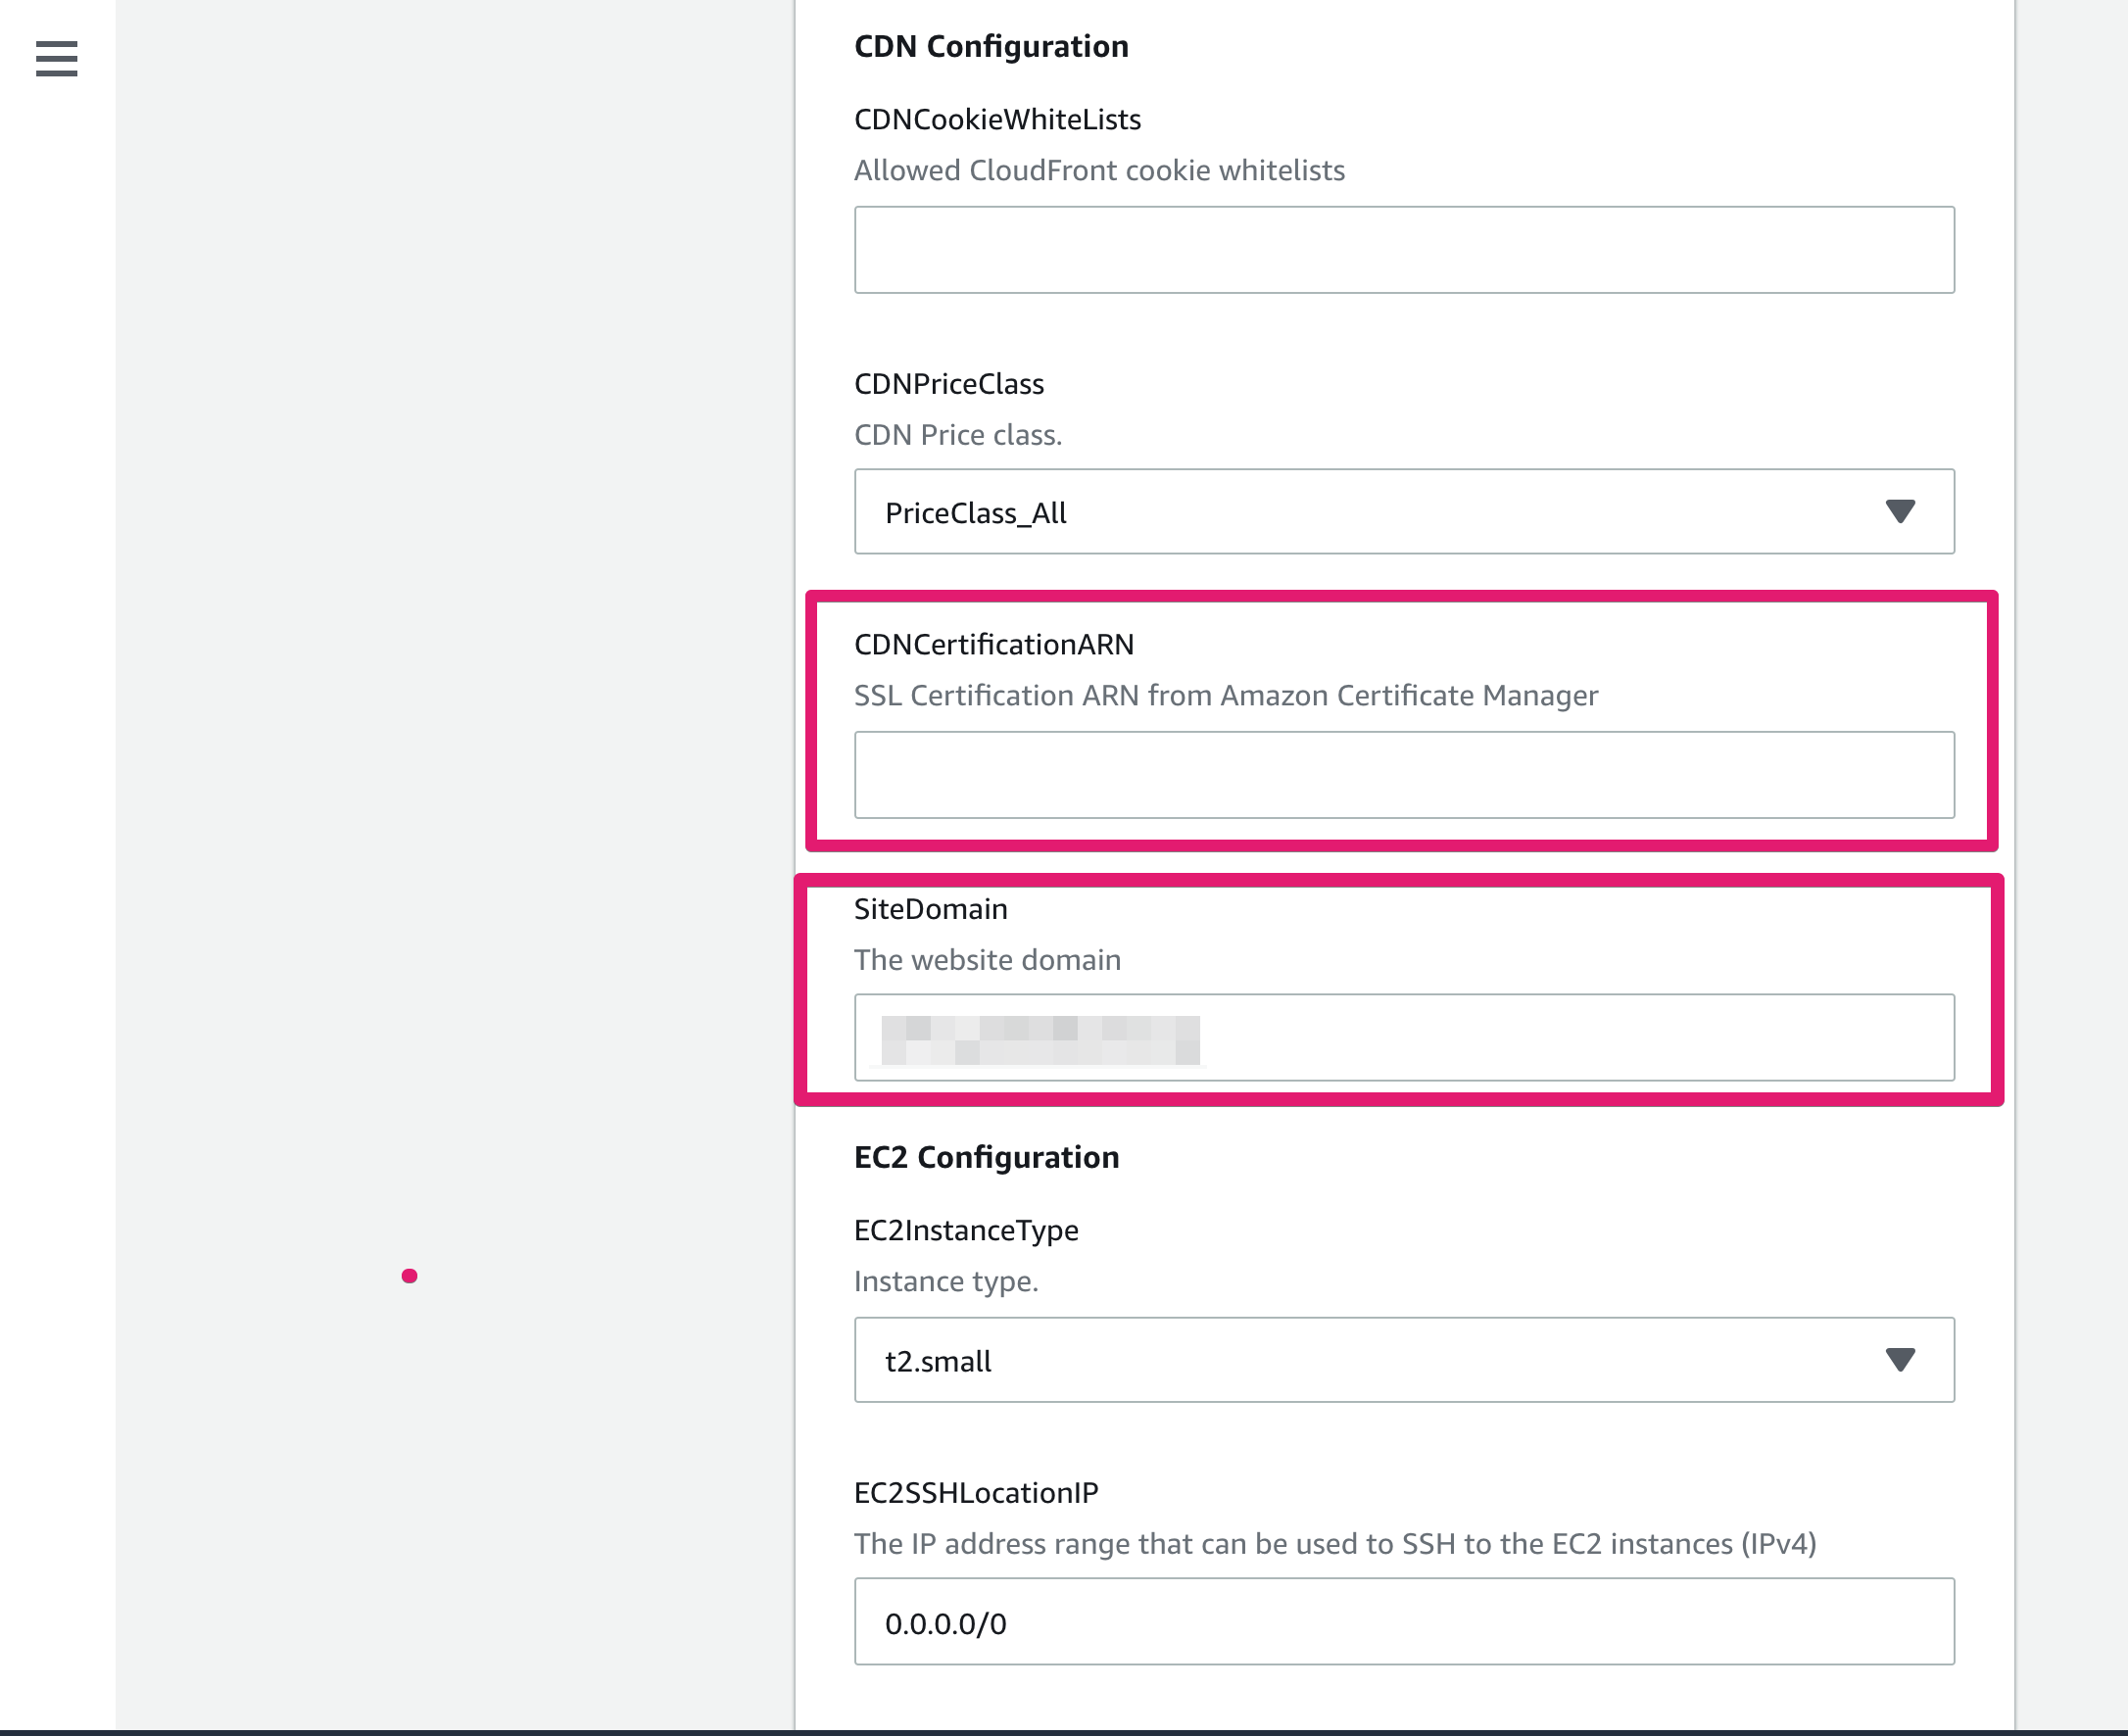
Update values
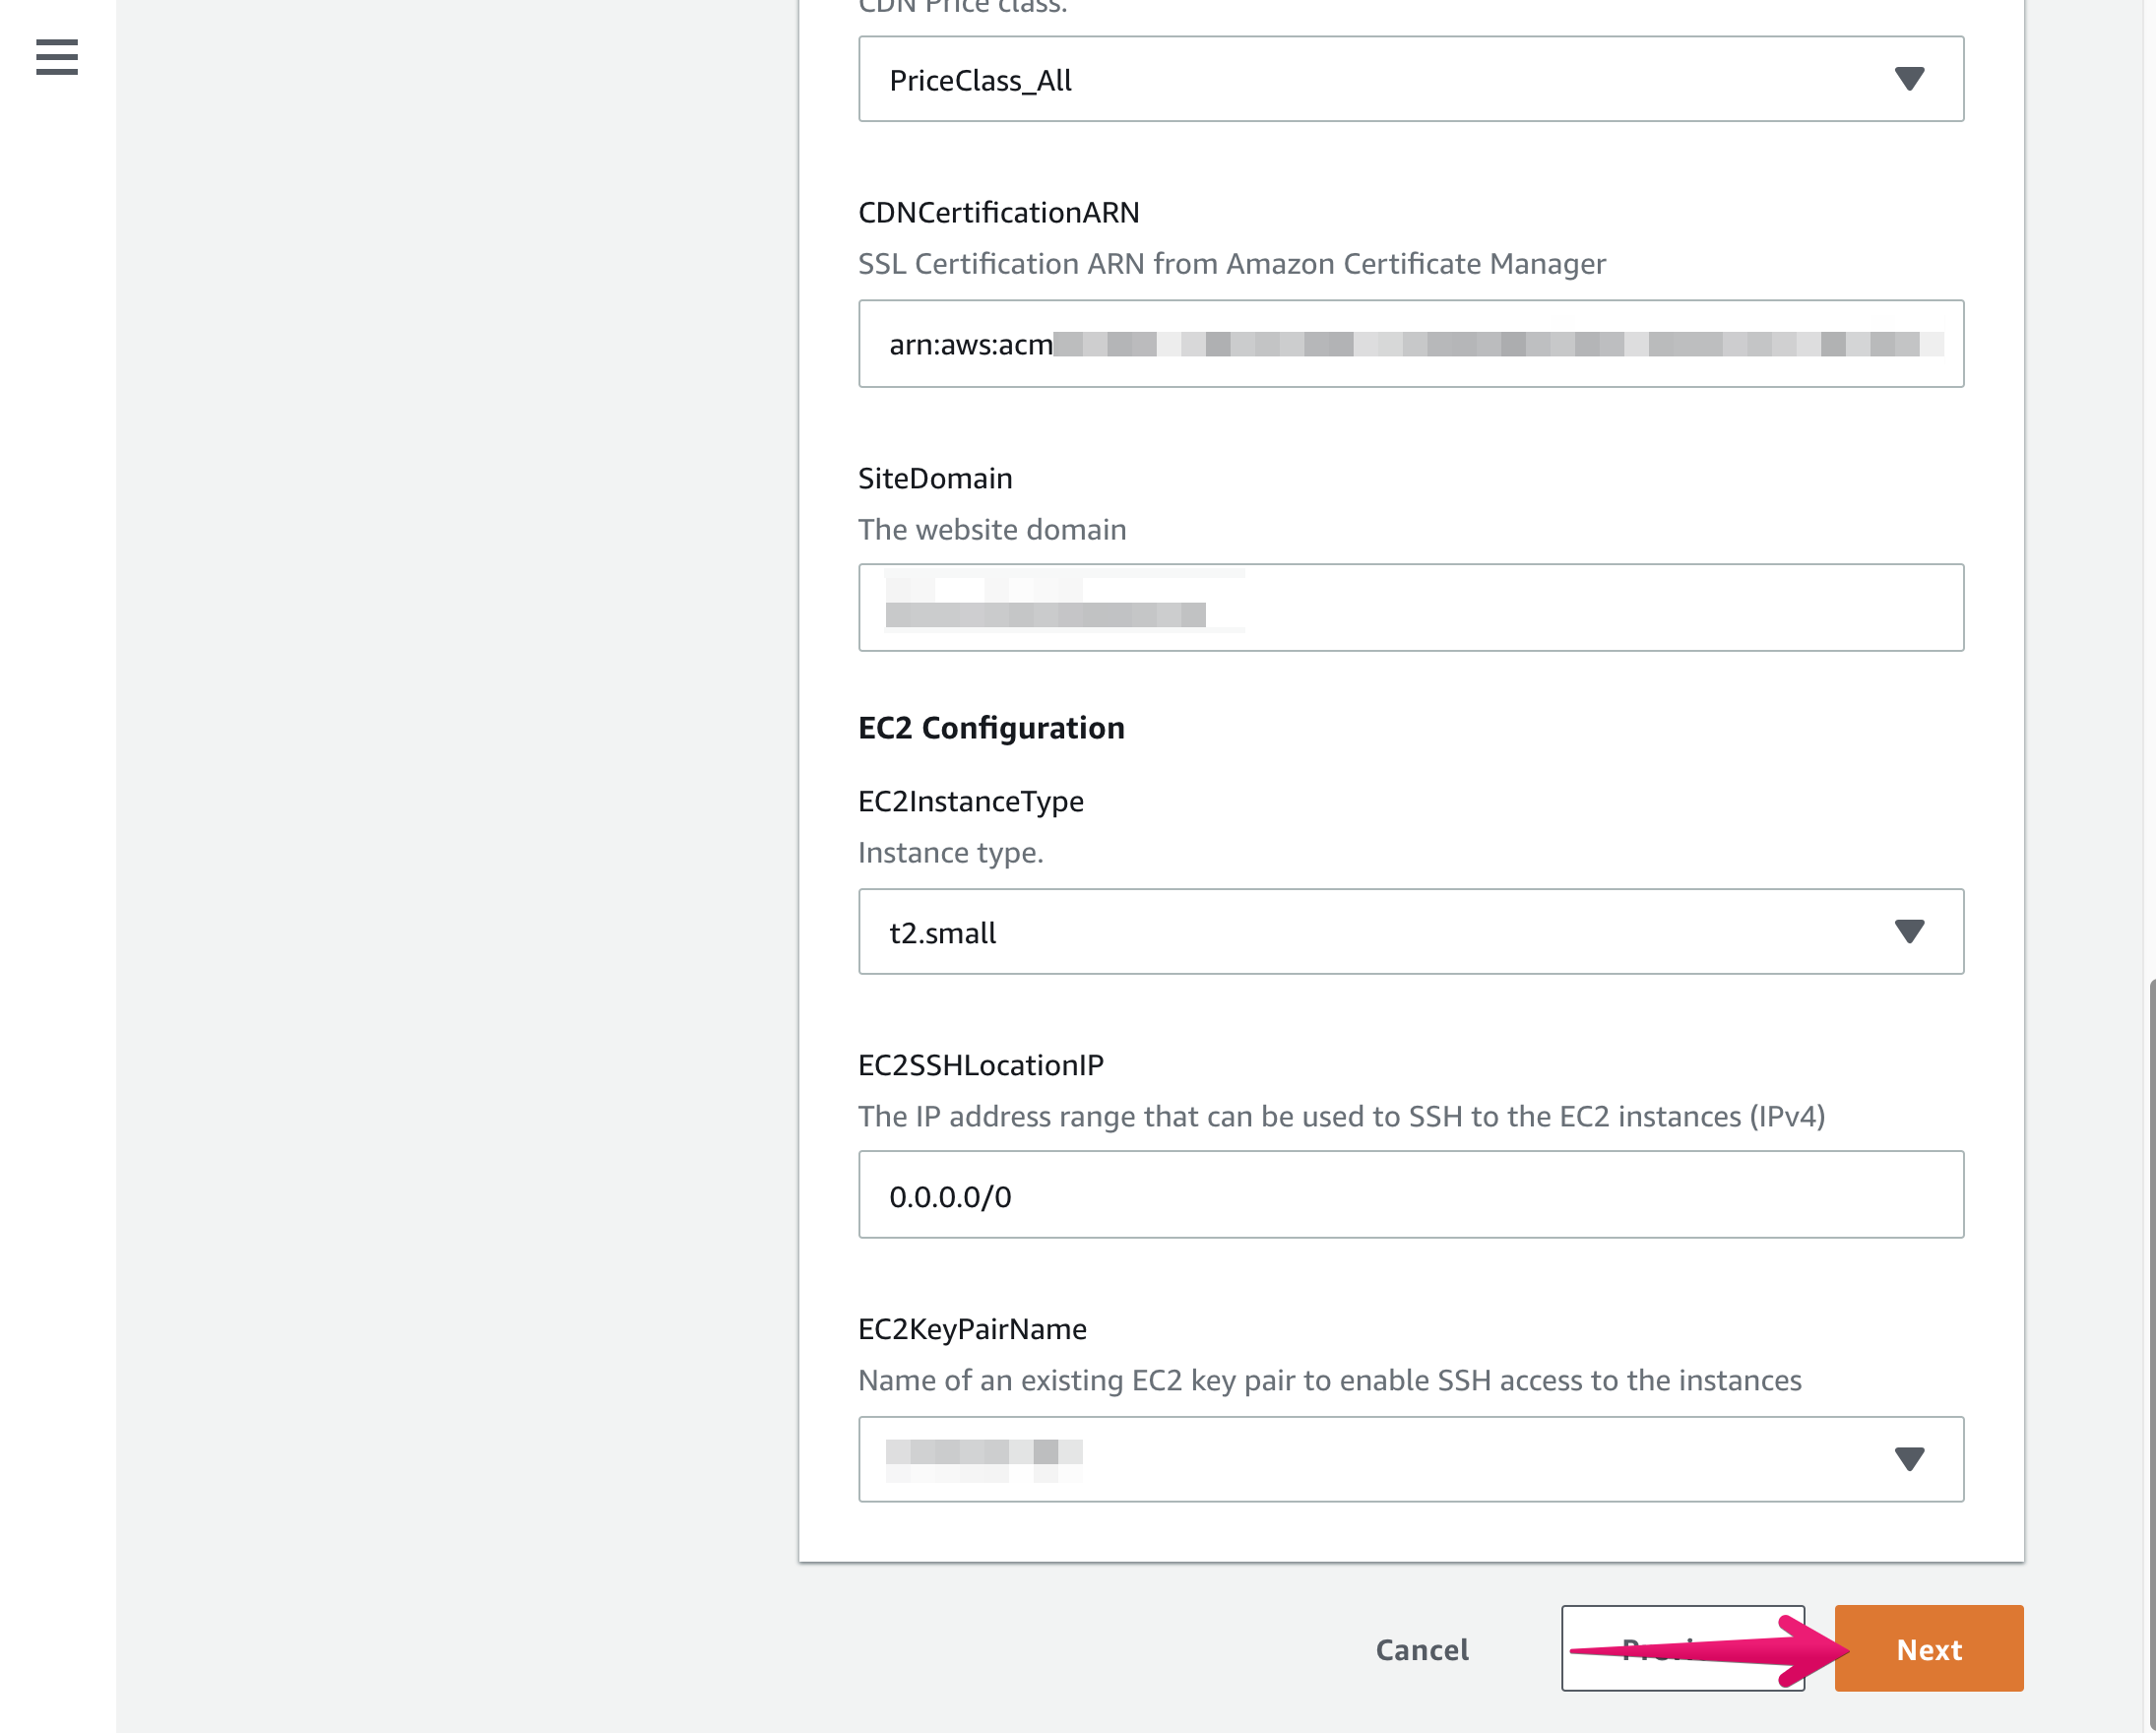
- Paste copied ARN to `CDNCertifiationARN`
- Input your site domain name to SiteDomain
Scroll down to the bottom of page then click [Next] button
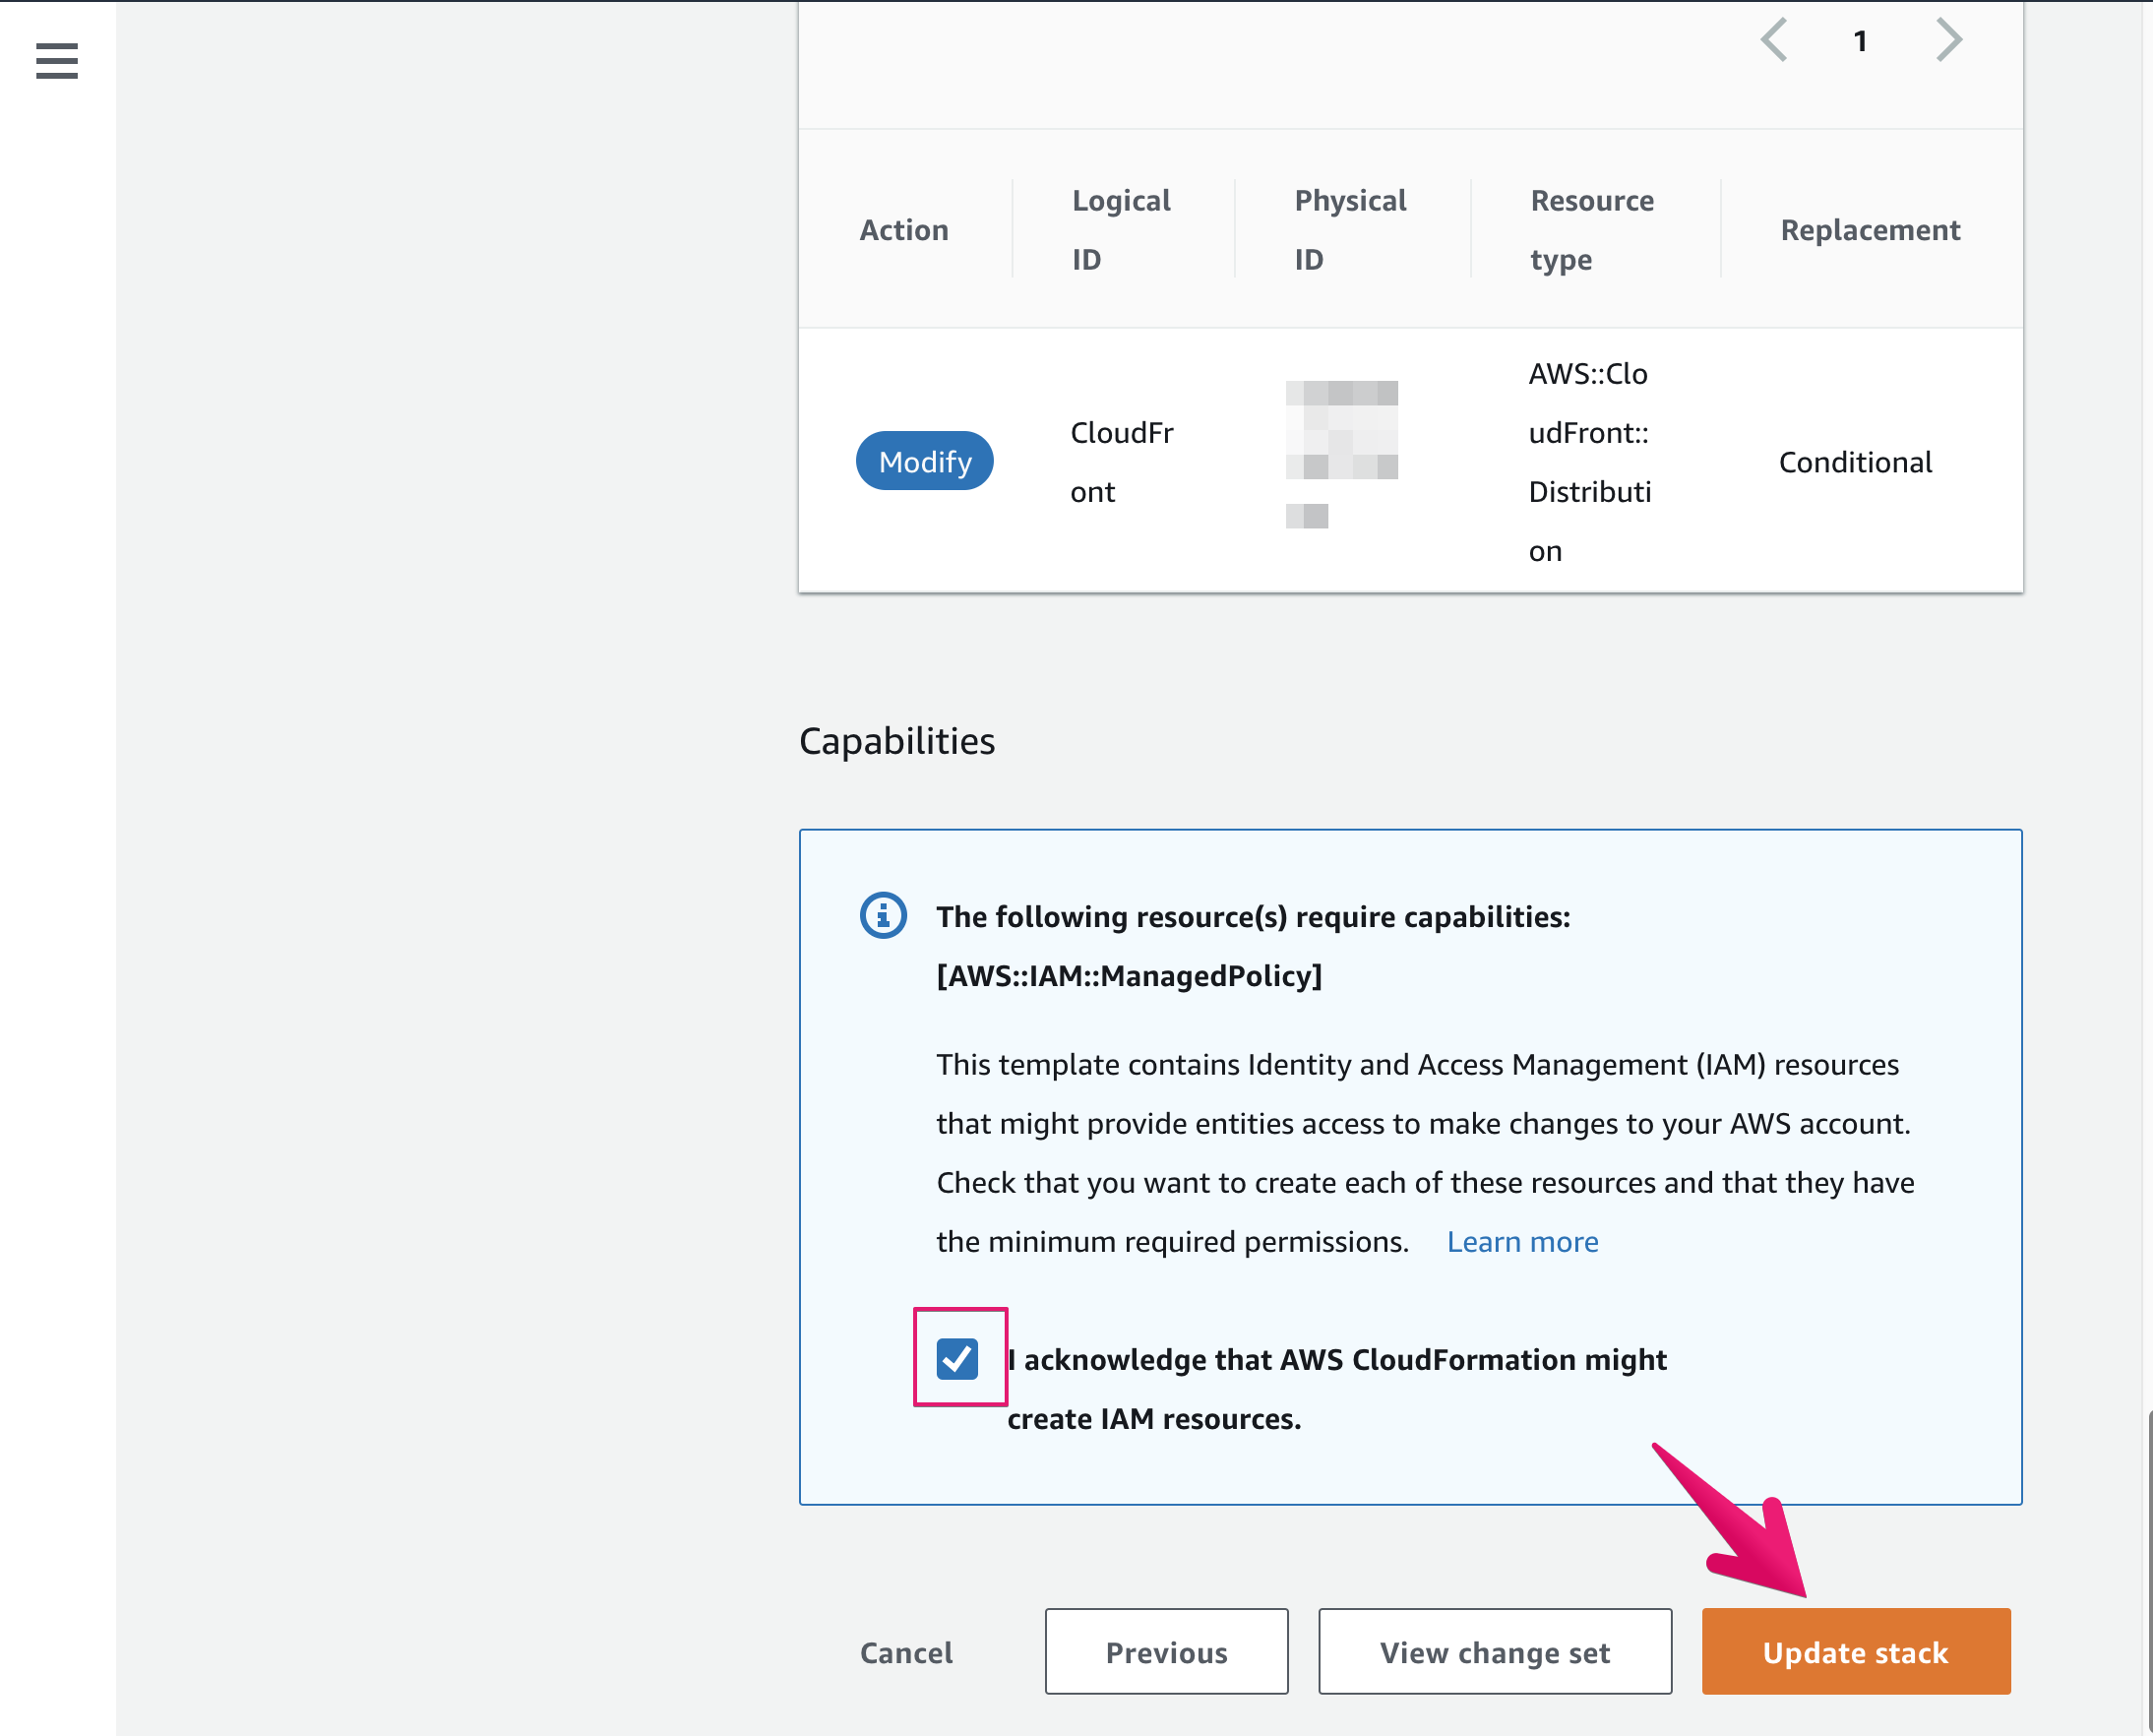
Check Capabilities then [Update stack]
Stack will be updating
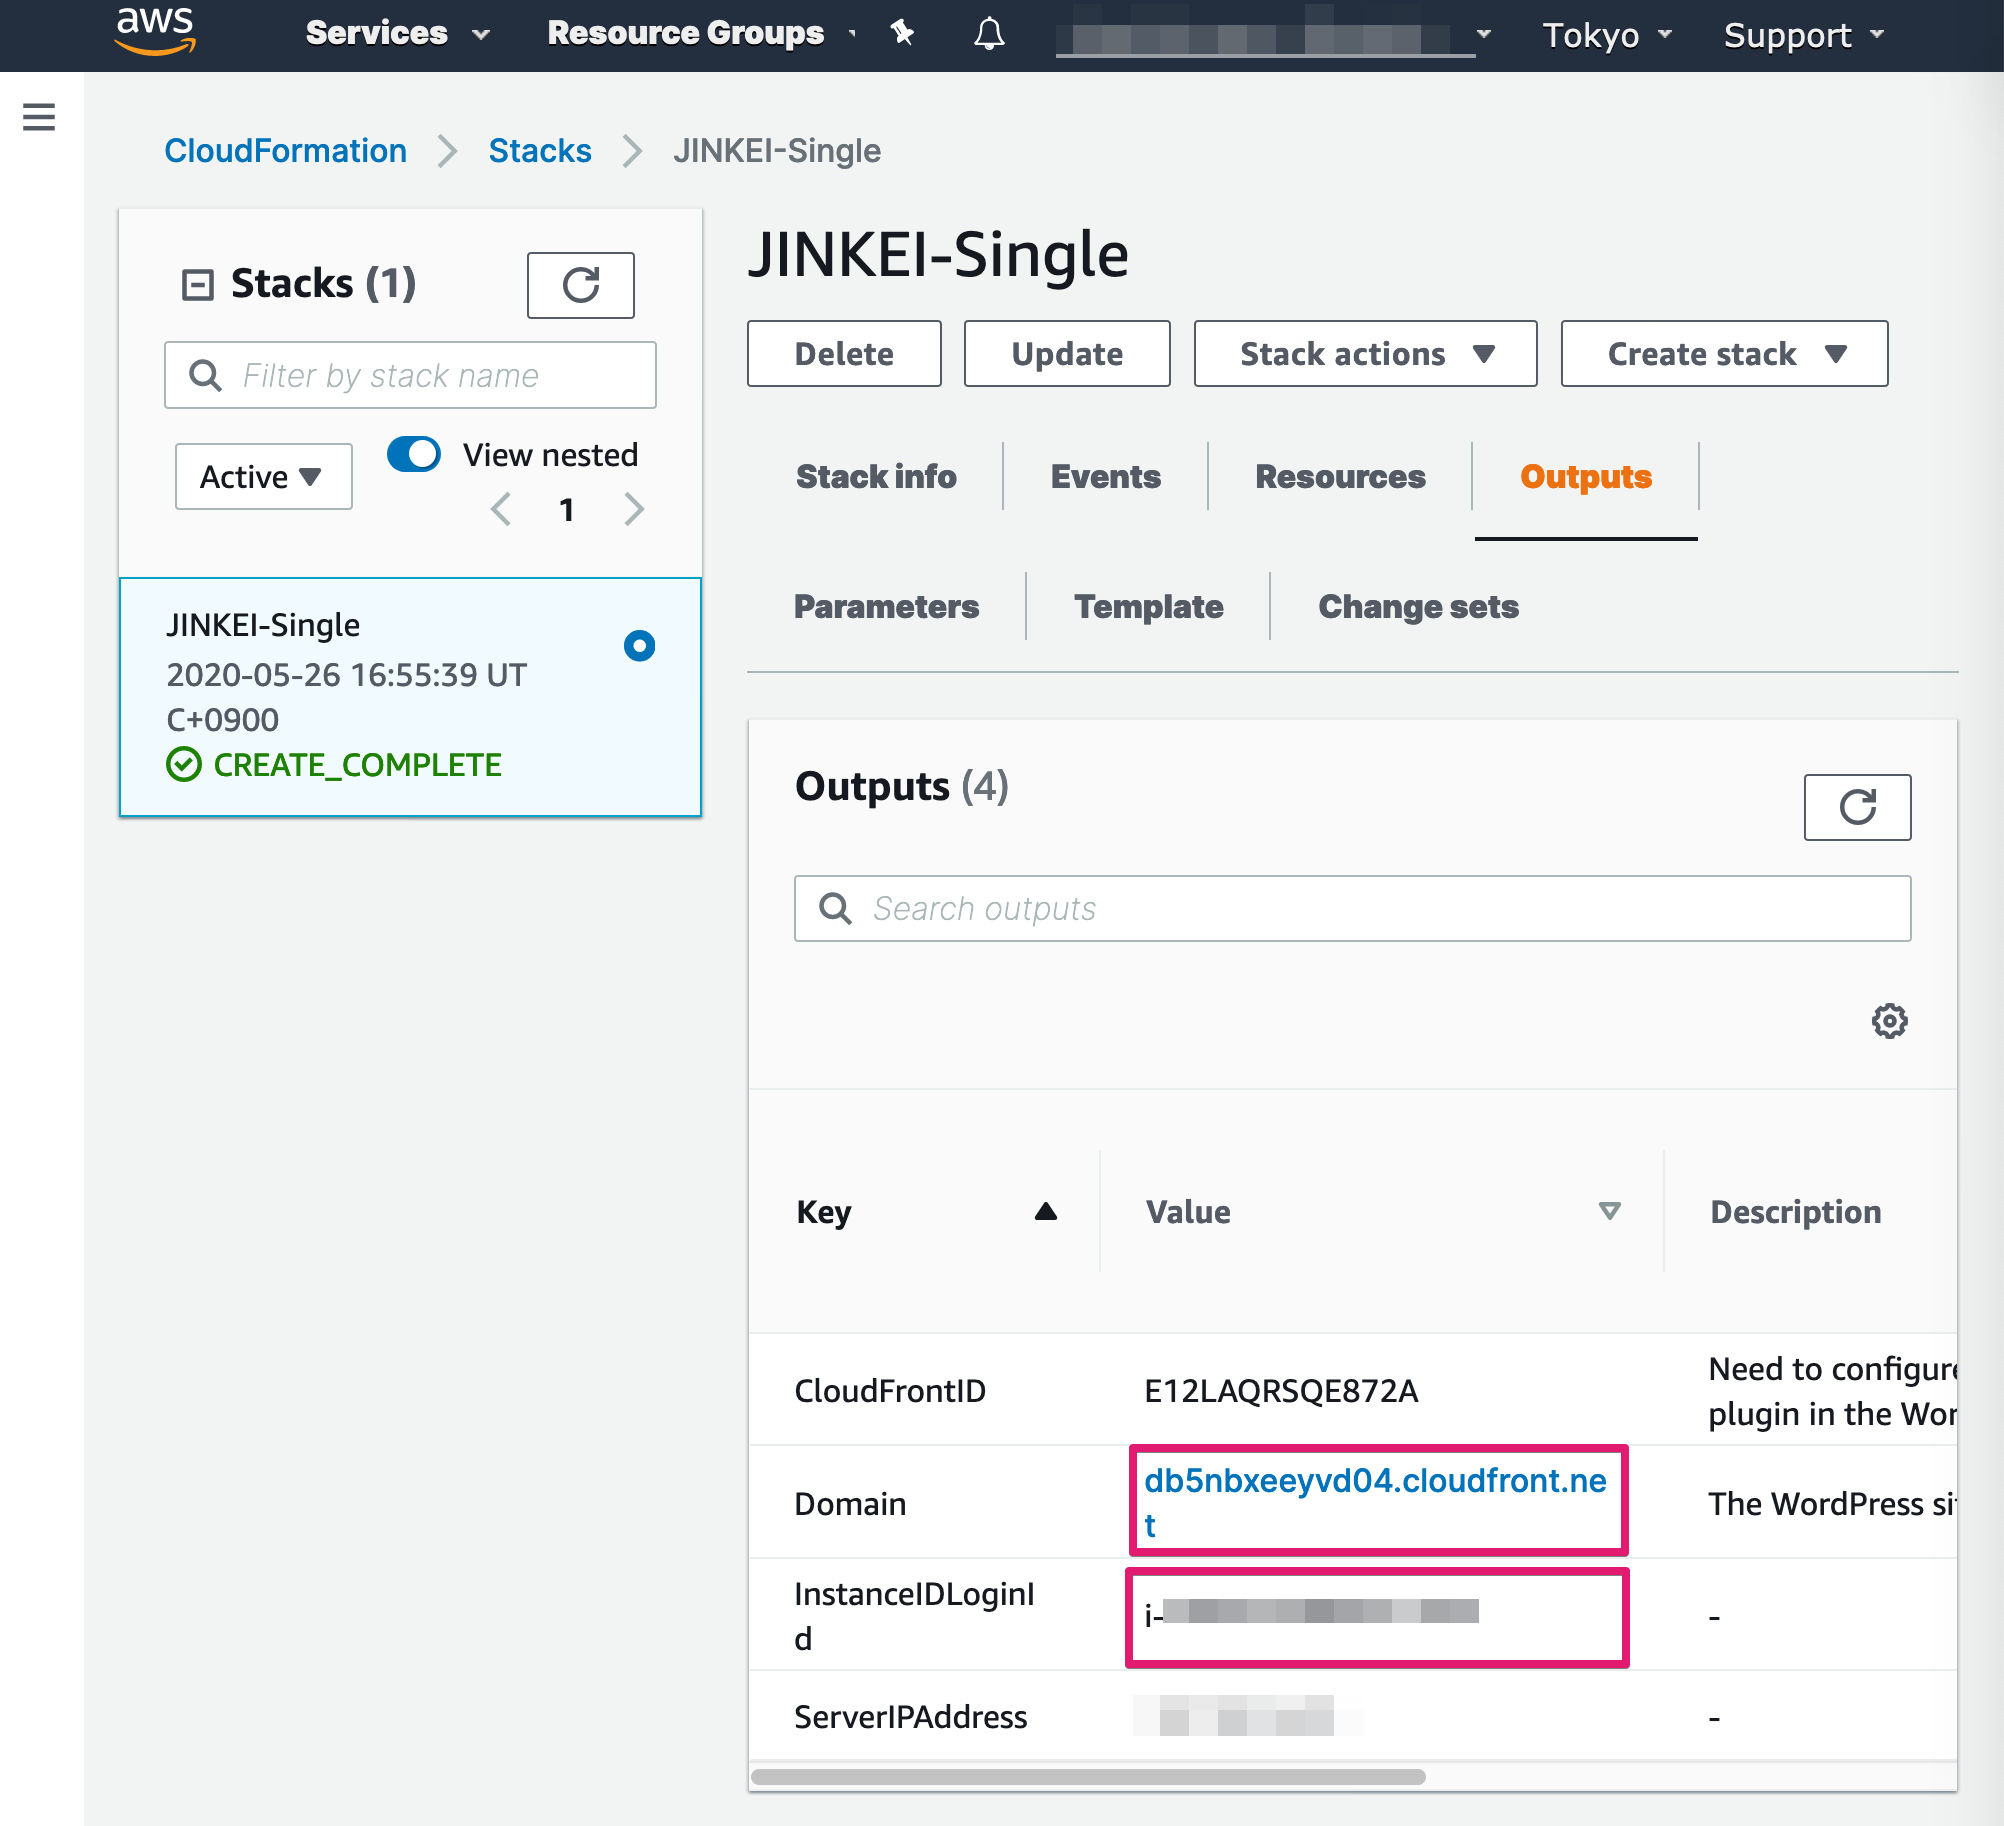
Click Outputs menu
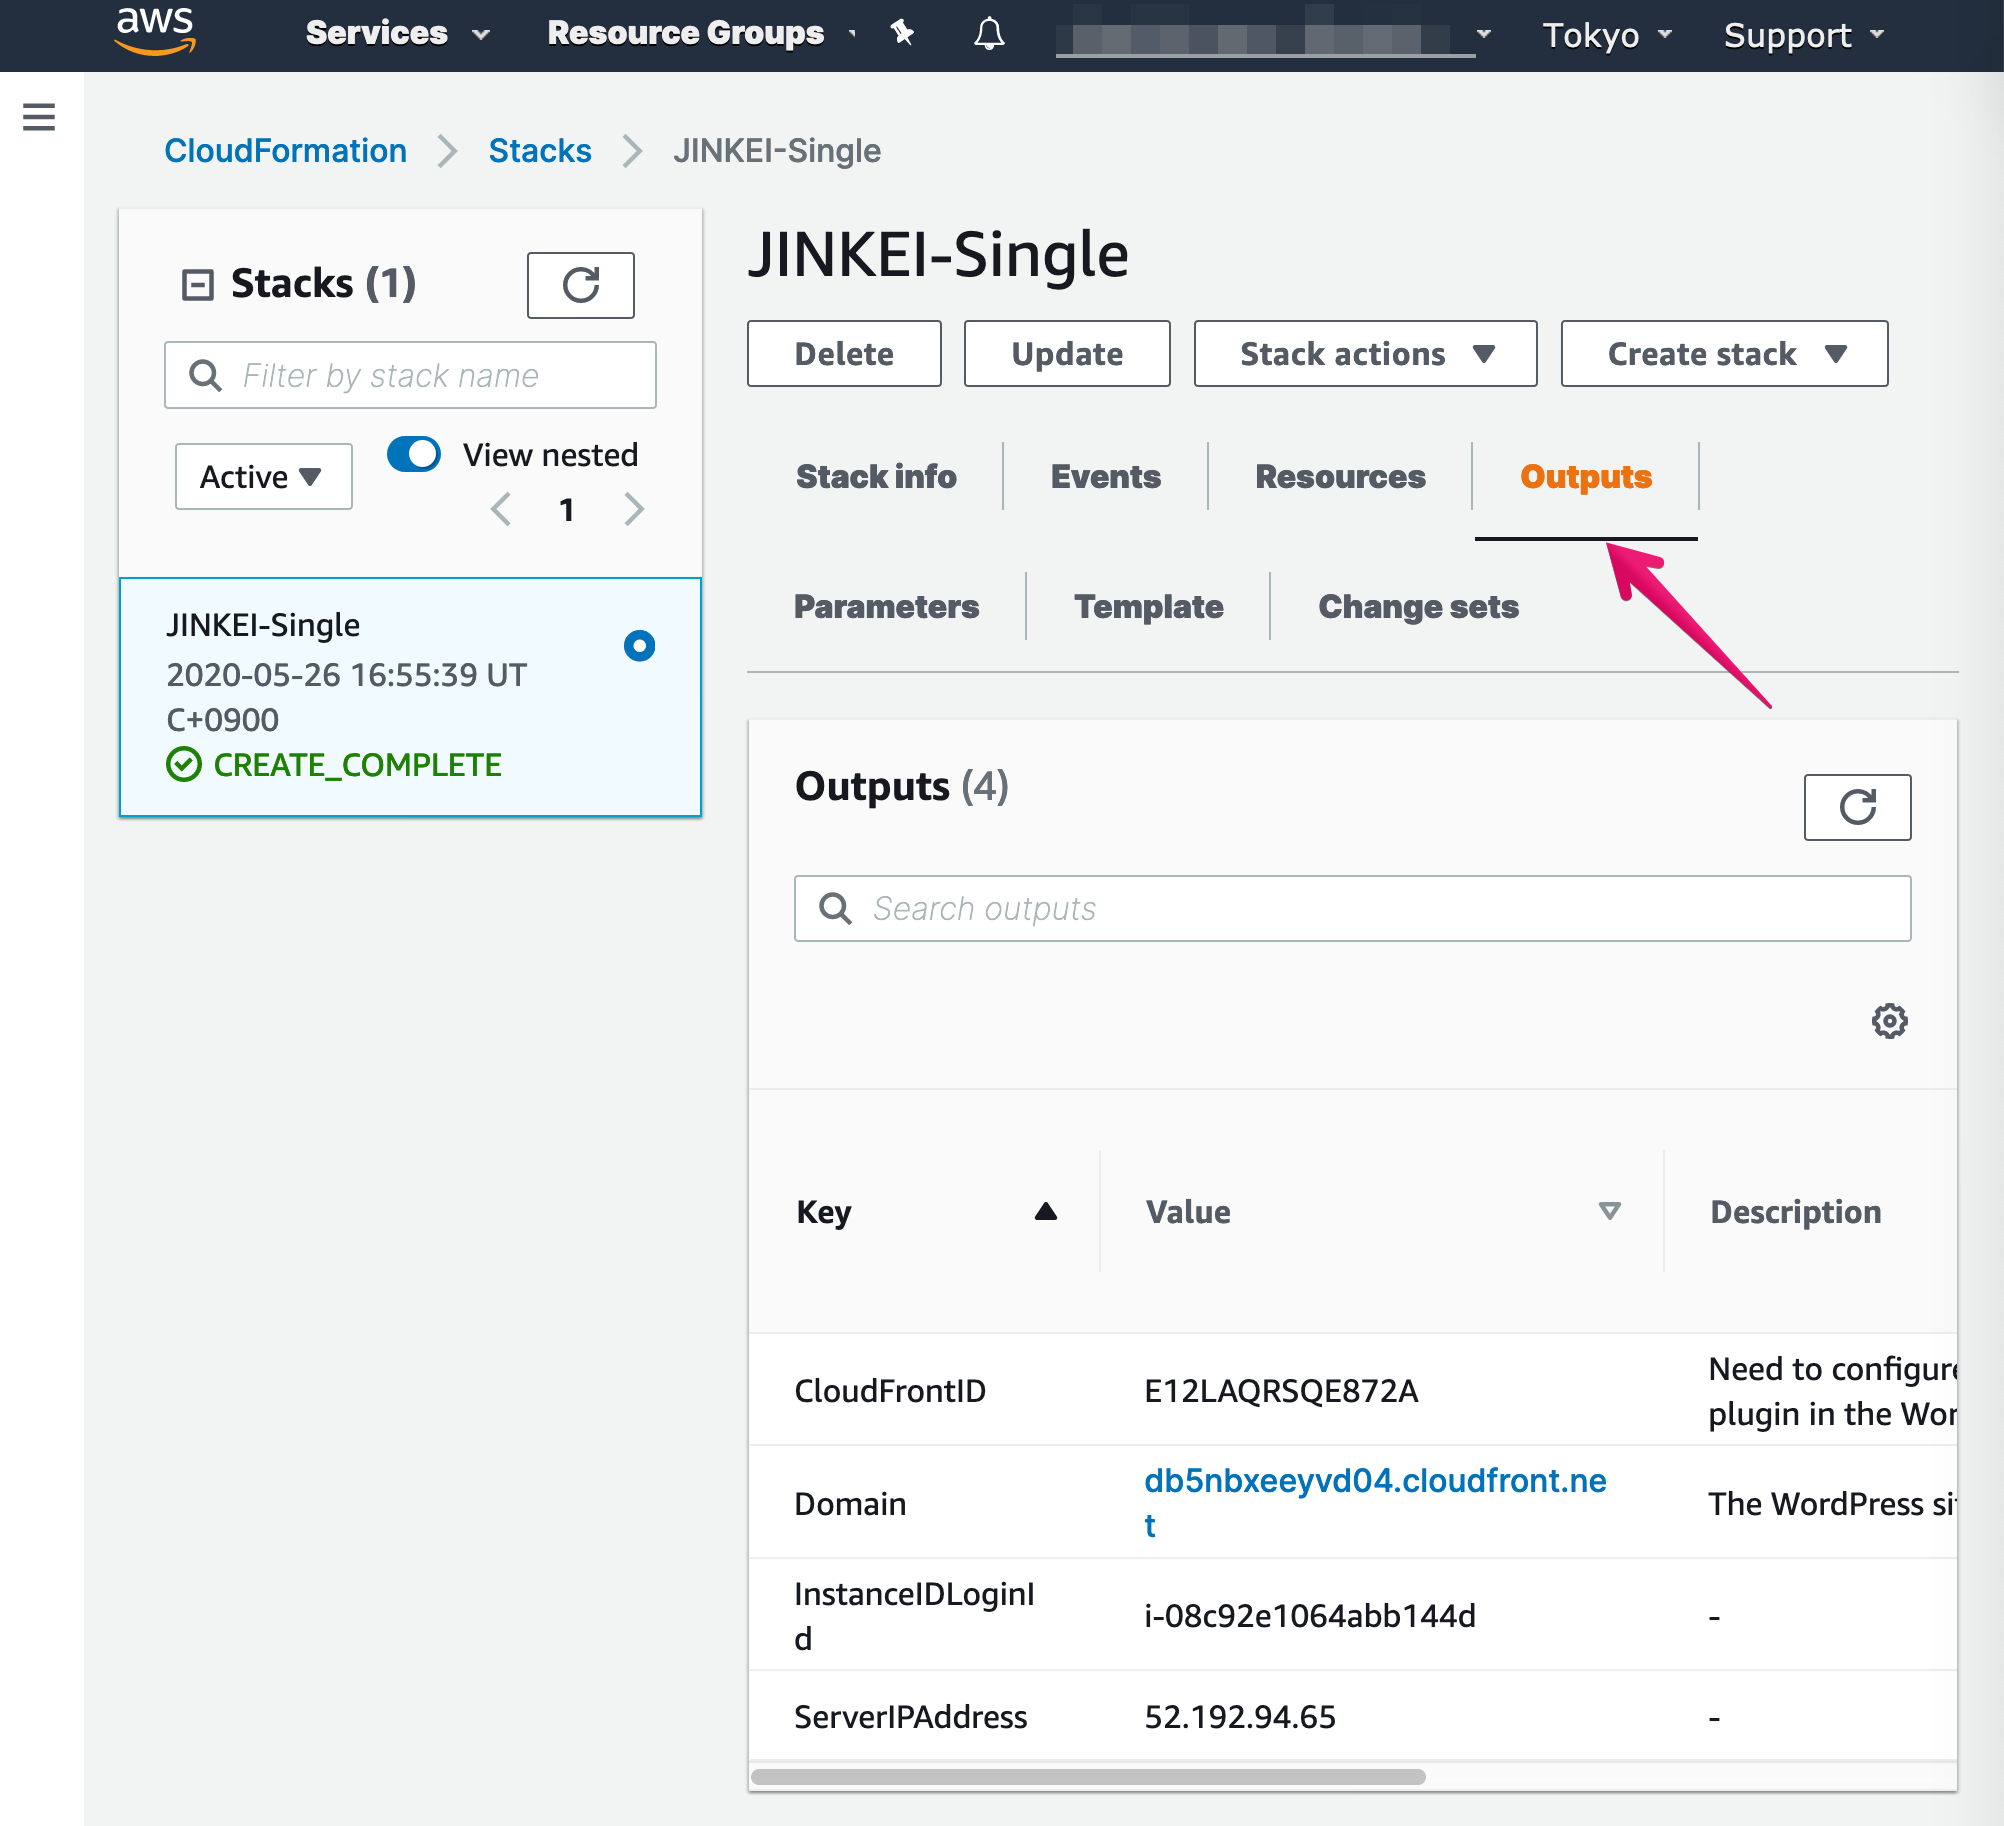
Copy Domain and InstanceIDLoginID
- Domain is default WordPress URL (e.g. db5nbxeeyvd04.cloudfront.net)
- InstanceIDLoginID is default password for admin of WordPress and equal to EC2' instance ID (e.g. i-abcedf123456789)
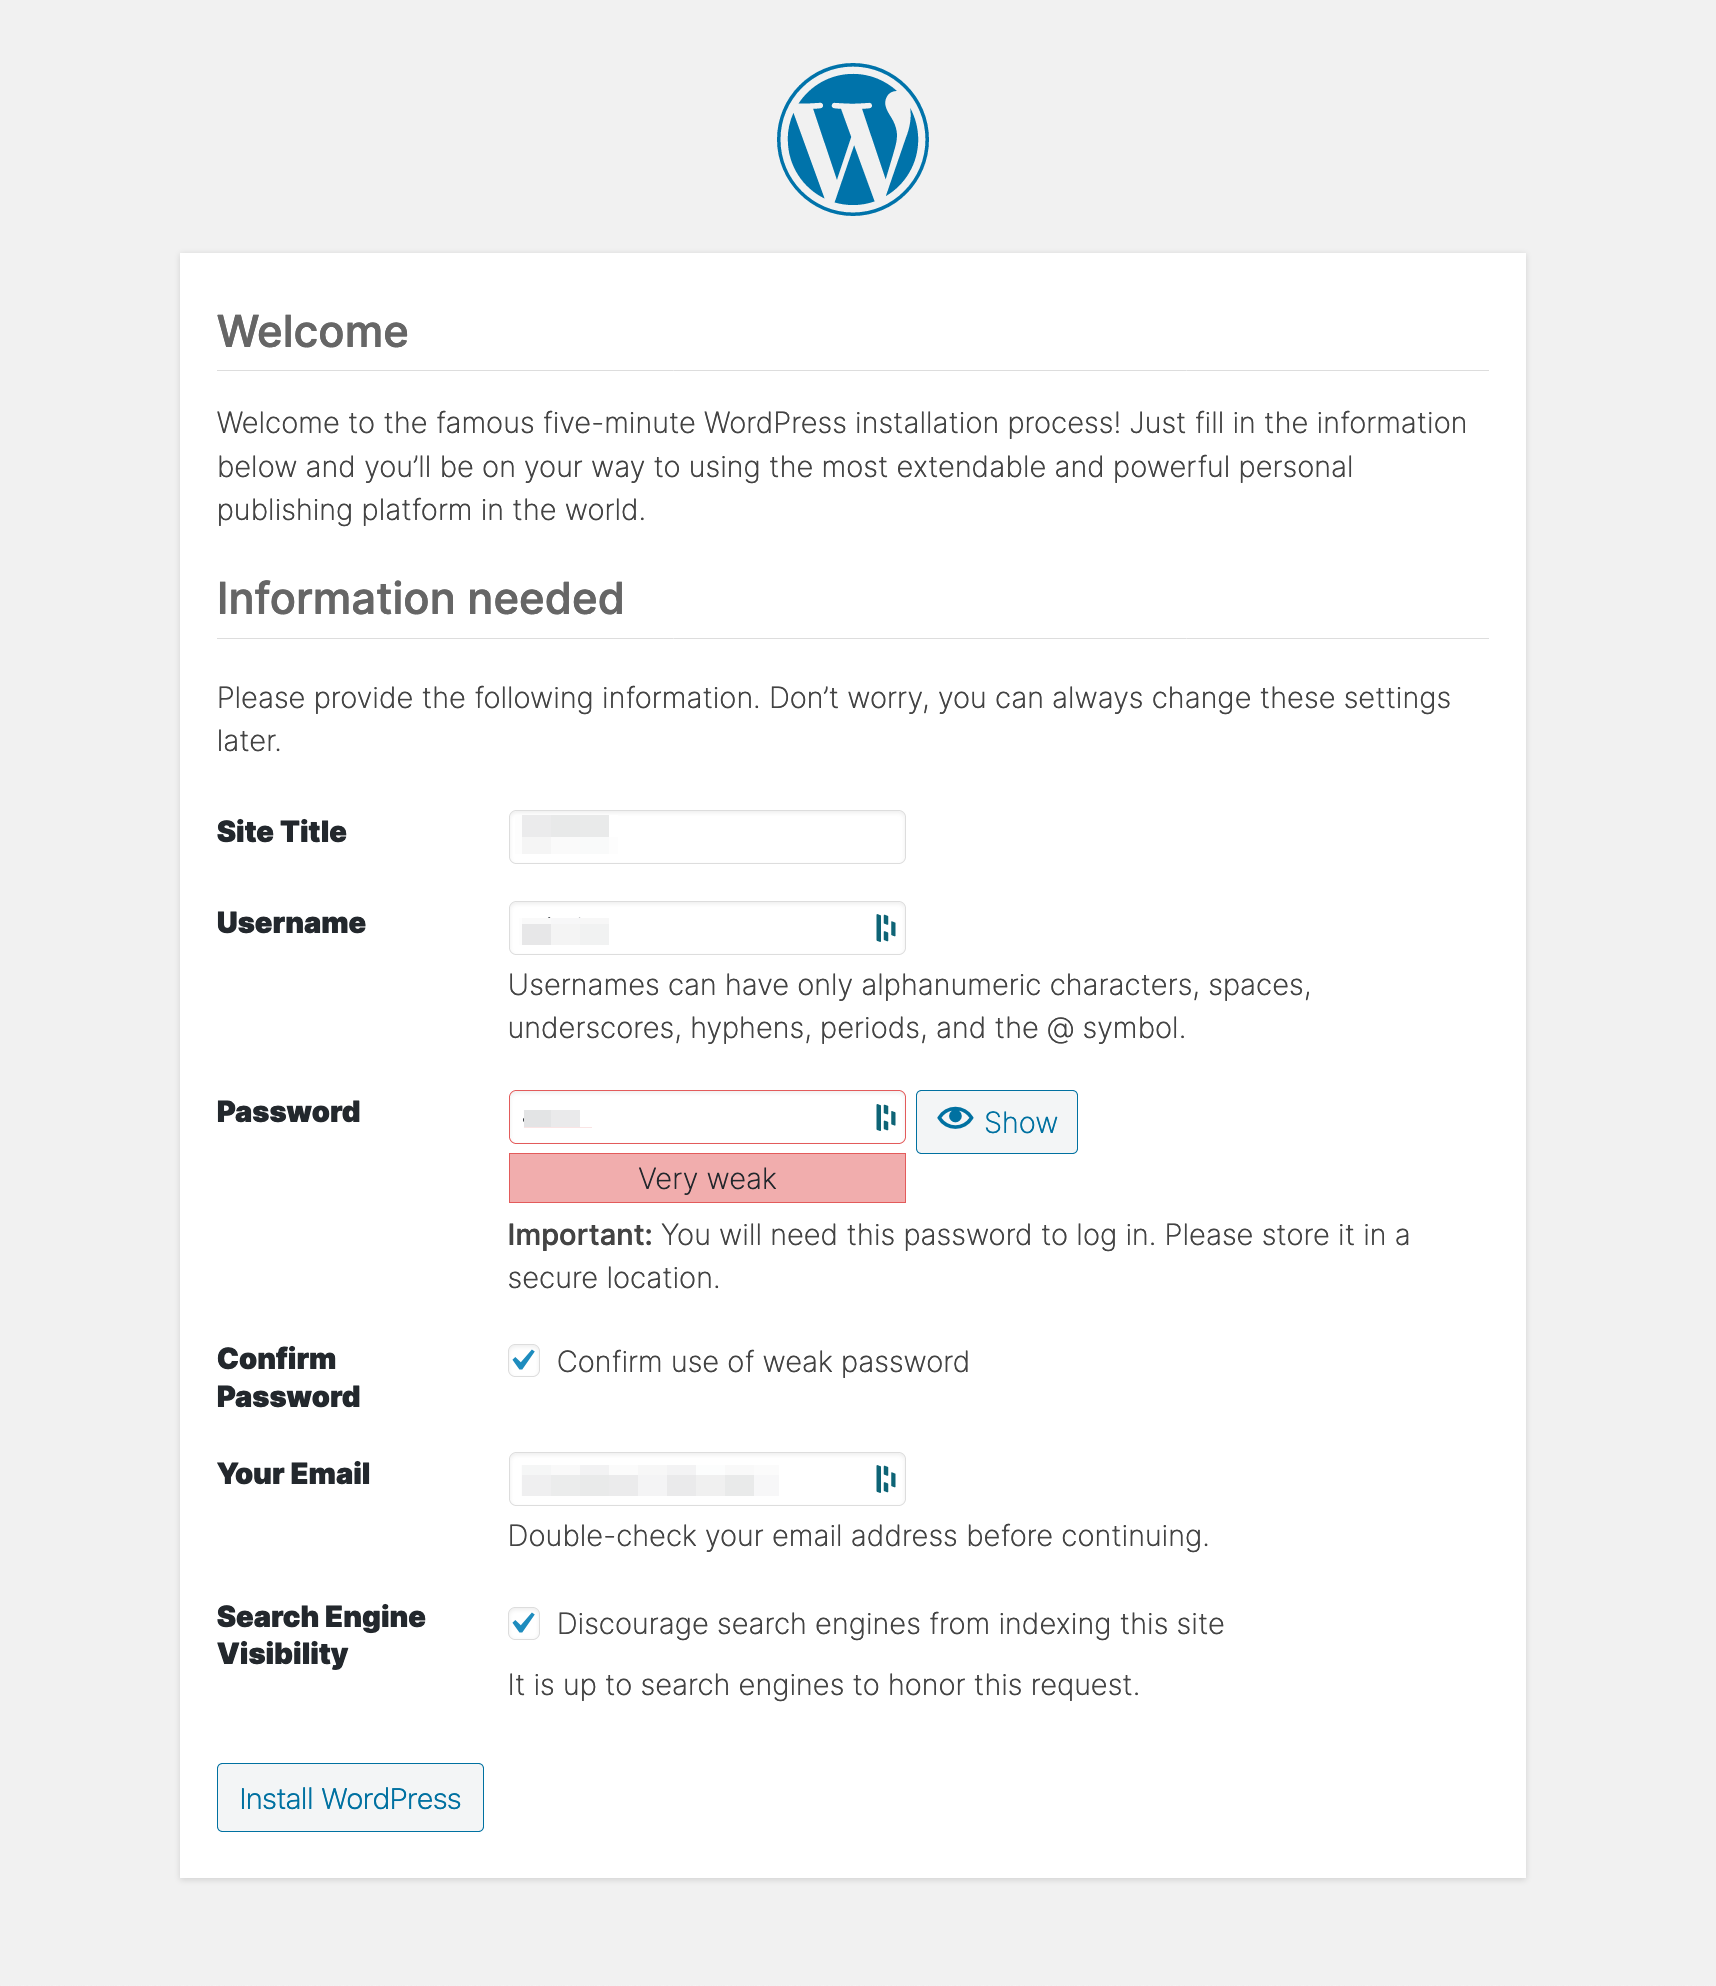
Phase 4. Set up WordPress
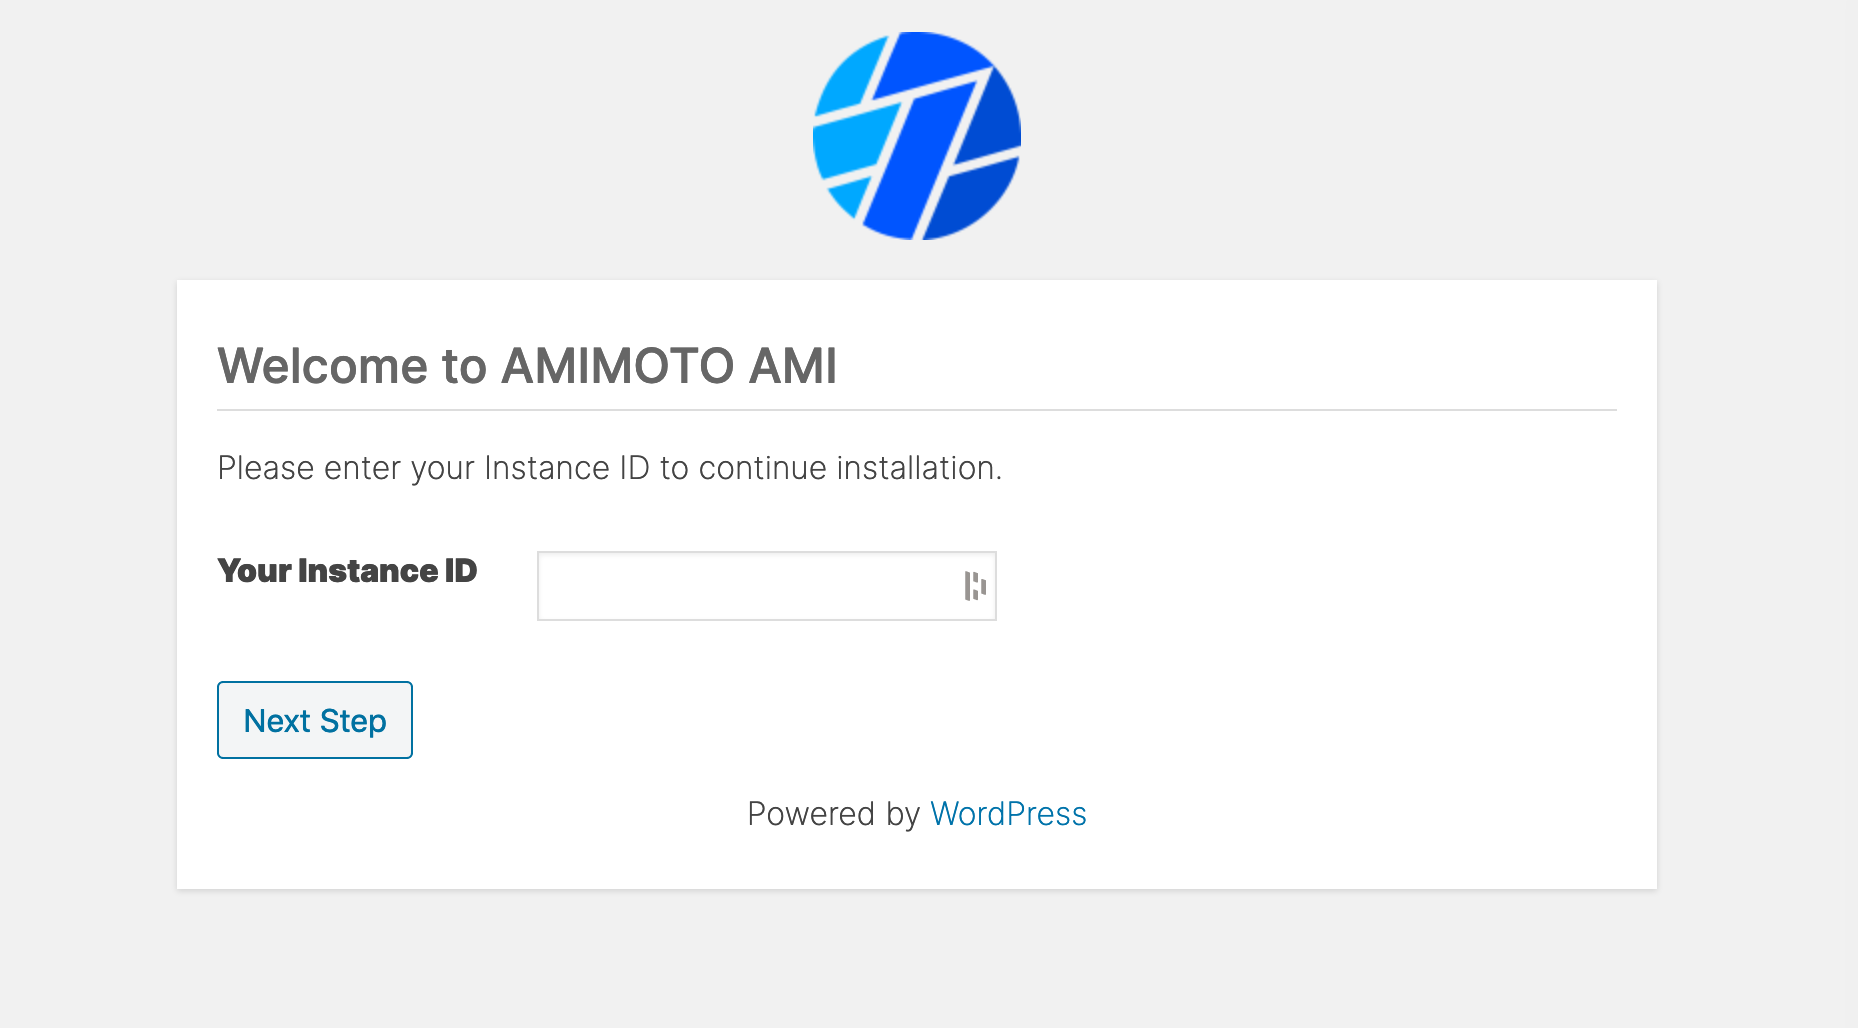
Access copied Domain (e.g. db5nbxeeyvd04.cloudfront.net)
Input InstanceIDLoginID then click [Next Step]
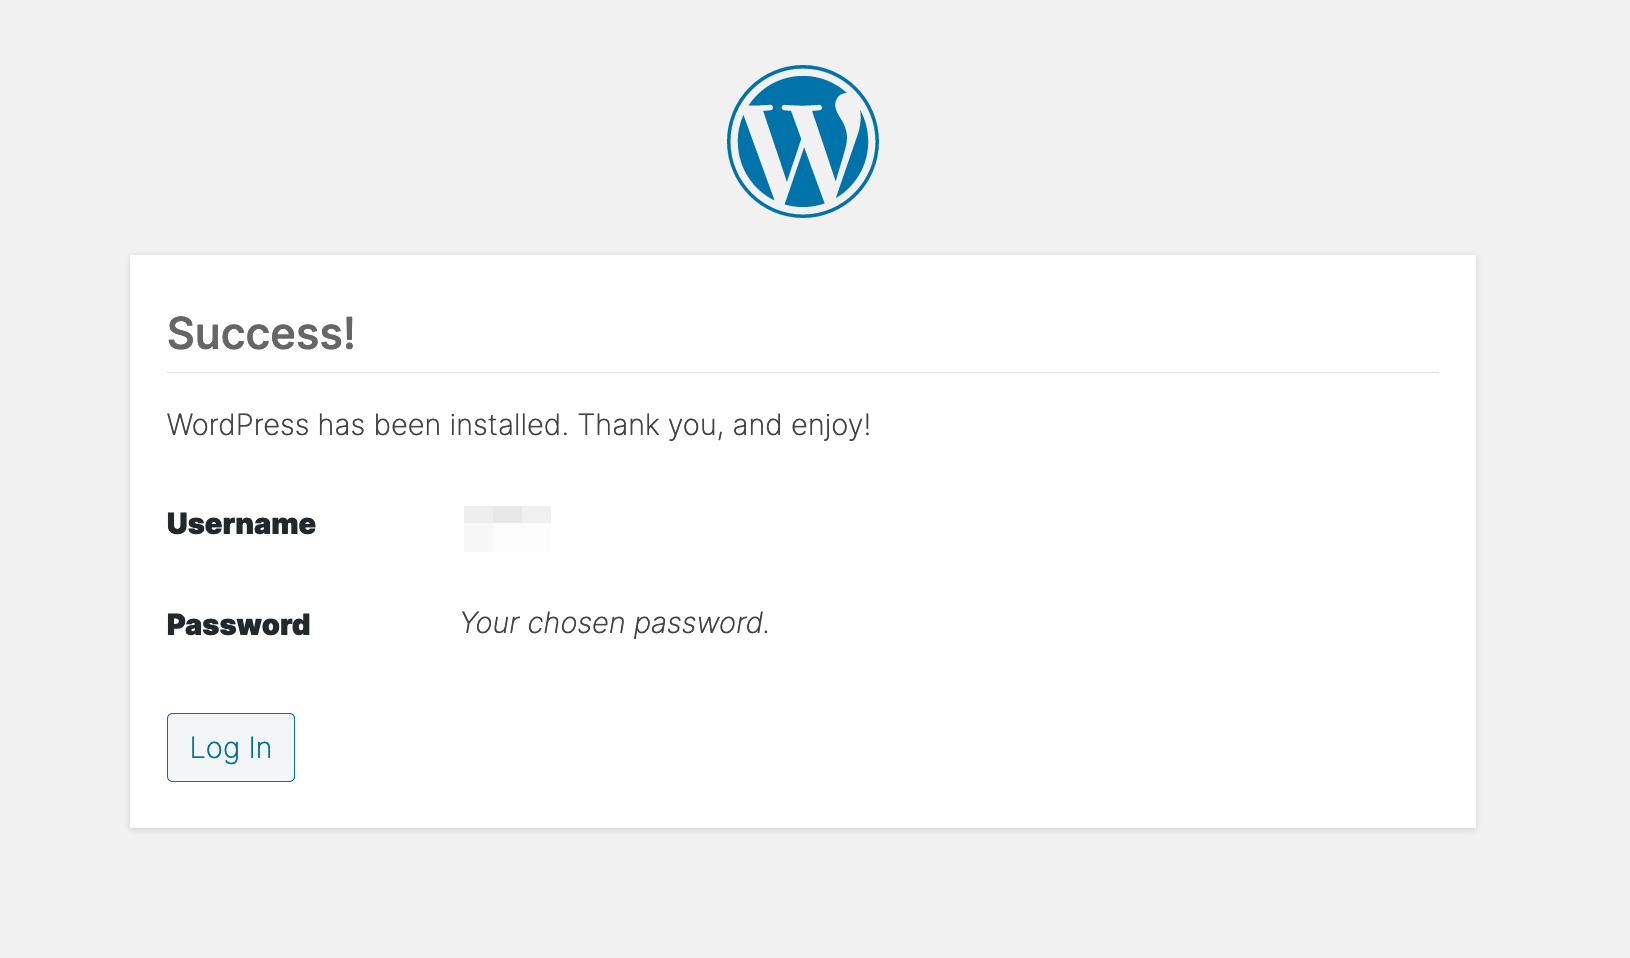
Fill in each fields to complete initial setup
.... And login to WordPress Dashboard
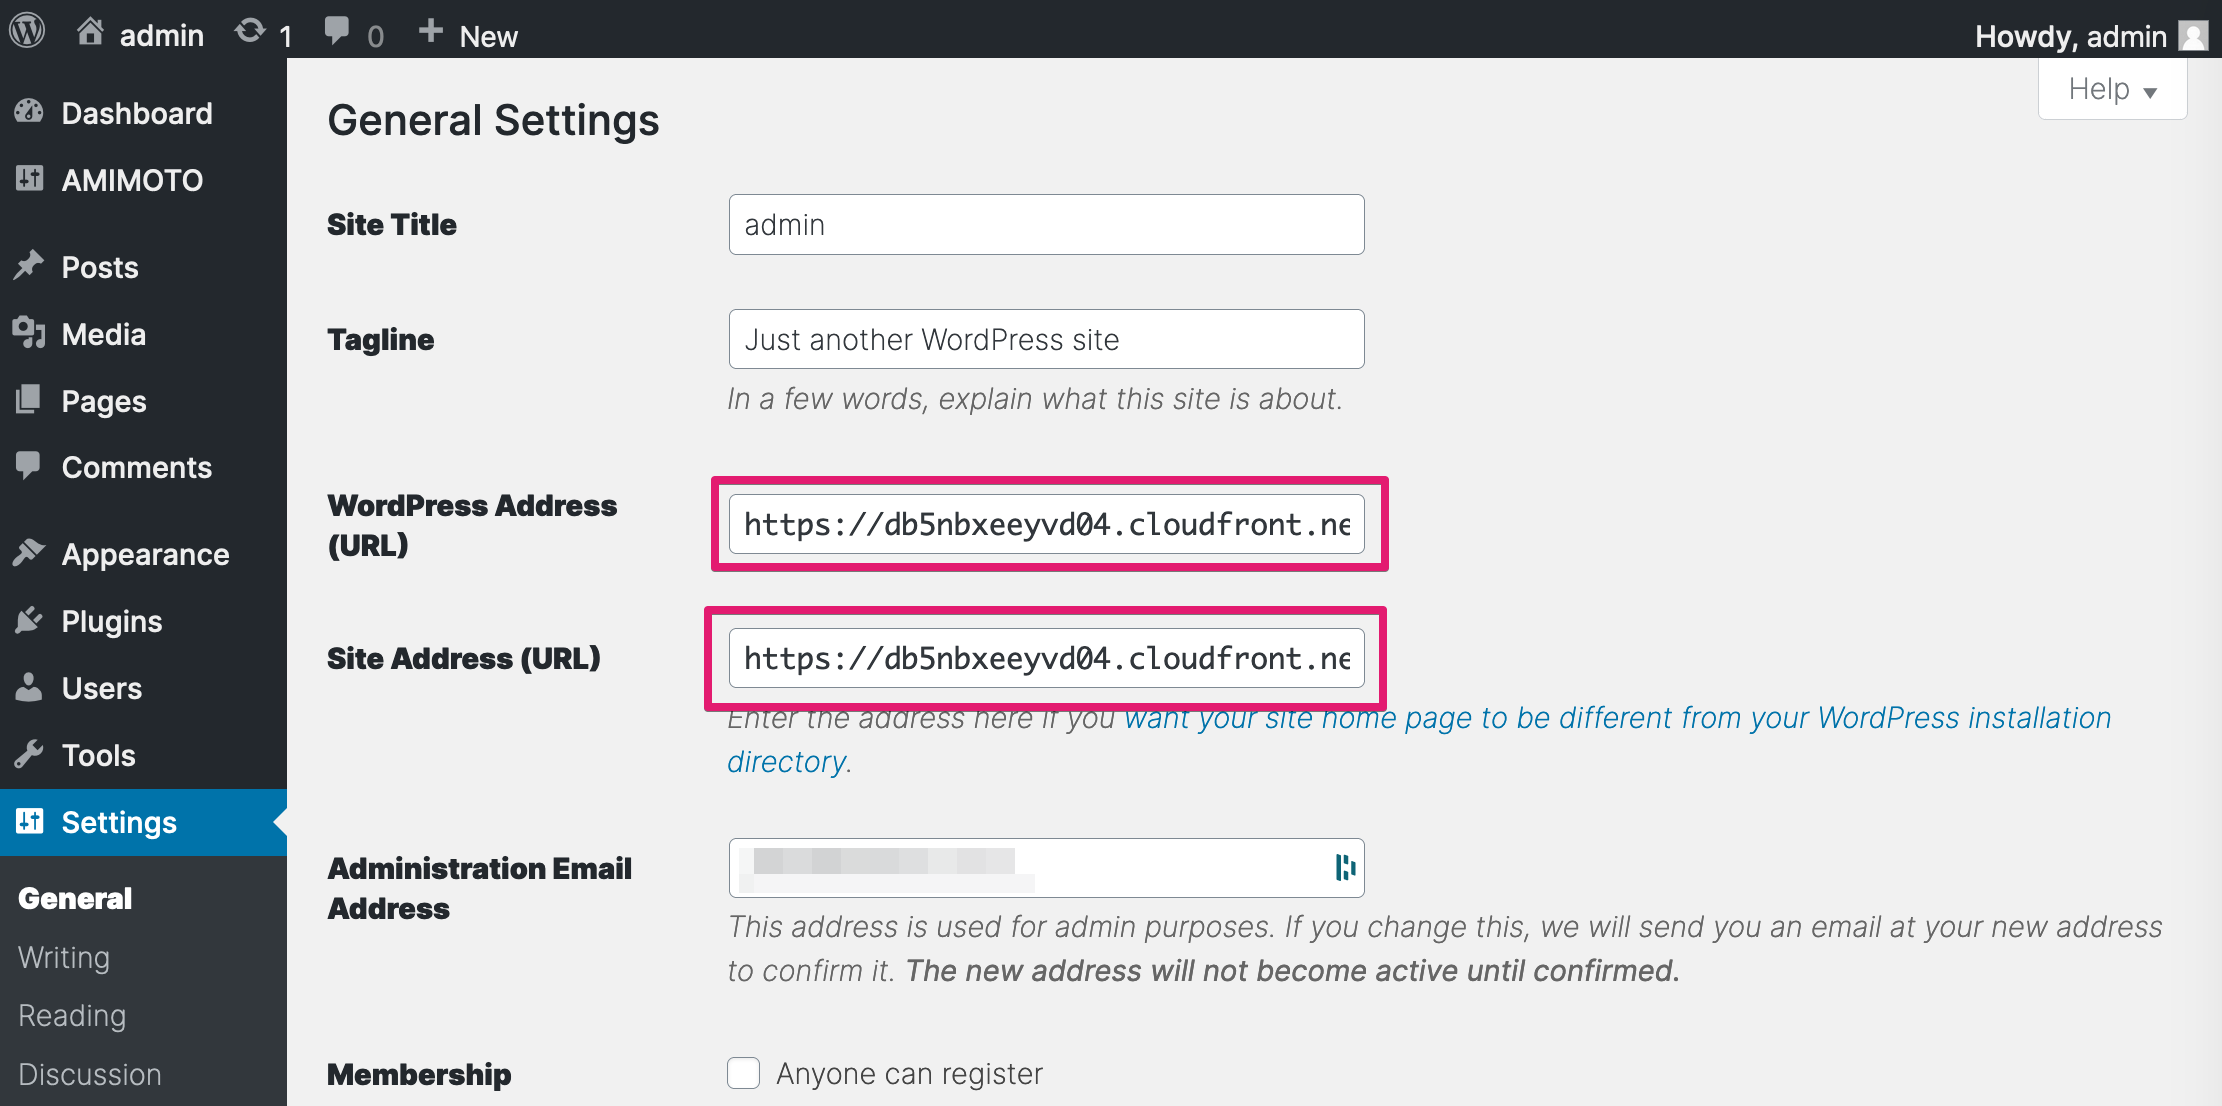
Update WordPress Address and Site Address to your domain name
CloudFront URL (e.g. db5nbxeeyvd04.cloudfront.net) to your domain name (jinkei.example.com)
Phase 5. Update DNS record of the domain name
Navigate to Control Panel of DNS provider and modify ALIAS or CNAME record to CloudFront URL (e.g. db5nbxeeyvd04.cloudfront.net)
That's all!