To go live with your custom domain name and HTTPs you'll need to set up a CNAME or an alias record.
This alias will allow us to mask your unique Amimoto domain with your custom domain name.
Log into your DNS Provider
Whether you're using Route53 on AWS, Network Solutions, Hover or one of the many DNS and domain providers, you'll need access to your DNS settings.
Adding a DNS New Record
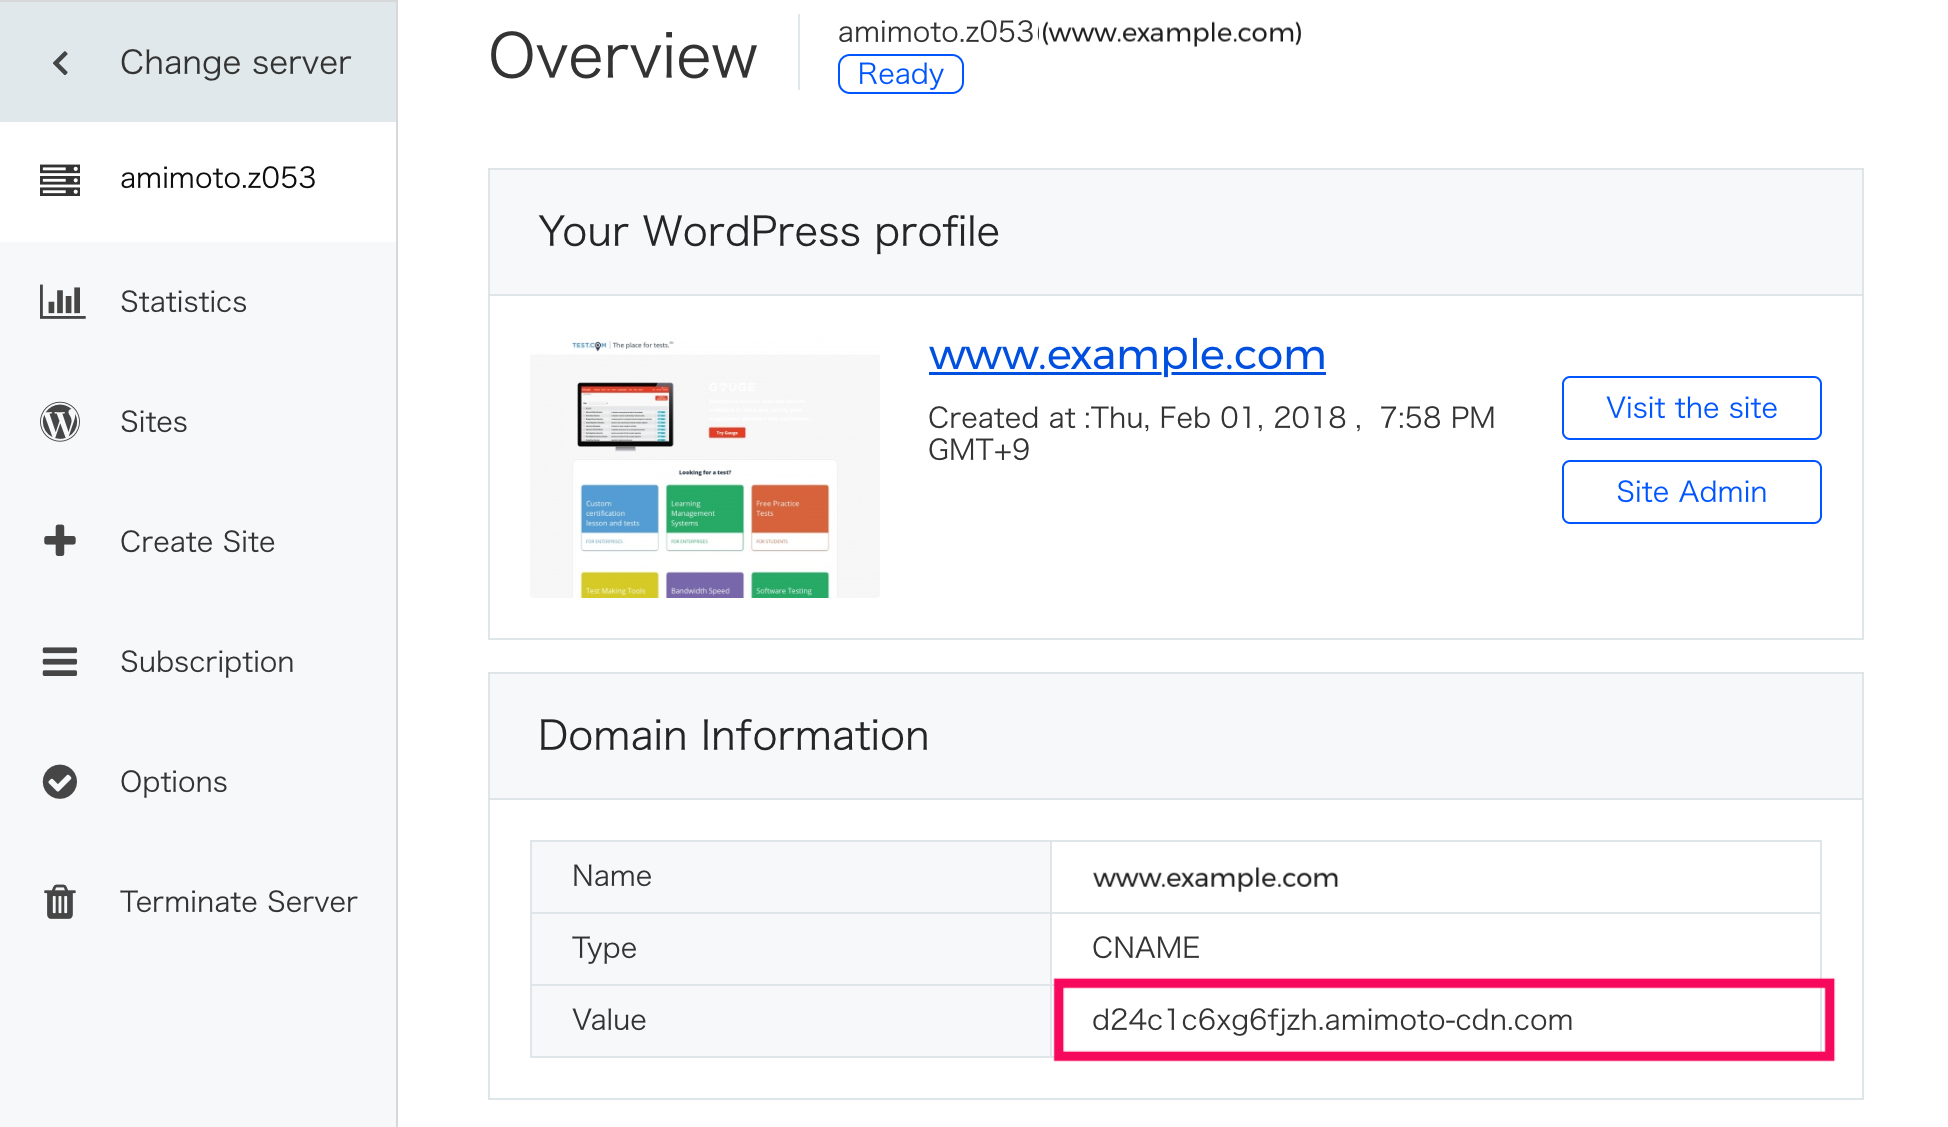
You'll need to add a new CNAME record. The name of the record is the desired domain name. In our case, it's www.example.com, and your unique CloudFront URL is the value.
Name:  www.example.com
Type:  CNAME
Value: example123.cloudfront.net
Where / what's my CloudFront domain?
The domain you will need to create this CNAME record is on the main server settings page.
Setting up a staging site and testing
If you're setting a staging environment, you can create a CNAME record for that staging domain name. For example, if you were using staging.example.com, you would need to request a cert for that domain, approve it and attach it.
After it's available and attached, you can update your DNS settings with the CNAME record and the staging domain you'd like to use.
So that you know, you can always use the issues CloudFront URL as a staging domain name.
Going Live
In this example, we are using https://www.example.com. To go live, you'll need an approved certificate attached to the site and update the DNS records.
Let us know if you have questions or experience issues during this process!