Every site on Amimoto comes with an included SSL Certificate for HTTPS. To sure your WordPress site, enable this by logging in and navigating to your servers management page.
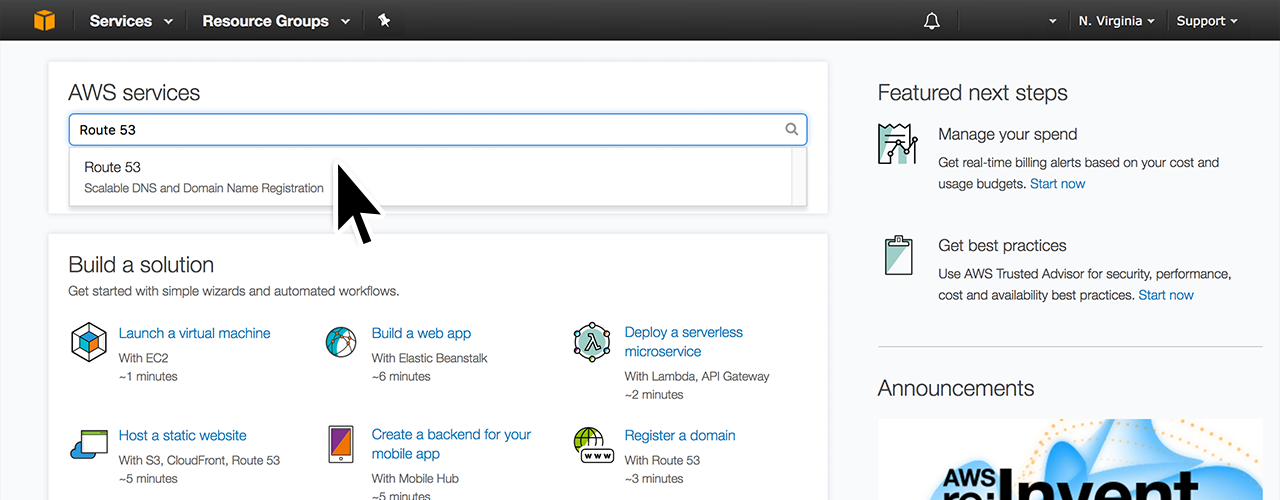
Register and assign a domain
Every site on Amimoto comes with an included SSL Certificate for HTTPS. To sure your WordPress site, enable this by logging in and navigating to your servers management page.
TL: DR
- View server settings using the Manage button.
- Select Option
- Navigate to [To SSL certificate management]
- Request a new SSL Cert for the desired domain name.
- Submit your request then check and approve the verification email.
- Assign the domain available domain to your site.
Request a New SSL Certificate
View servers settings & Navigate to SSL / Cert Settings
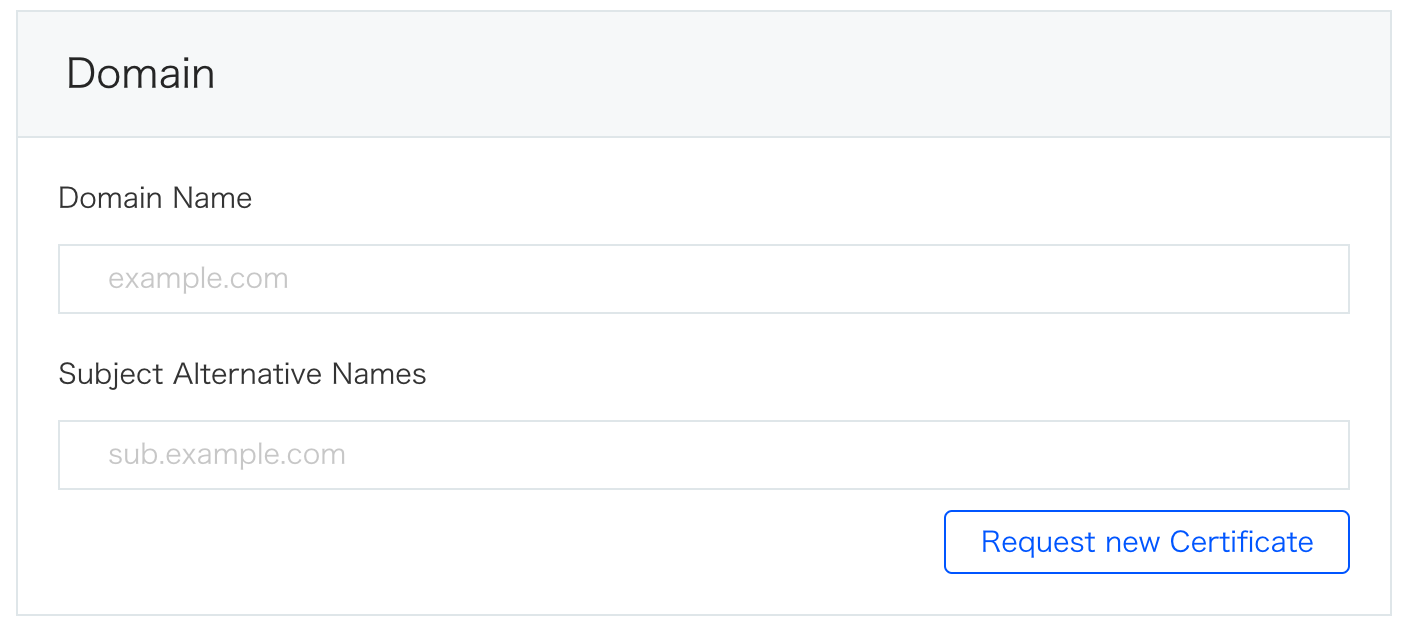
Navigate to SSL / Certificated under the options menu. Add your desired domain name and alternative domains you'd like.
Alternative domains can be different TLD domains, or they can be subdomains of the primary TLD.
Request a new SSL
Submit your request and check for verification emails. The verification emails go to the
If you have any, add your Domain Name and Subject Alternative Names, then submit your request for a new Certificate.
Please note
No wild card SSL (e.g. *.example.com ) is acceptable. If the domain name is different than the original name you've required setting up your server, please let us know when submitting this request.
After submitting this request, you'll see a Domain Verification information window.

Make sure that you save this information.
The email address used for this request is the one listed on the domain registrar. It may be different from your Amimoto account email.
It will check the following addresses but may include additional emails:
Add DNS records to validate.
Note:
Domain validation should be done within 72 hours of your request. If you cannot, you should make a request again.
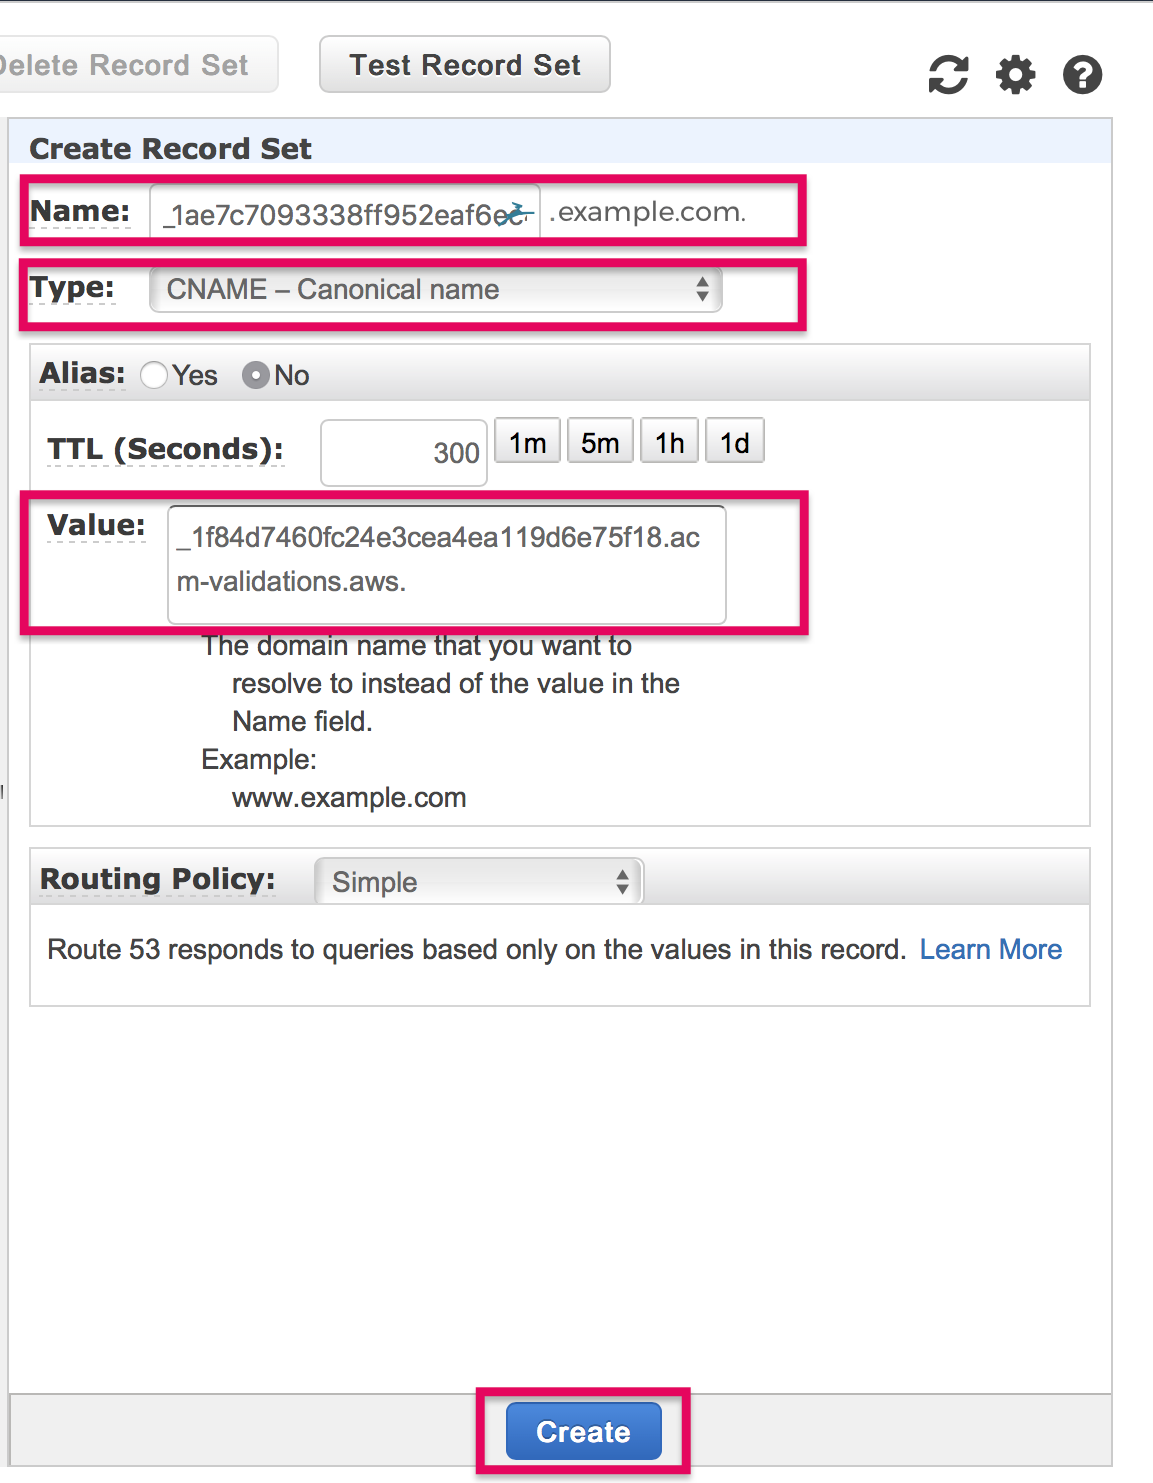
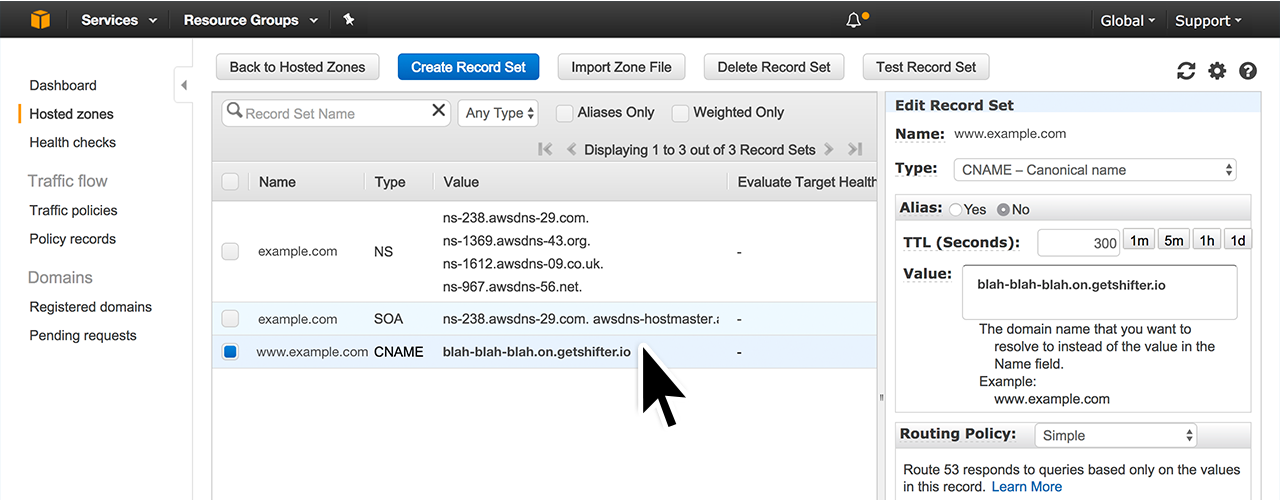
Goto ControlPanel of your DNS provider, and set up DNS records for DNS authentication.
Here is example for Route 53 of AWS.
Create the record and input value of the DNS record you copied above, then click [Create]
Assign a newly approved domain
Once you've verified a domain to use, you can just go to the servers settings again and select the site you'd like to activate with HTTPS.
The available and verified domains will appear under the WordPress and HTTPS settings panels.
You can attach the domain to your site if the domain status is available. If the status if Pending or Validating, you may still need to validate your domain or it's currently in progress.
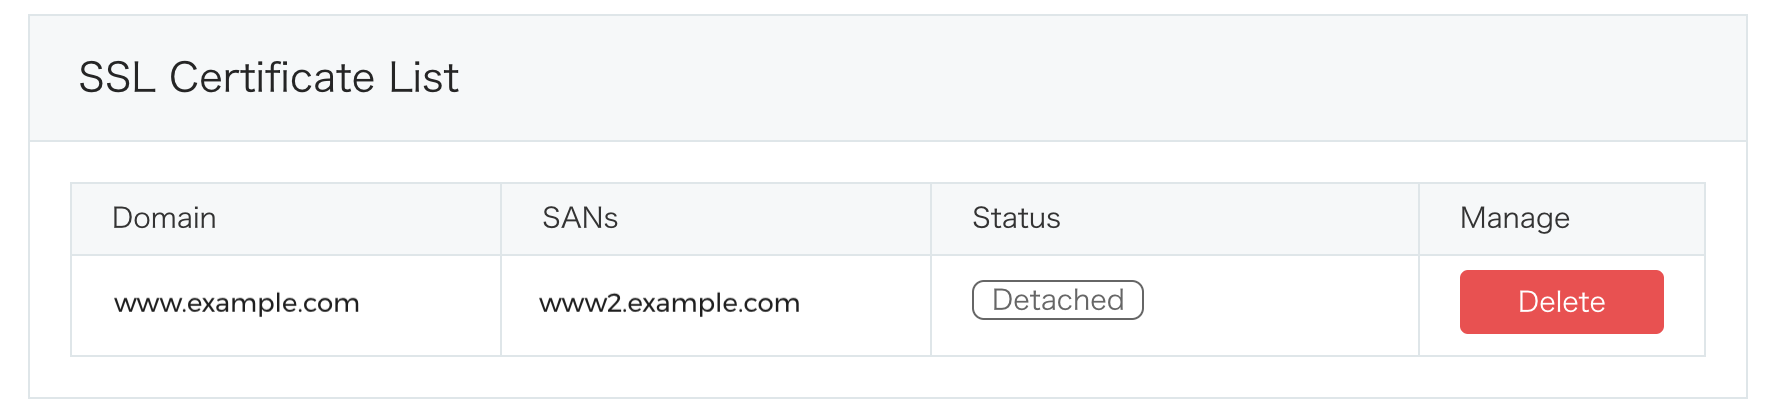
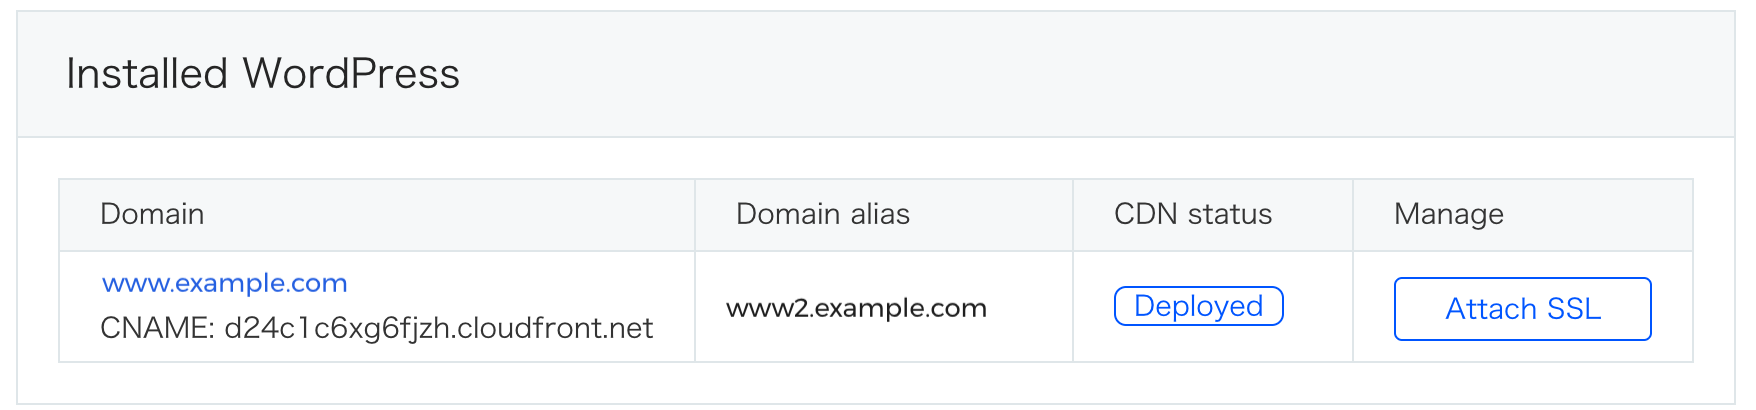
Back to Amimoto Dashboard, the domain name you asked for is Detached status. It stands for DNS authentication is finished and ready to attach.
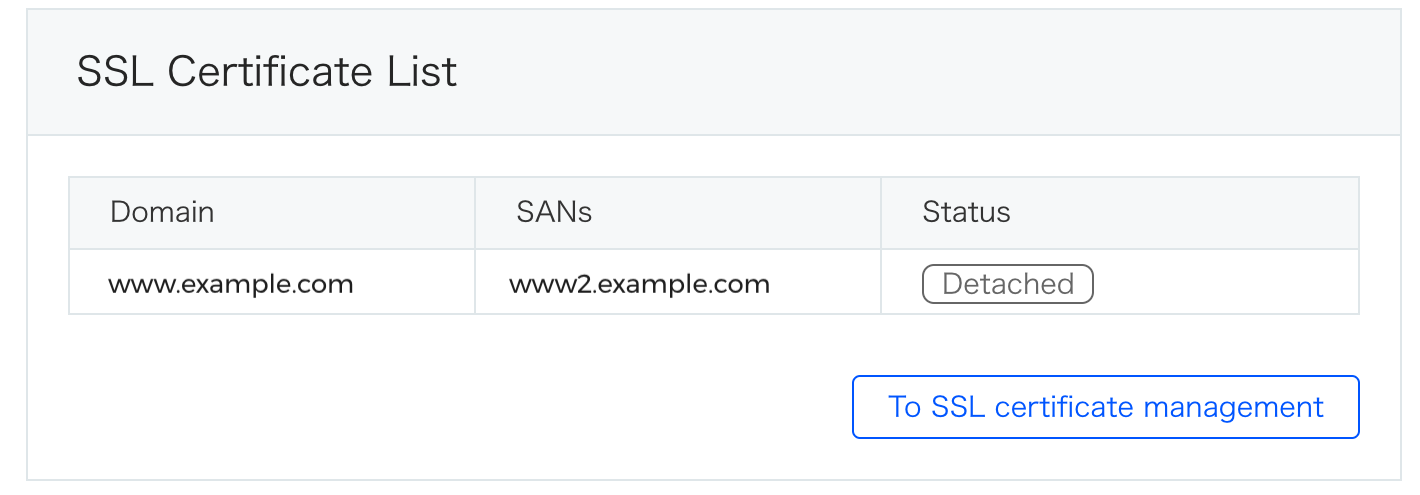
You can find it as [Attach SSL] on the Installed WordPress section, Click it to attach it to domain.
Succeeded:
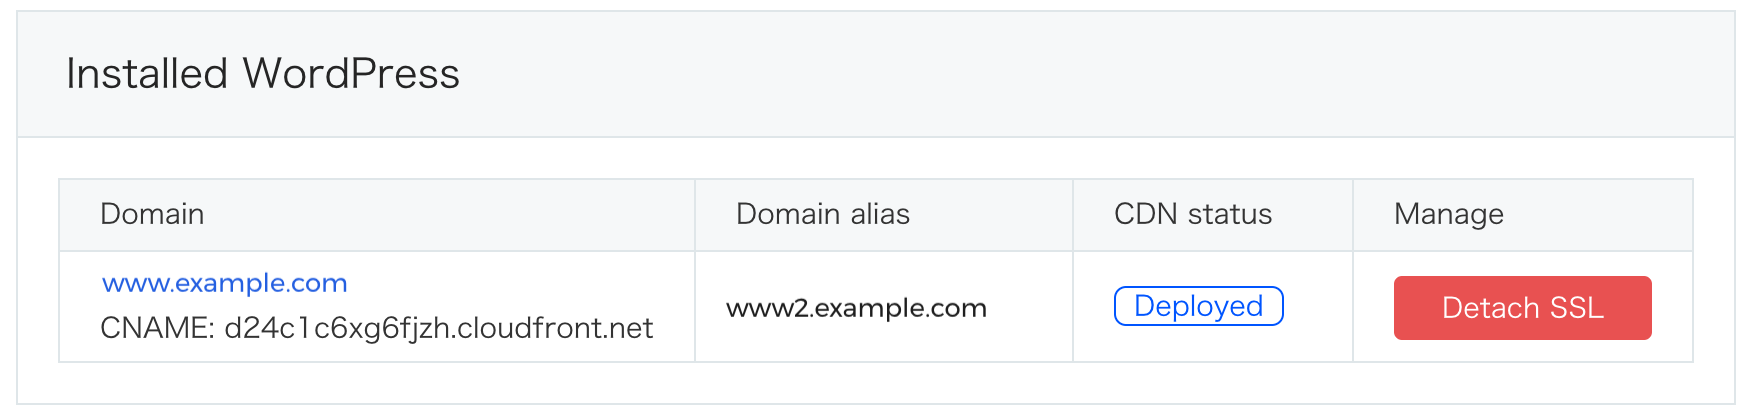
Let's change the DNS setting after the SSL attachment has succeeded.
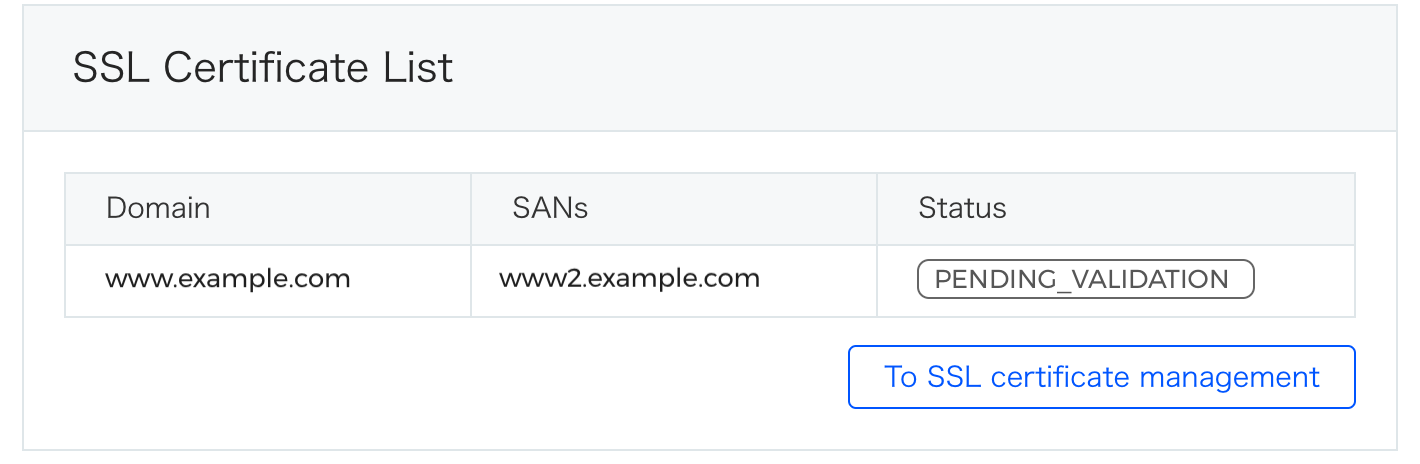
If the status is Pending_Validation, validation is undone. Change the TTL of DNS records and wait for validation has done.
Errors on Status
Pending_Validation
The validation is undone. Change the TTL of DNS records and wait for validation has done.
Verification_Timed_Out
Server could not complete domain validation within 72 hours since you've made a request and you cannot assign domain/SSL to your WordPress.
Remove the domain name and request the certification again.

If you cannot remove the domain name, contact to support desk.
Assign a newly approved domain
Once you've verified a domain to use, you can just go to the servers settings again and select the site you'd like to activate with HTTPS.
The available and verified domains will appear under the WordPress and HTTPS settings panels.
You can attach the domain to your site if the domain status is available. If the status if Pending or Validating you may still need to validate your domain or it's currently in progress.

Setting up your CNAME with your DNS Provider
The DNS server requires CNAME records to set it up.
Copy CNAME, which ends with cloudfront.net. In the above sample, it is d1t5blf5zezlzg.cloudfront.net
Set up DNS and make your site public
Go to your DNS service provider like AWS Route 53, GoDaddy, )
Test access for your domain with your browser
In this case, the URL will be https://www.example.com.
With Amimoto, we apply SSL certification to your domain(s) so that you and your clients can get secure access to the site.