Launching WordPress on AWS with AMIMOTO- AMI
AMIMOTO AMI is an Amazon Machine Image (or AMI) built by the AMIMOTO Managed Hosting Team. That's where the AMI in the name comes from.
This AMI is designed and built to run WordPress and comes with features like Auto Scaling, inherent security, and the latest versions of PHP, NGINX, and more.
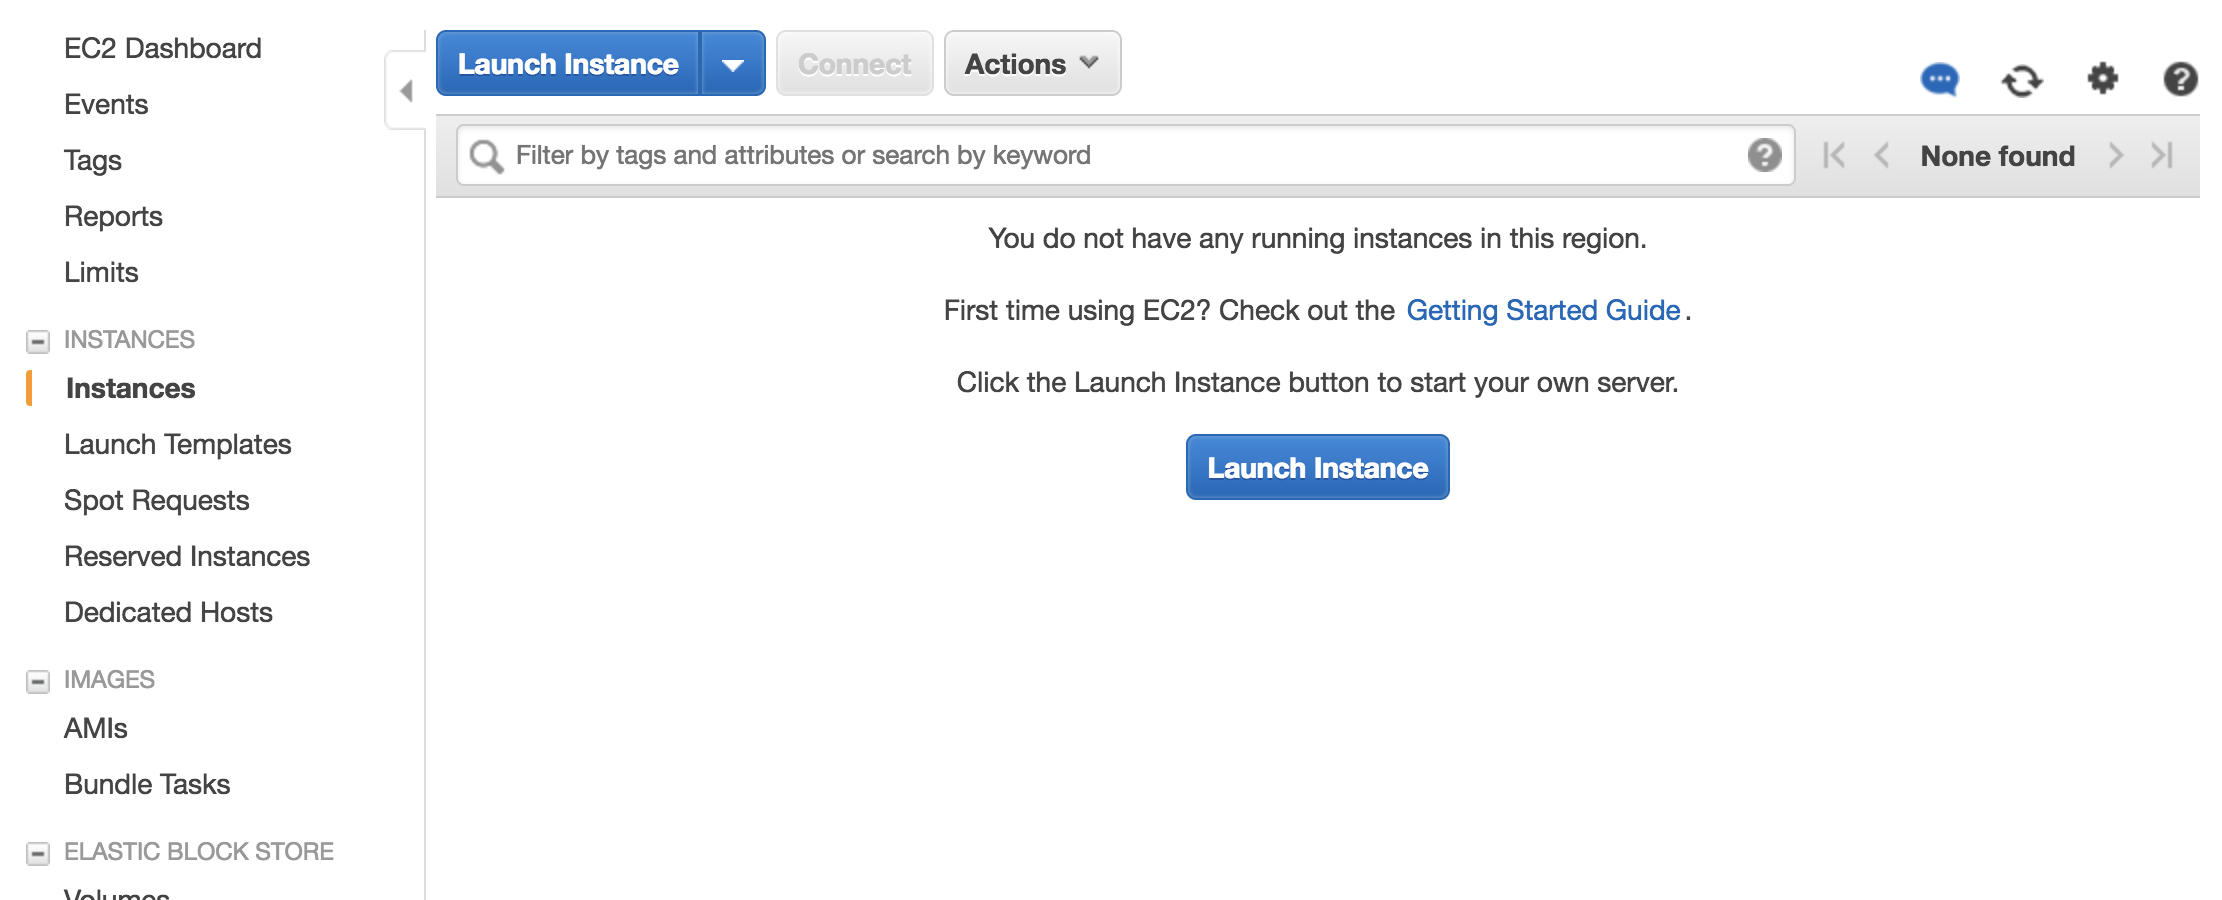
To launch your first Instance running AMIMOTO navigate to the EC2 product page in the AWS control panel.
From here you can get an overview of the current running Instances within your account, change regions, or view settings related to EC2.
Launch Instance
From the top left corner, there's a button and option to launch a new Instance, select that.
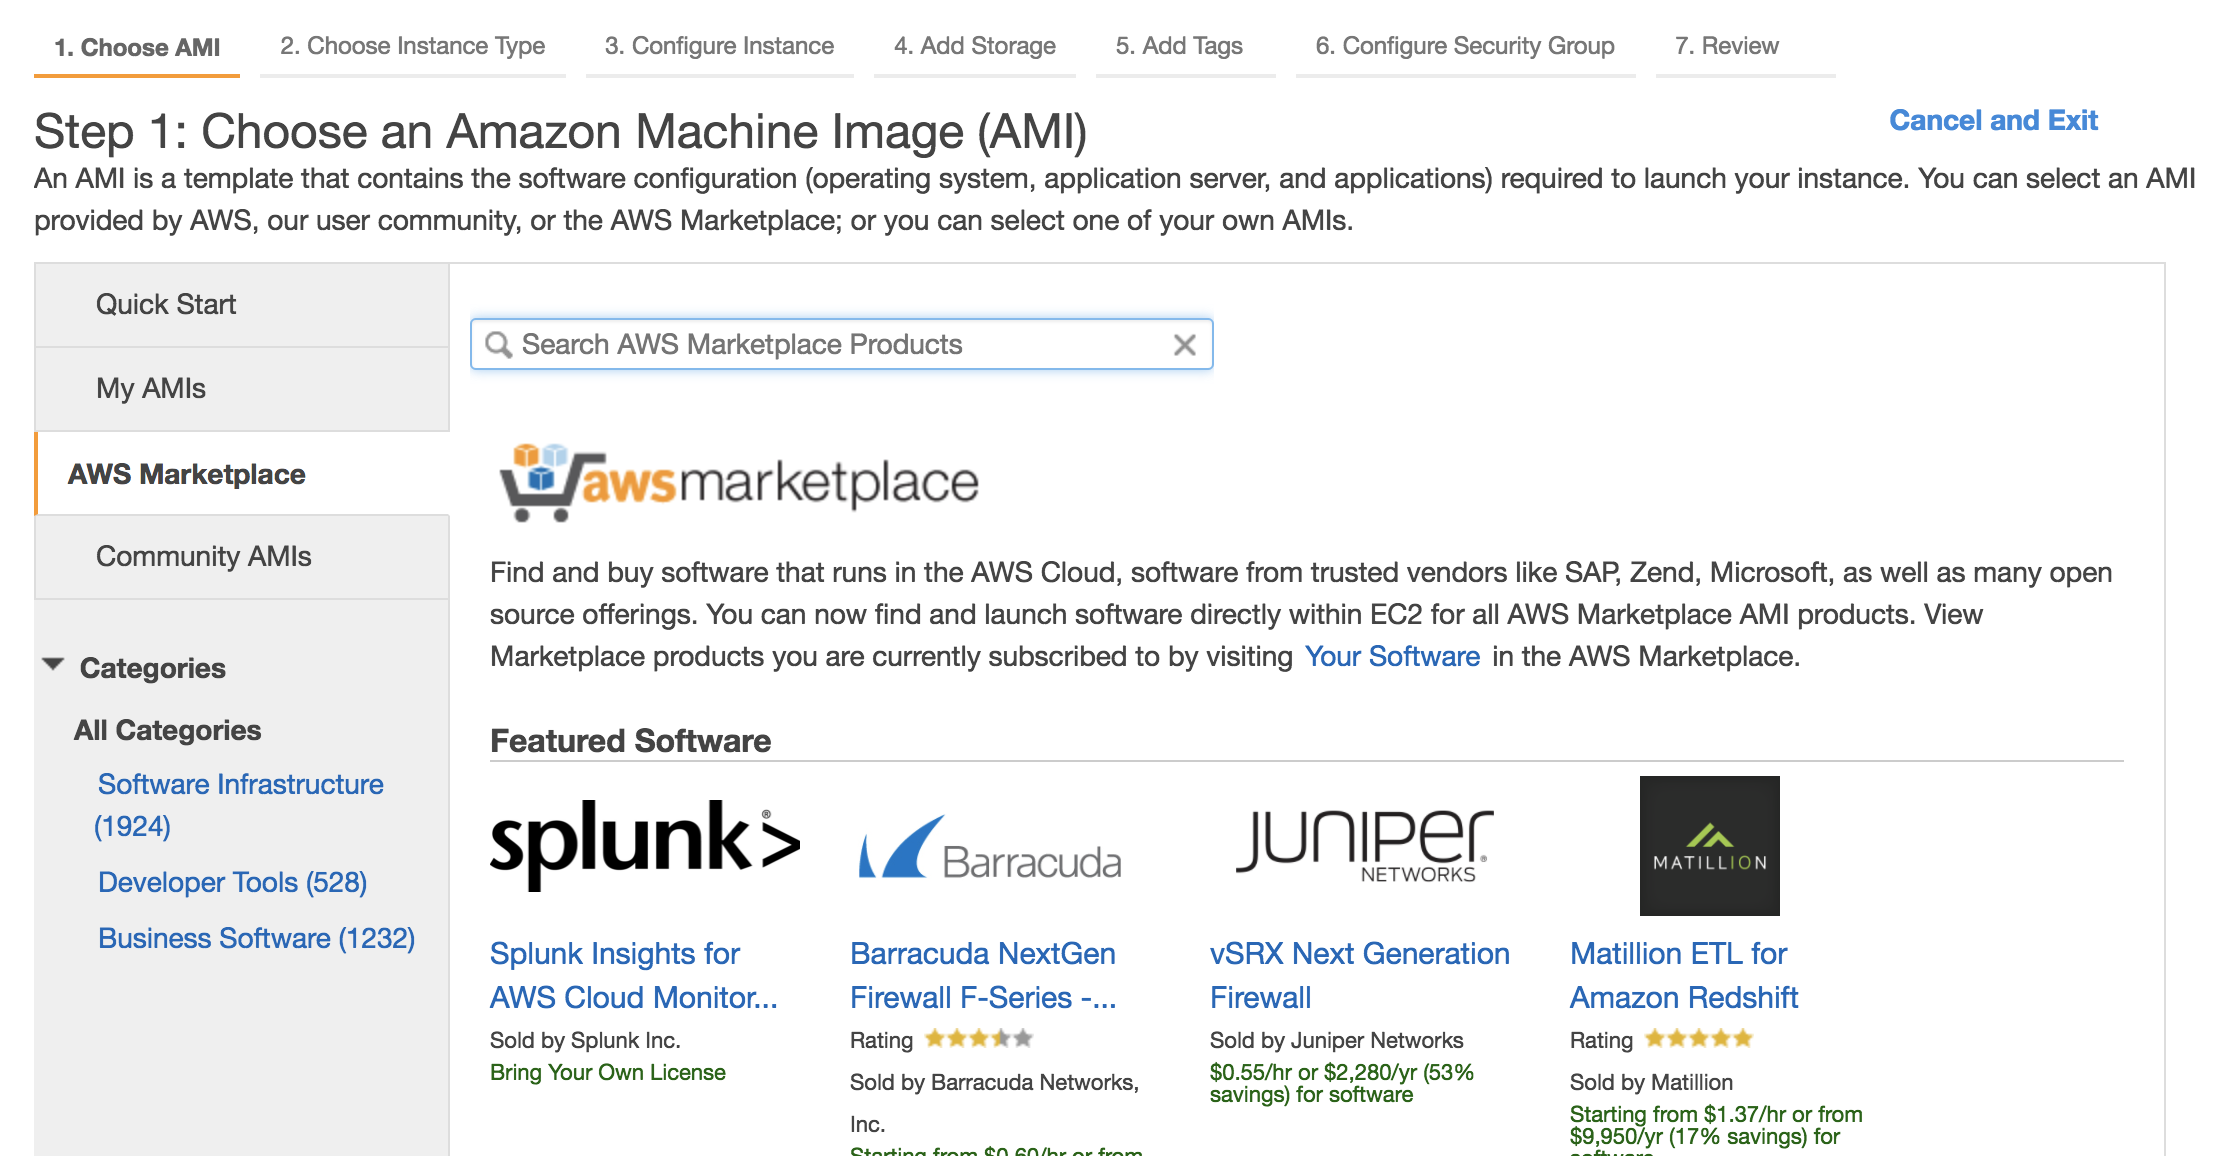
This will launch the EC2 quick start menu.
AMIMOTO is an AWS Marketplace product so select Marketplace from the tab options and search: AMIMOTO.
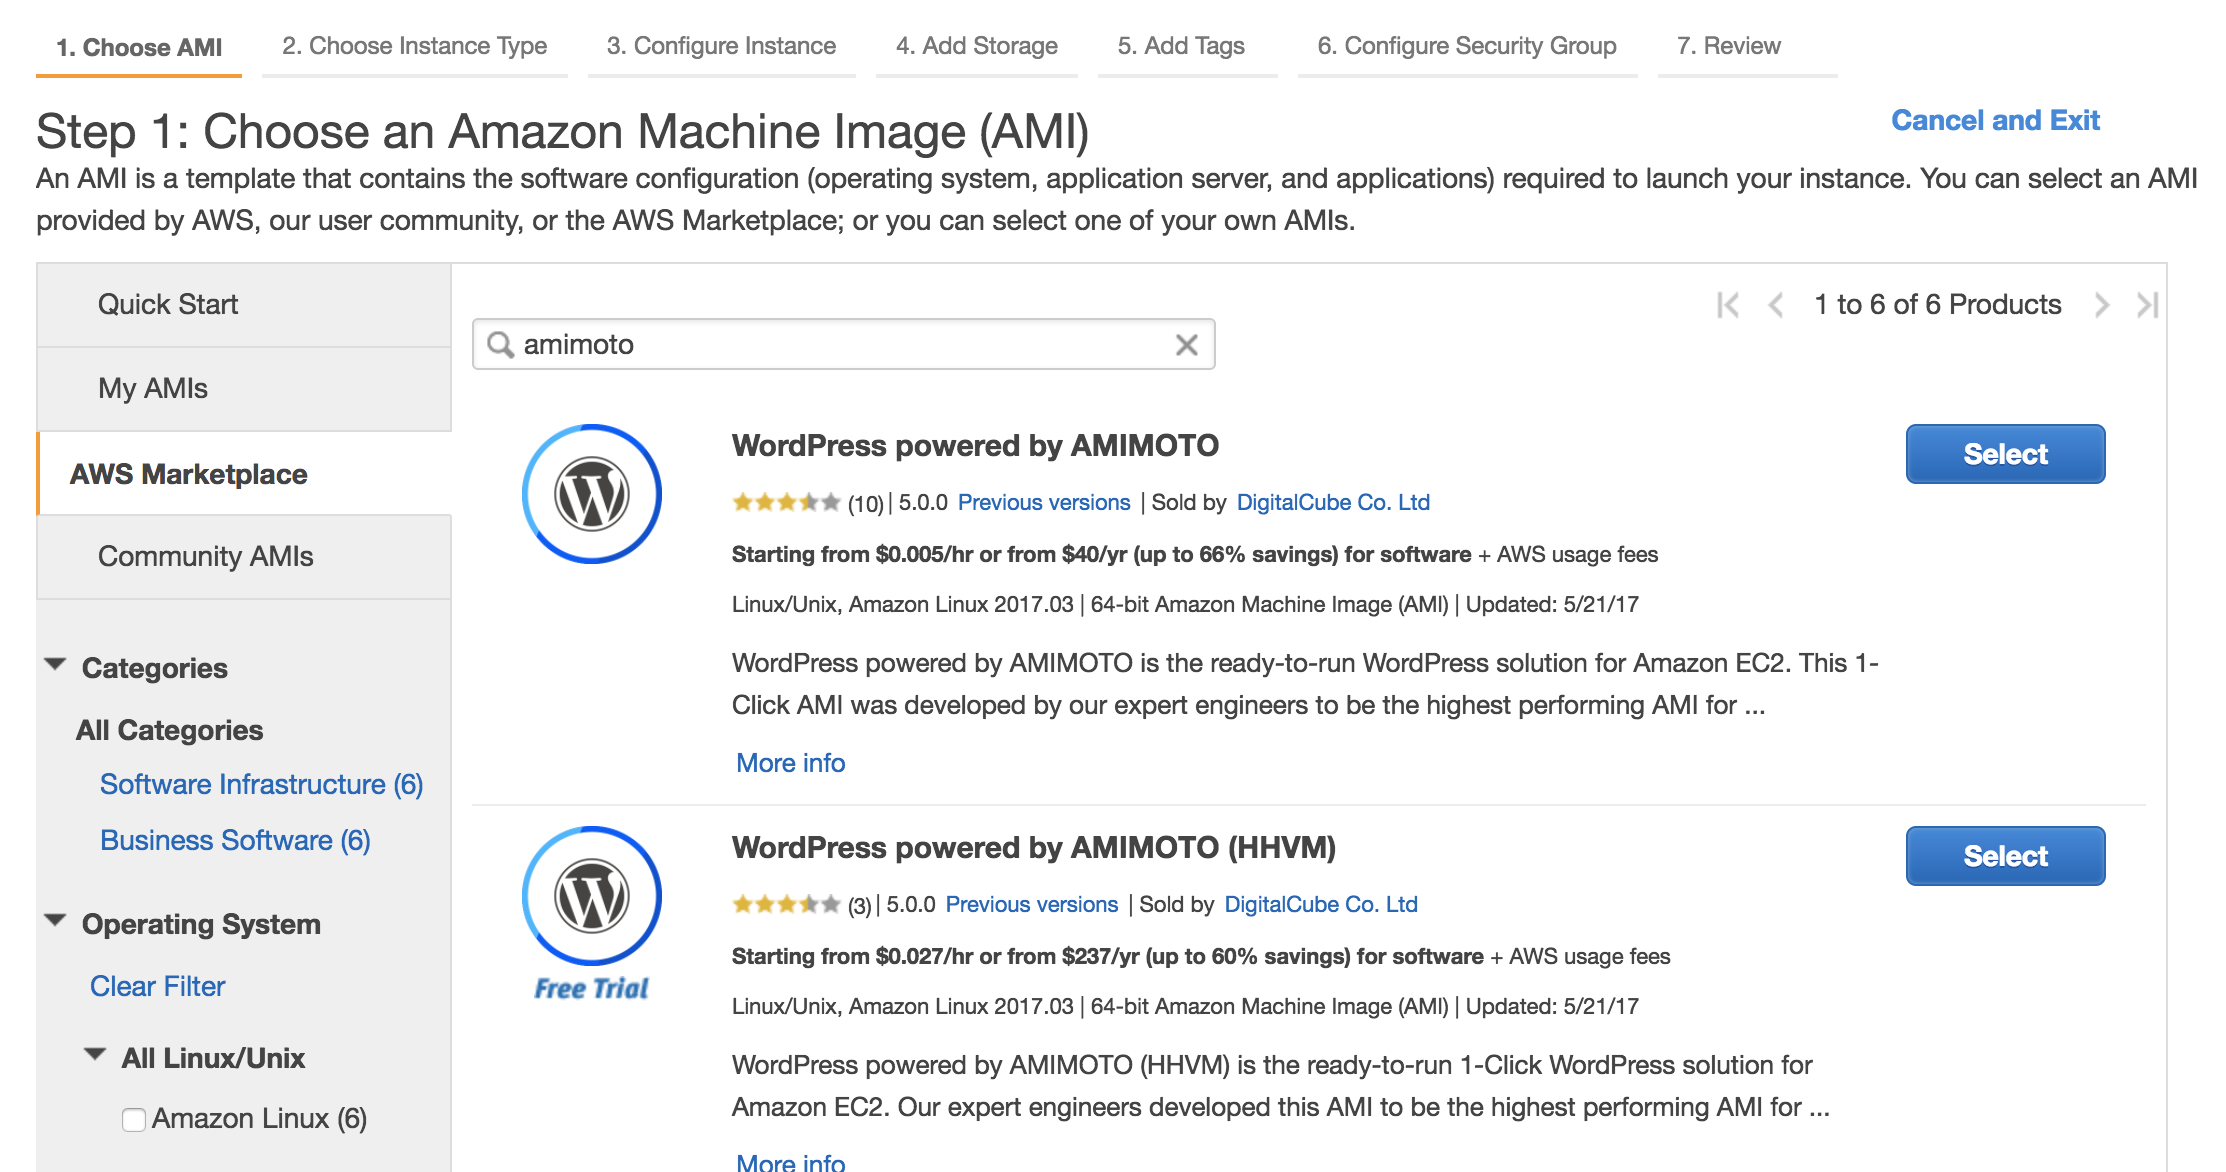
In the results, you'll see a few products. From single Instance servers or Auto Scaling WooCommerce sites, AMIMOTO has a number of options. For this demo select the first option titled WordPress powered by AMIMOTO.
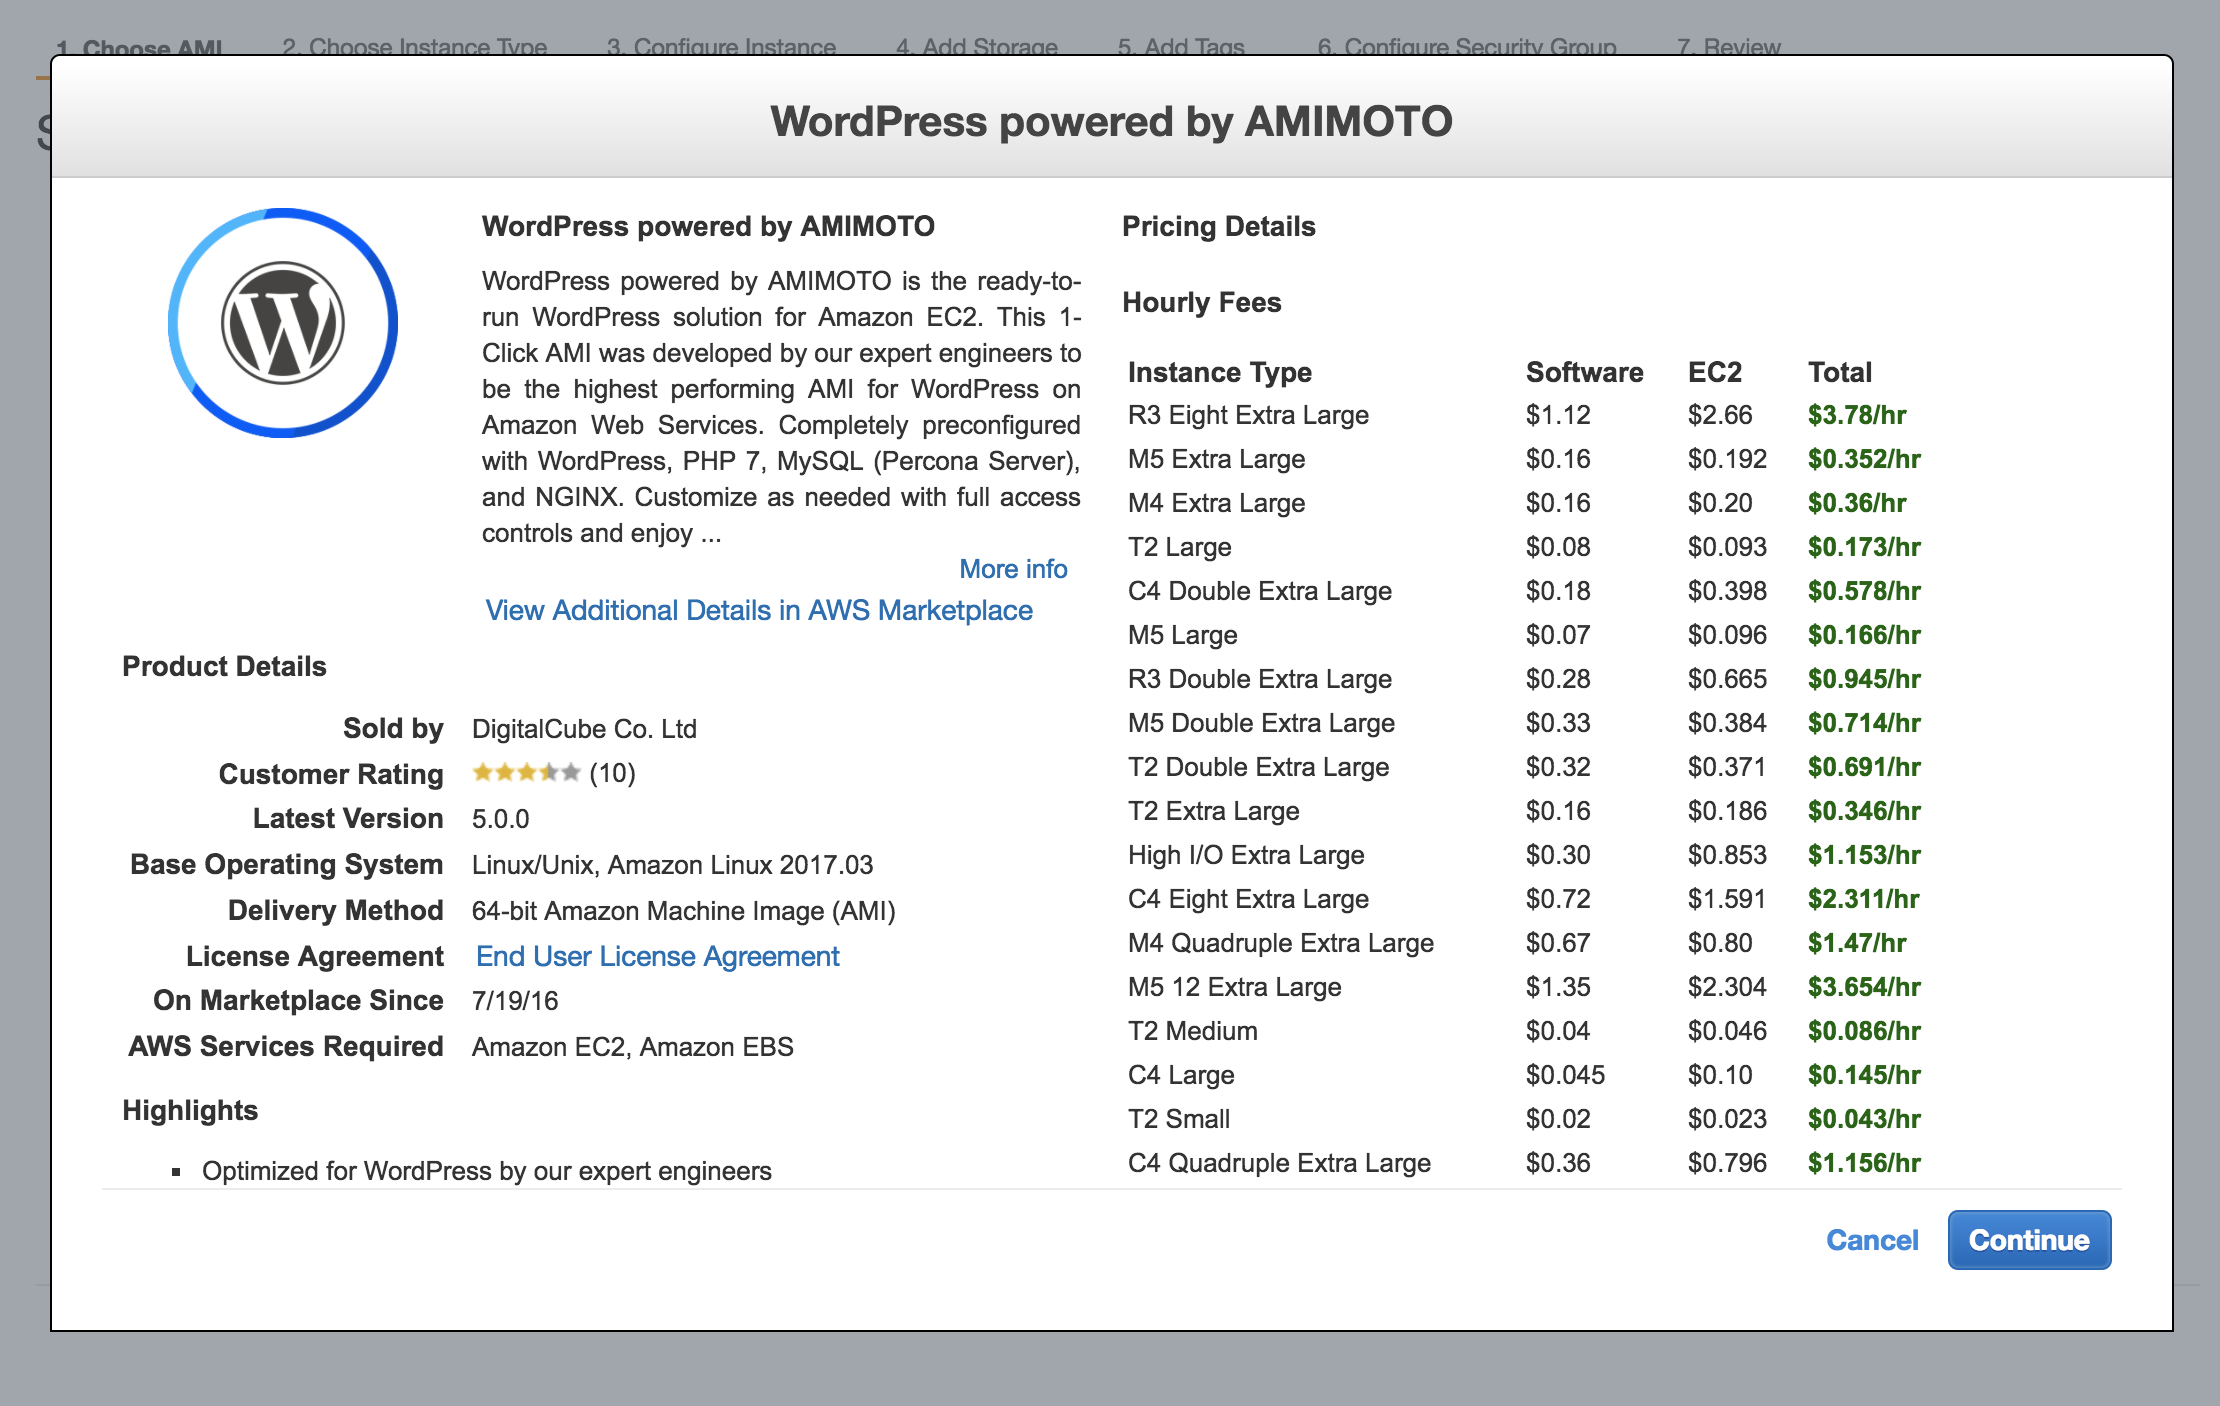
You'll be presented with an overview of the AMI options and pricing. Select continue to advance.
Step 2 of the EC2 Quick Start menu will display a table of options for Instance size. Depending if you are new to AWS or have an existing account some Instance sizes will be free tier eligible.
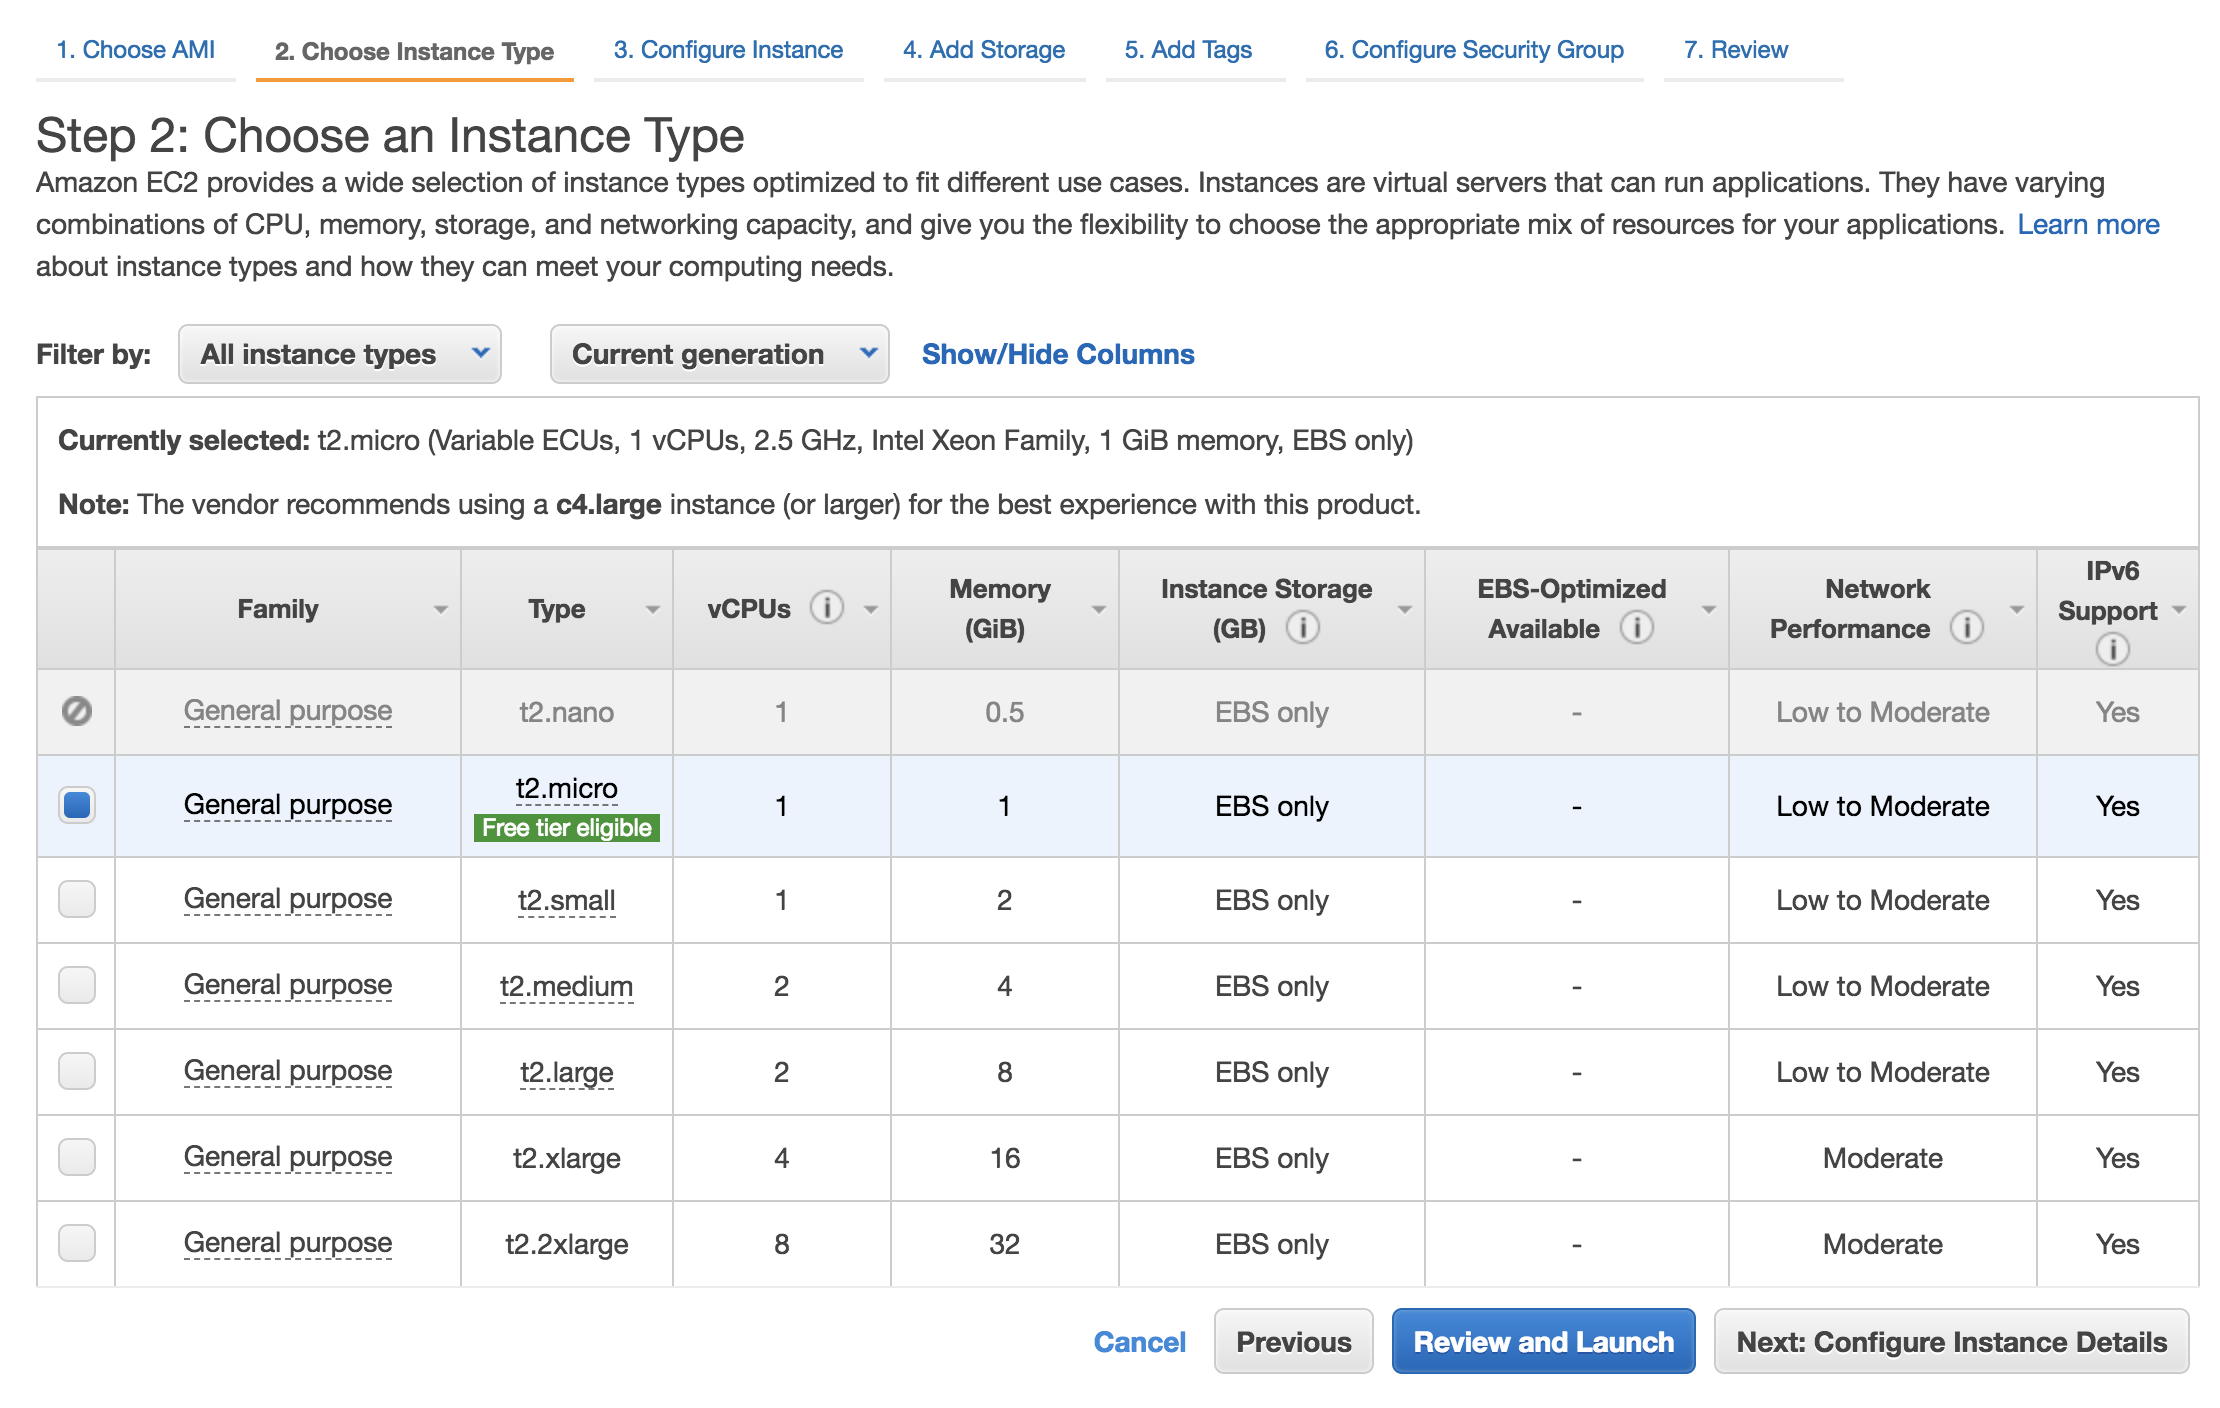
For this demo, we will select t2.Micro.
This Instance size comes with 1GB of memory and 1 Virtual CPU. It's a great starter option for anyone learning about AMIMOTO, WordPress, and AWS.
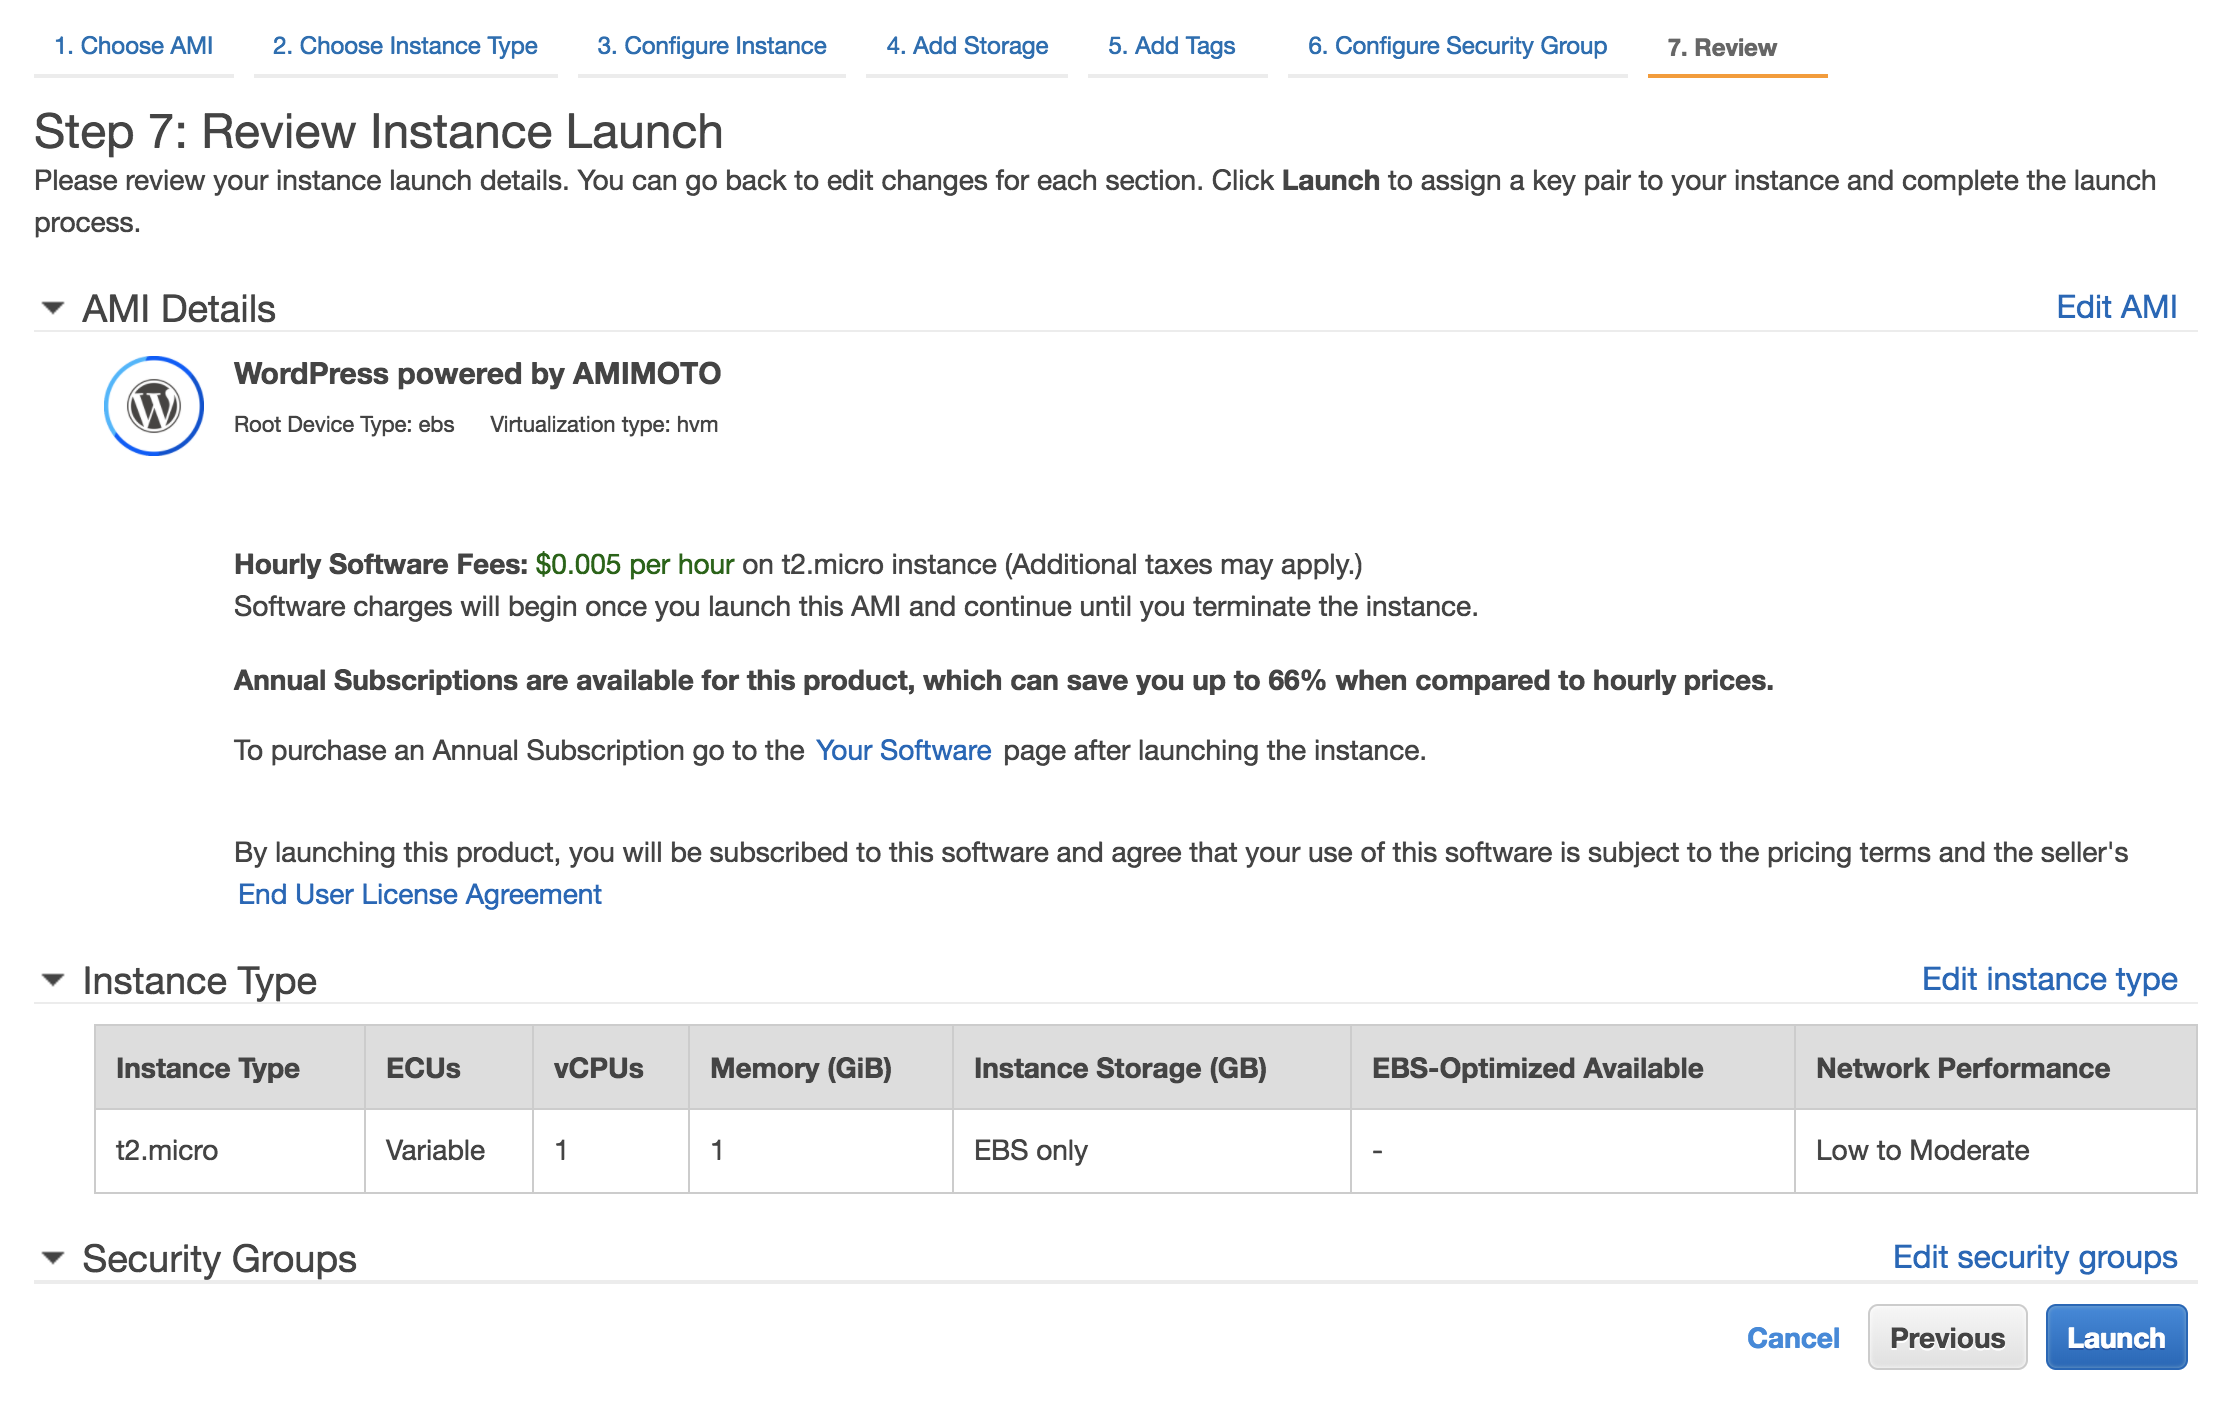
If you are not familiar with EC2 or advanced settings you can select Review and Launch. This will apply the default settings to the Instance and begin the setup.
One last check before launching your server is selecting an Instance (or Server) Key.
This is your SSH key for the server and will give you admin access if needed to your server.
This key is not required to use AMIMOTO or WordPress but it is something you want to keep save and store for future reference.
If you do not have a key created yet, select Create a new Keypair from the drop-down options and name your key.
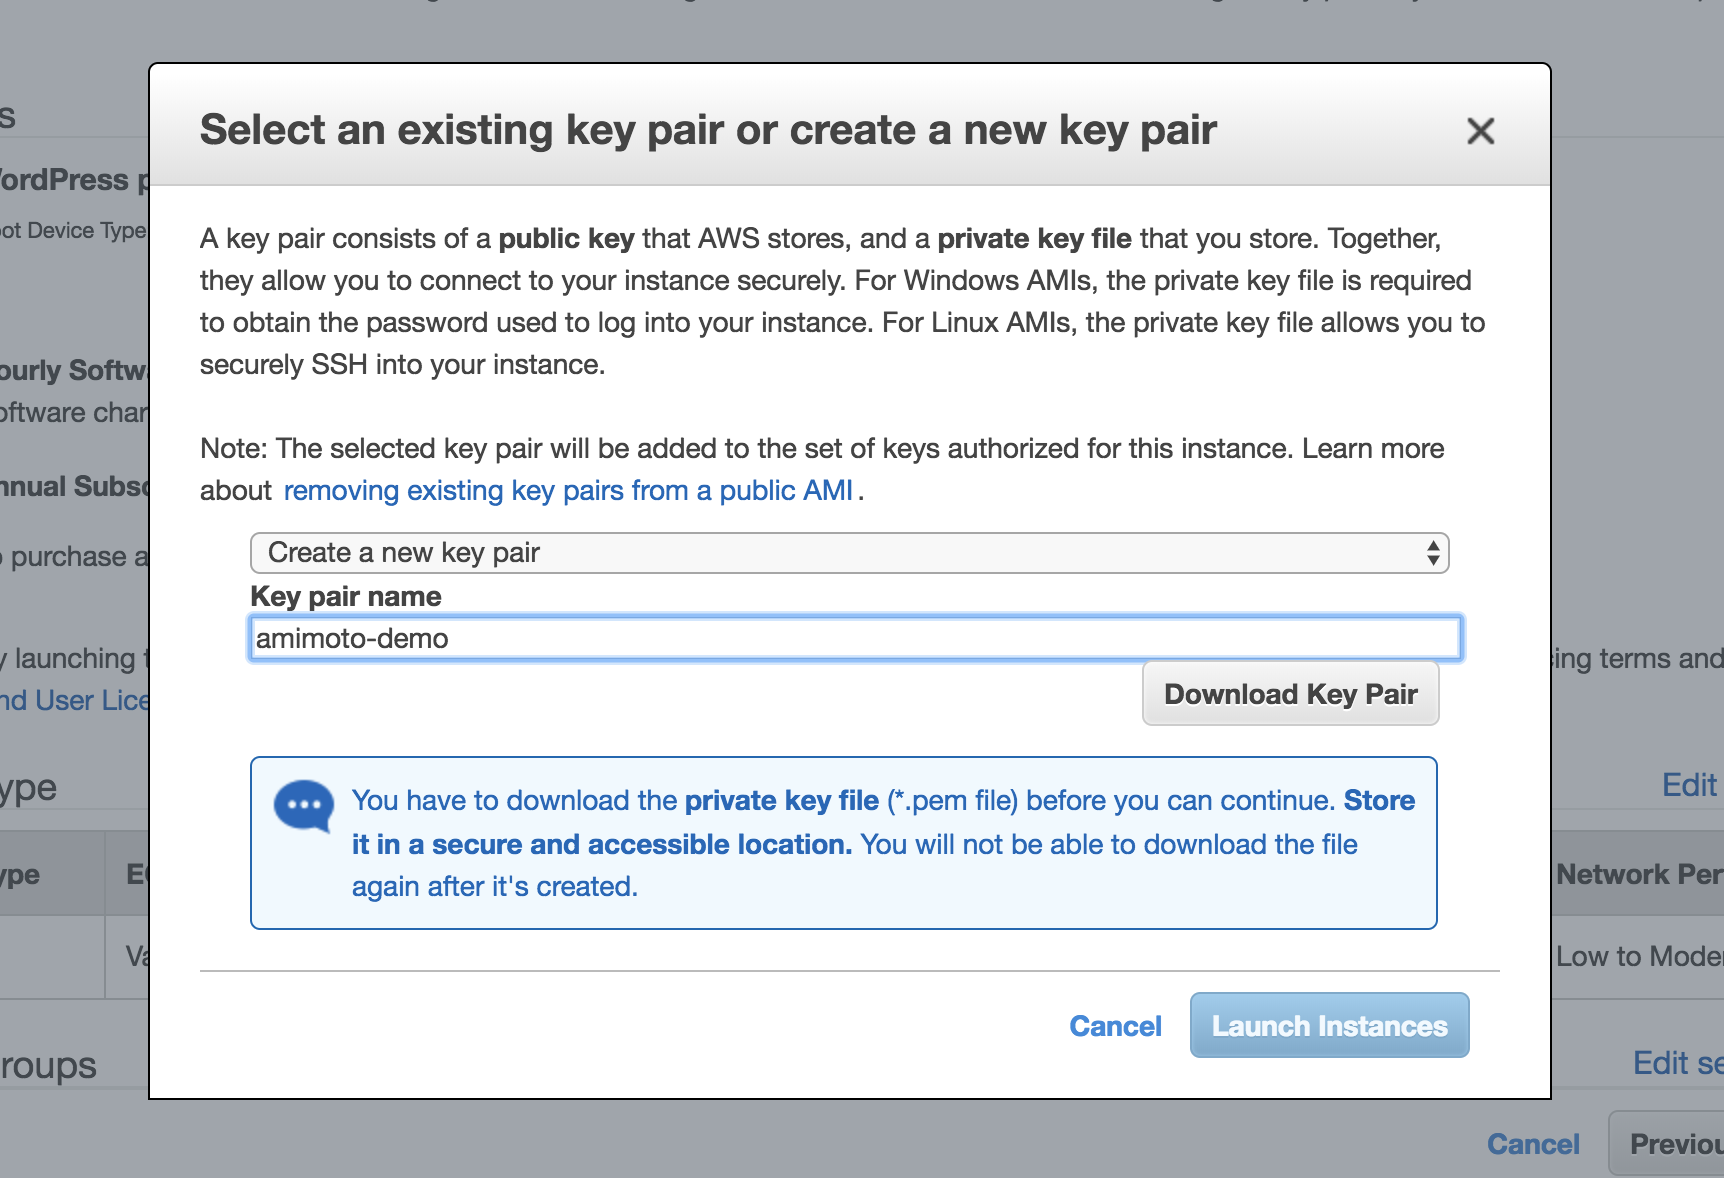
Remember, download your Keypair and keep it safe!
Now you are ready to Launch your server! Select Launch Instances from the Quick Start window.
Your AMIMOTO AMI EC2 Instance is now starting up.
While that's spinning up let's assign an Elastic IP Address to this new Instance.