Launch AMIMOTO AMI with Auto Scaling and enable HTTPS for it.
Step 1. [Marketplace] Launch WordPress powered by AMIMOTO (Auto Scaling) JIN KEI
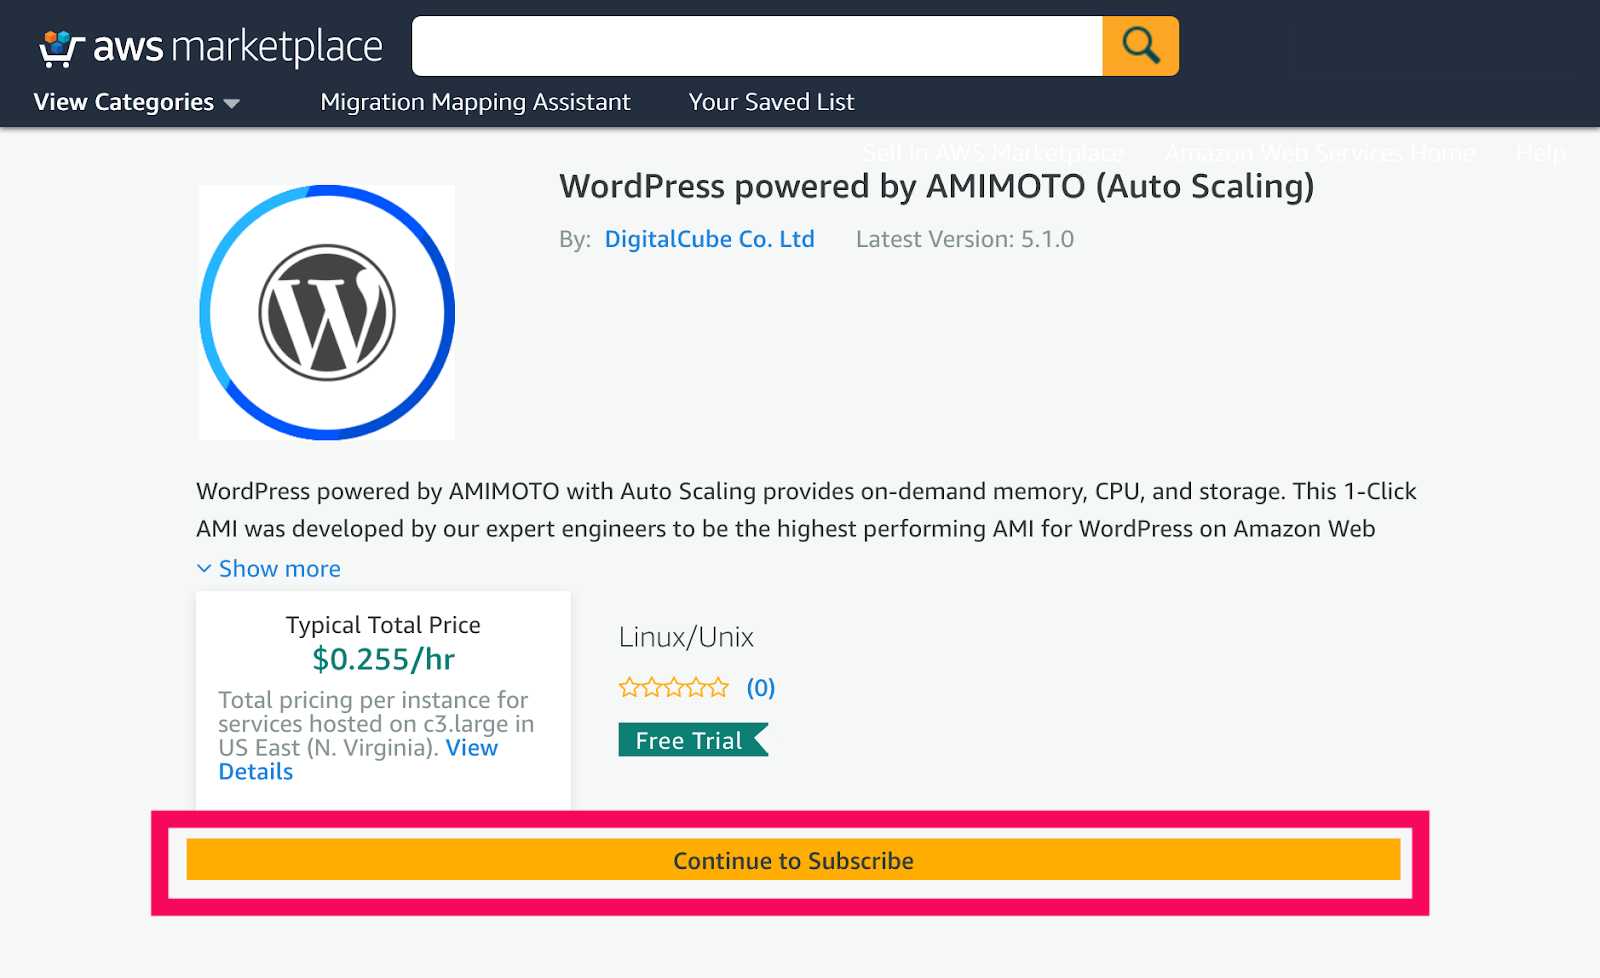
Step 1-1. Click [Continue to Subscribe]
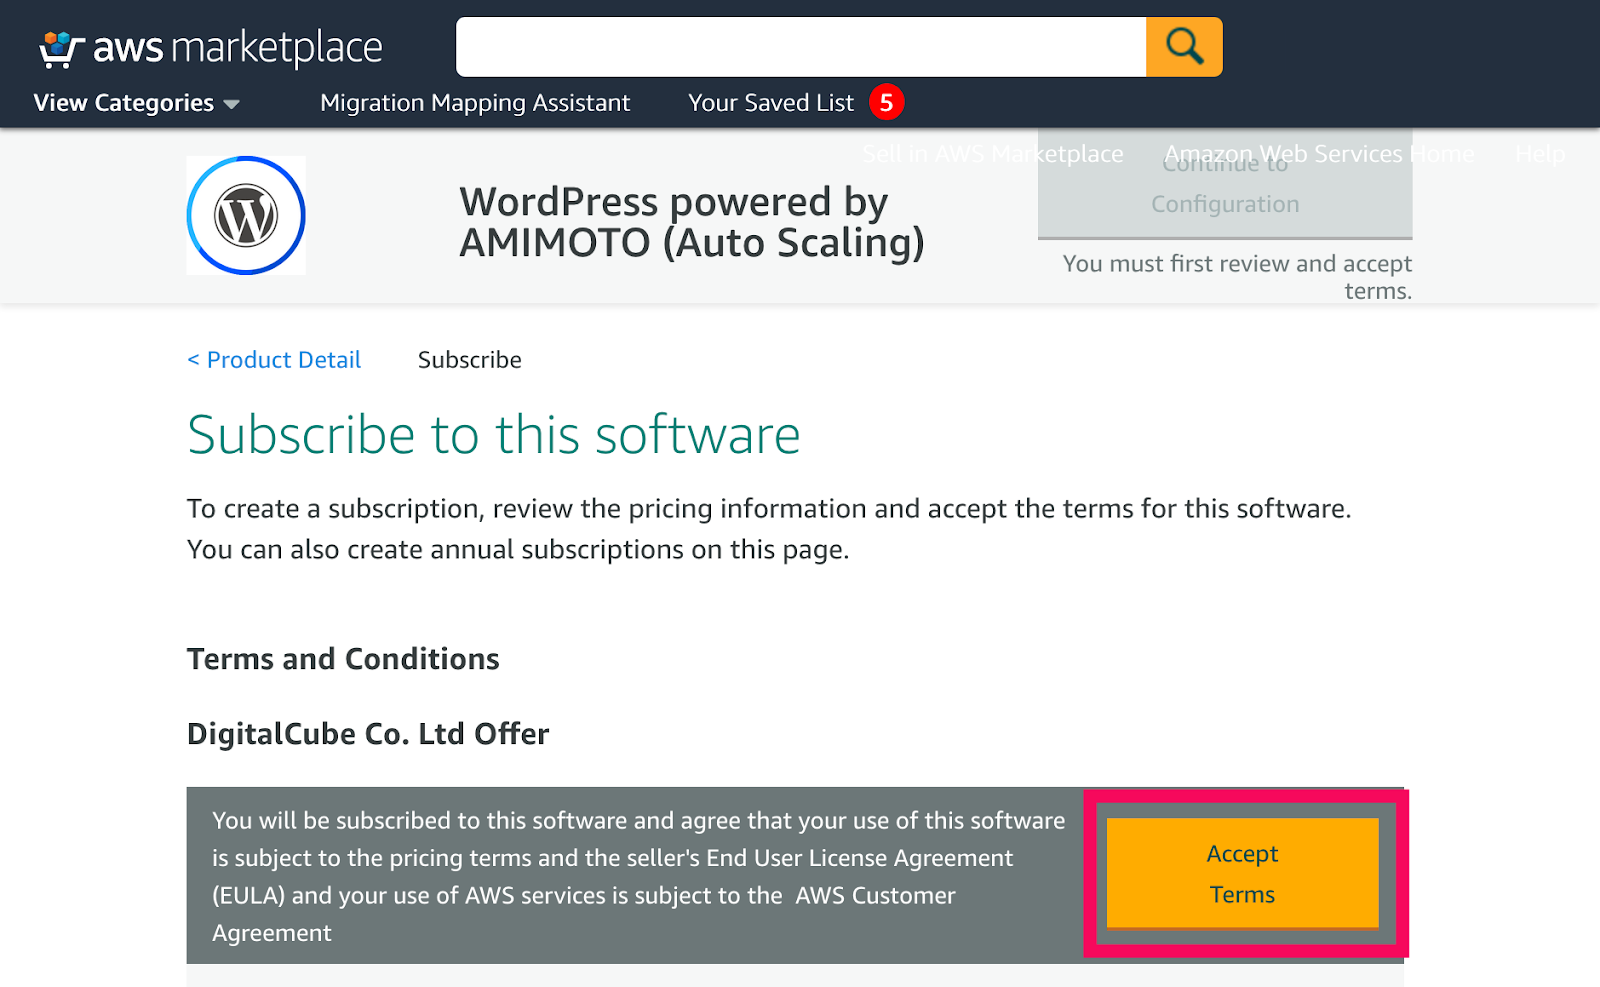
Step 1-2. Click [Accept Term]
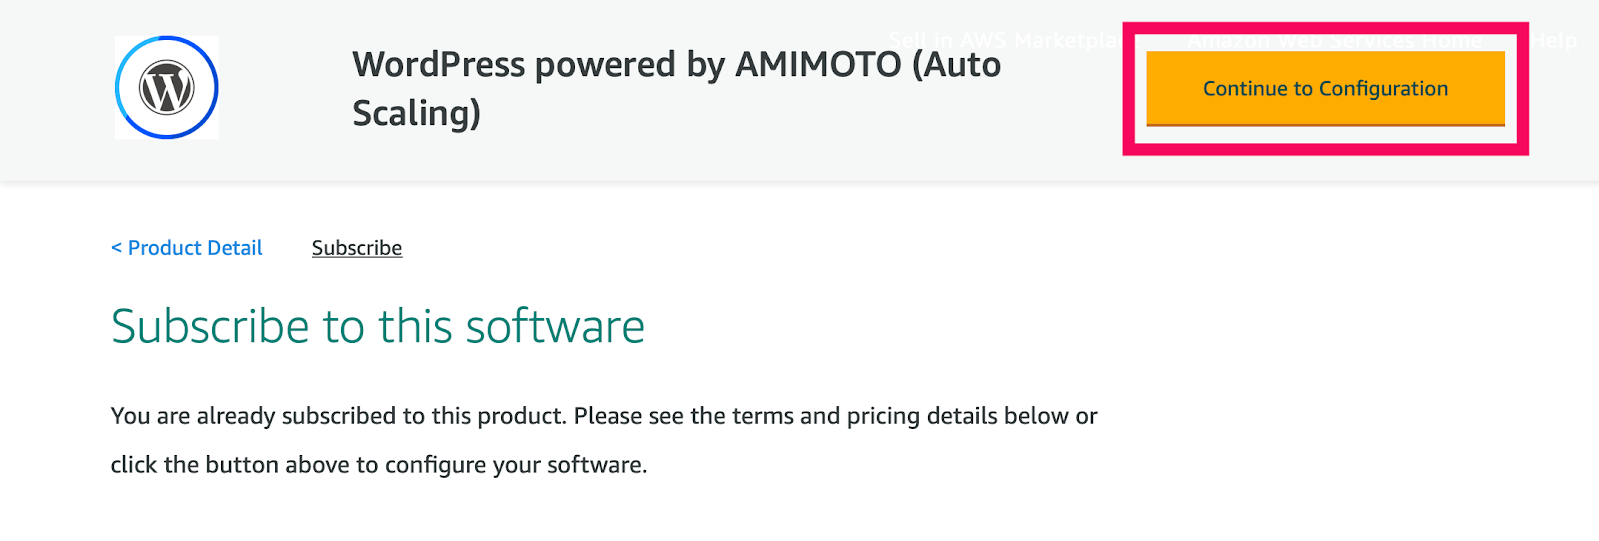
Step 1-3. Click [Continue to Configuration]
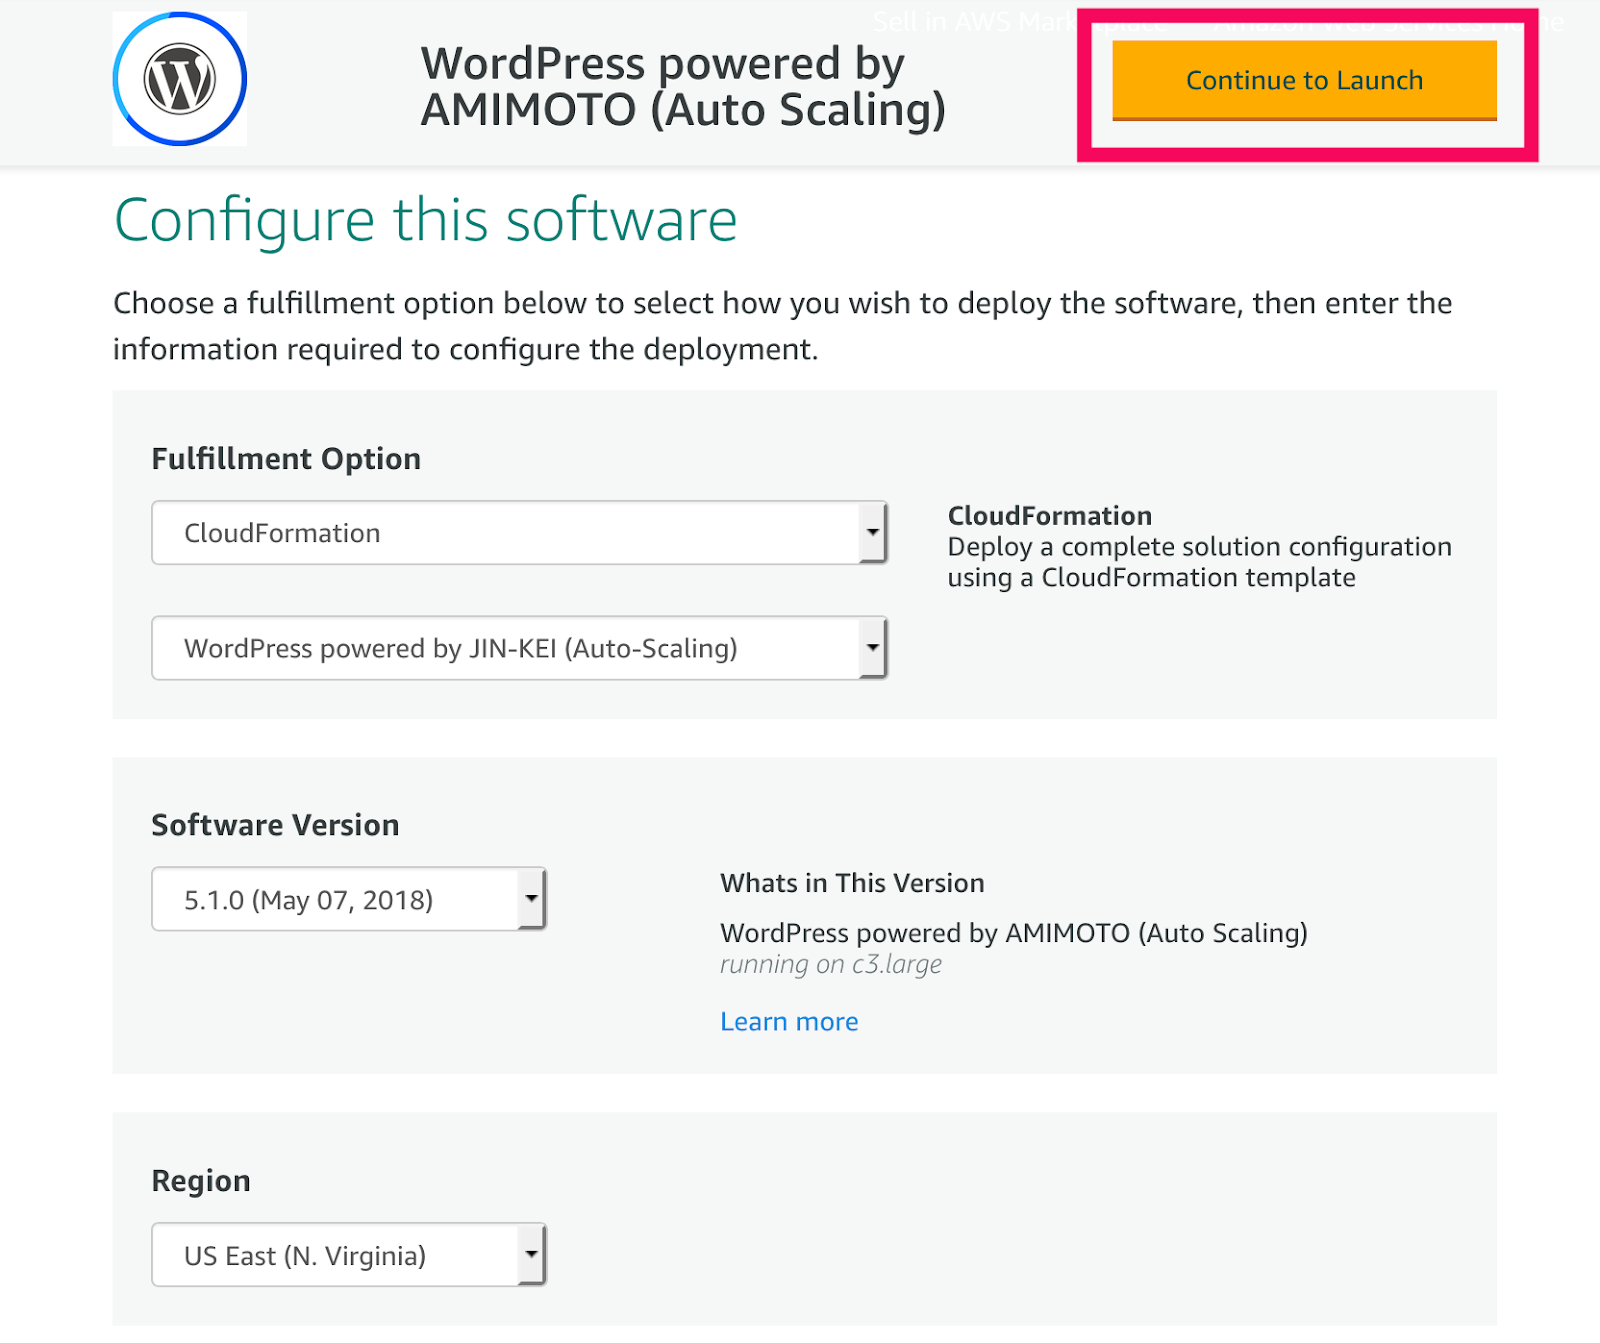
Step 1-4. Choose each pulldown menu.
- Fulfilment Option: [CloudFormation]
- CloudFormation: [WordPress powered by AMIMOTO (Auto Scaling)]
- Software Version: Choose latest (5.1.0 is the latest, on 2018 October)
- Region: Choose your favourite or nearest region from US East (N. Virginia), US West (Oregon), EU (Ireland) and EU (Paris).
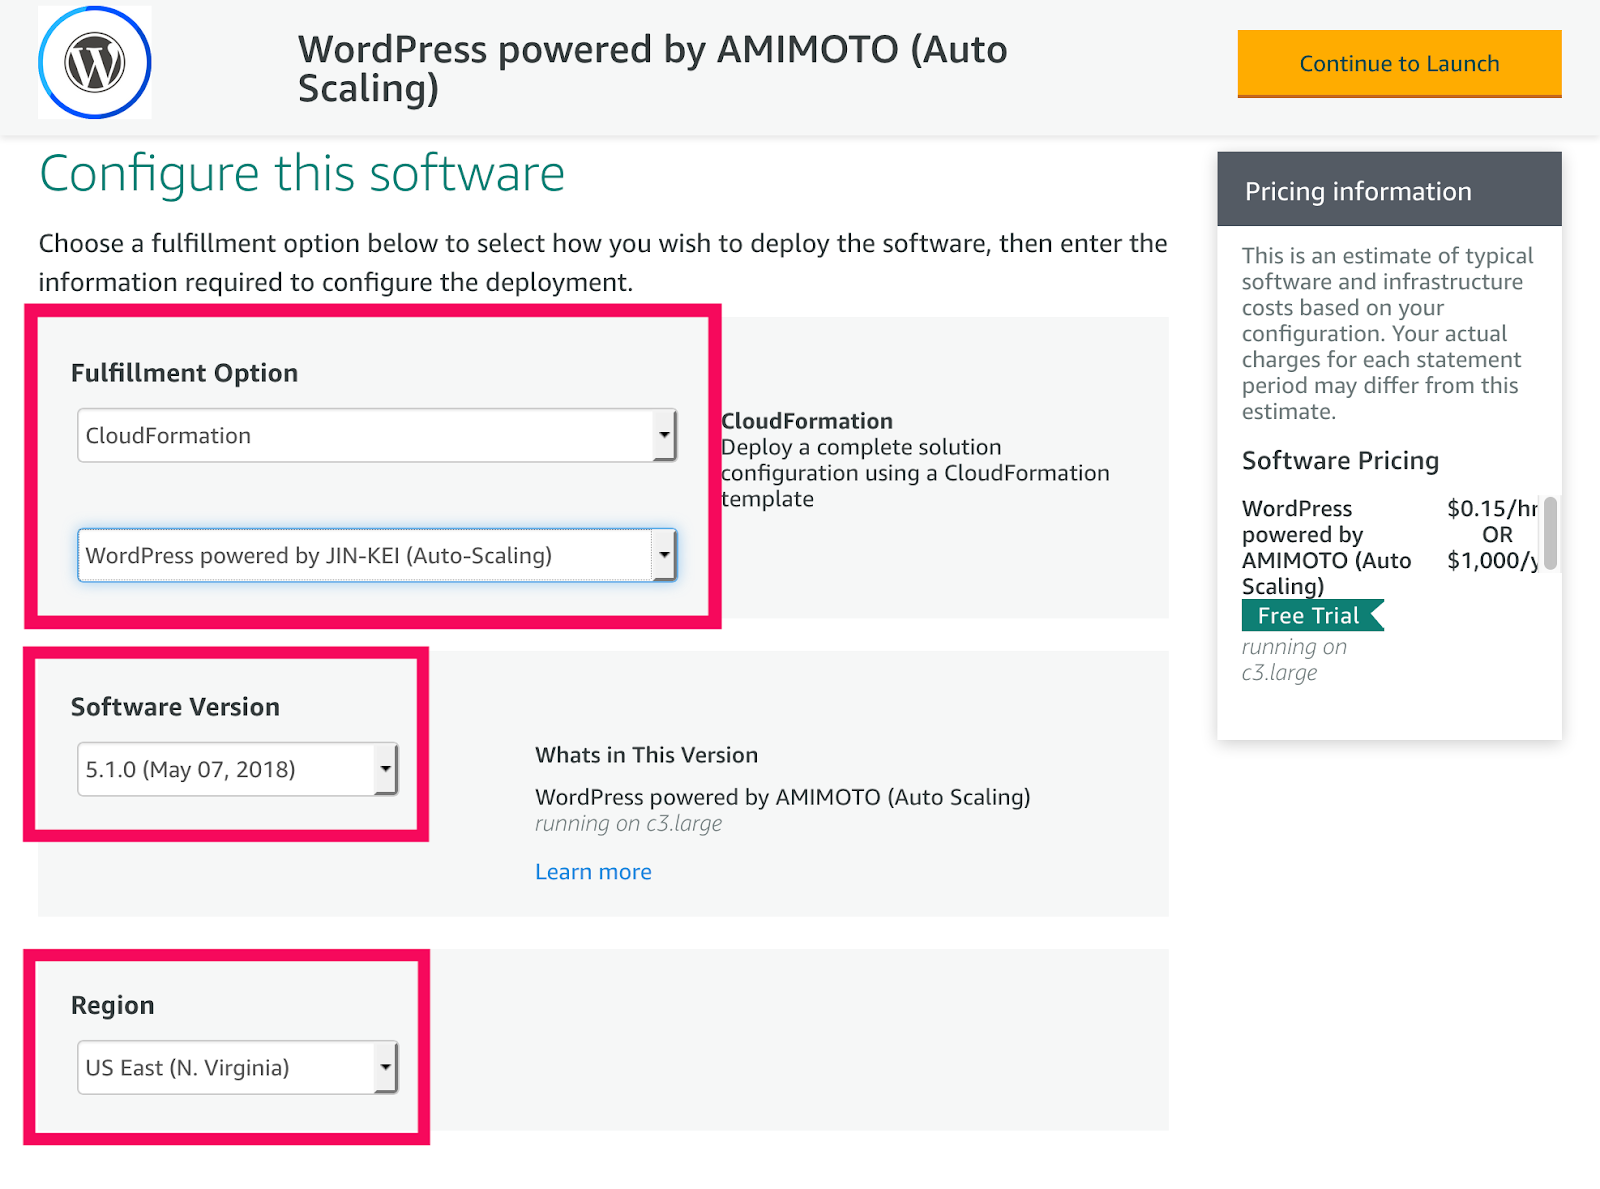
Step 1-5. Then click the top of the right button[Continue to Launch]
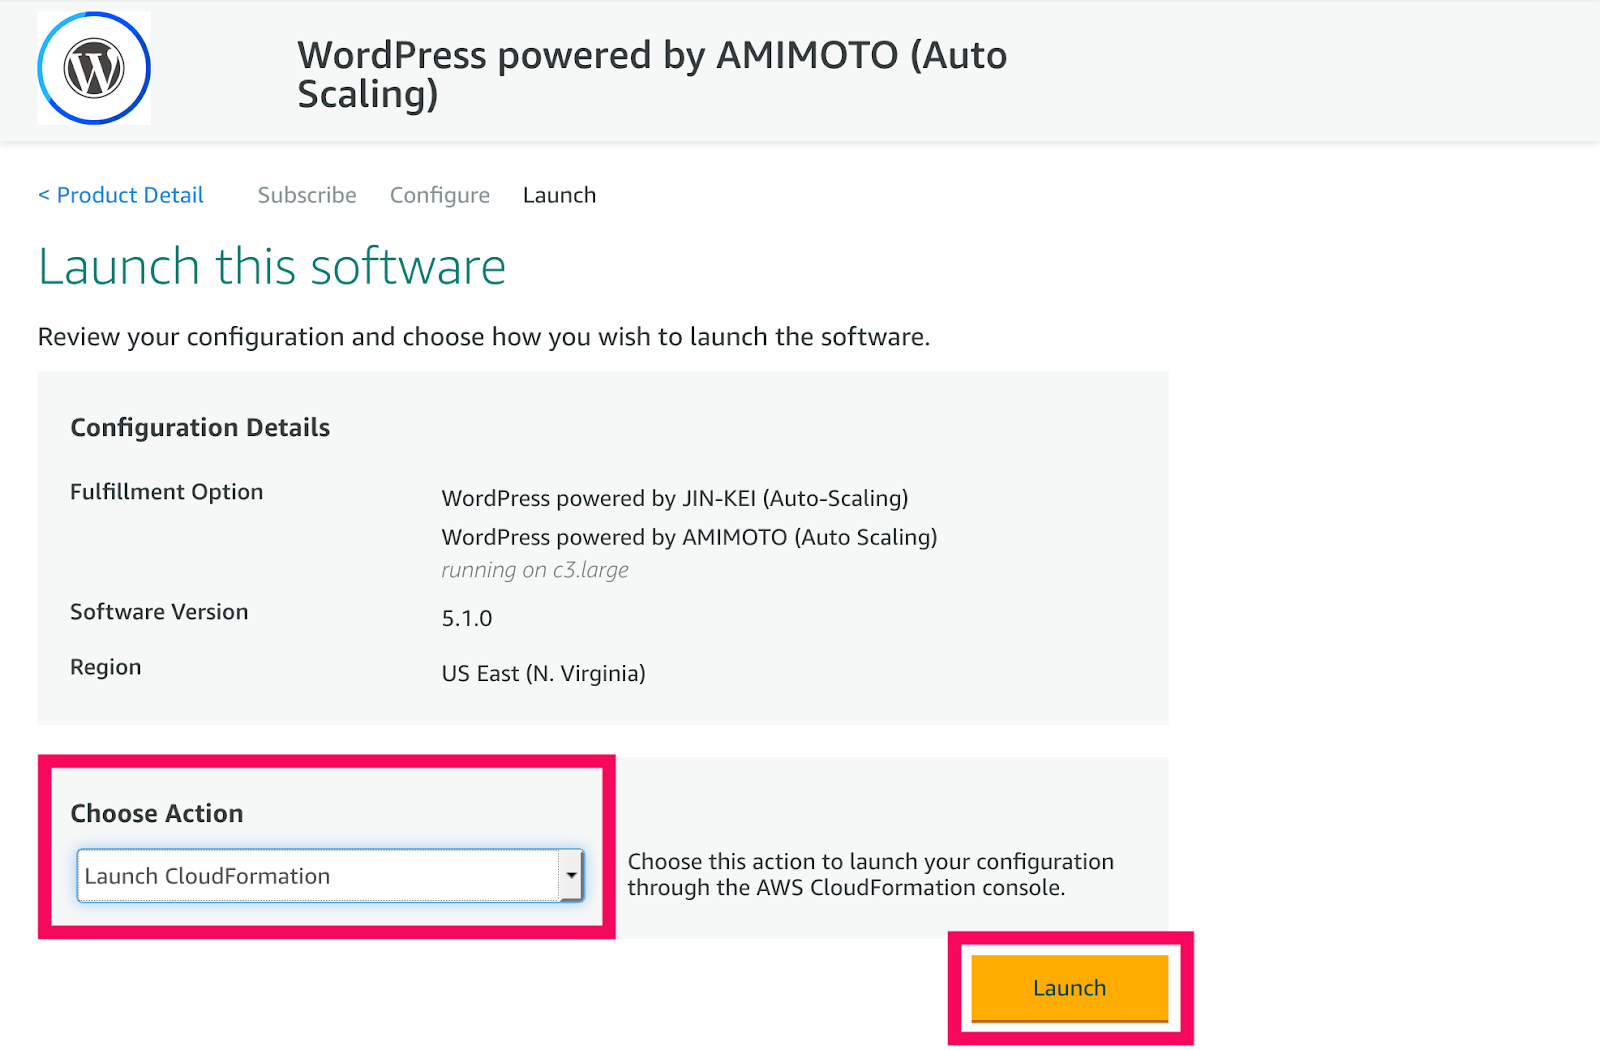
Step 1-6. Select [Launch CloudFormation] in [Choose Action] and click [Launch]
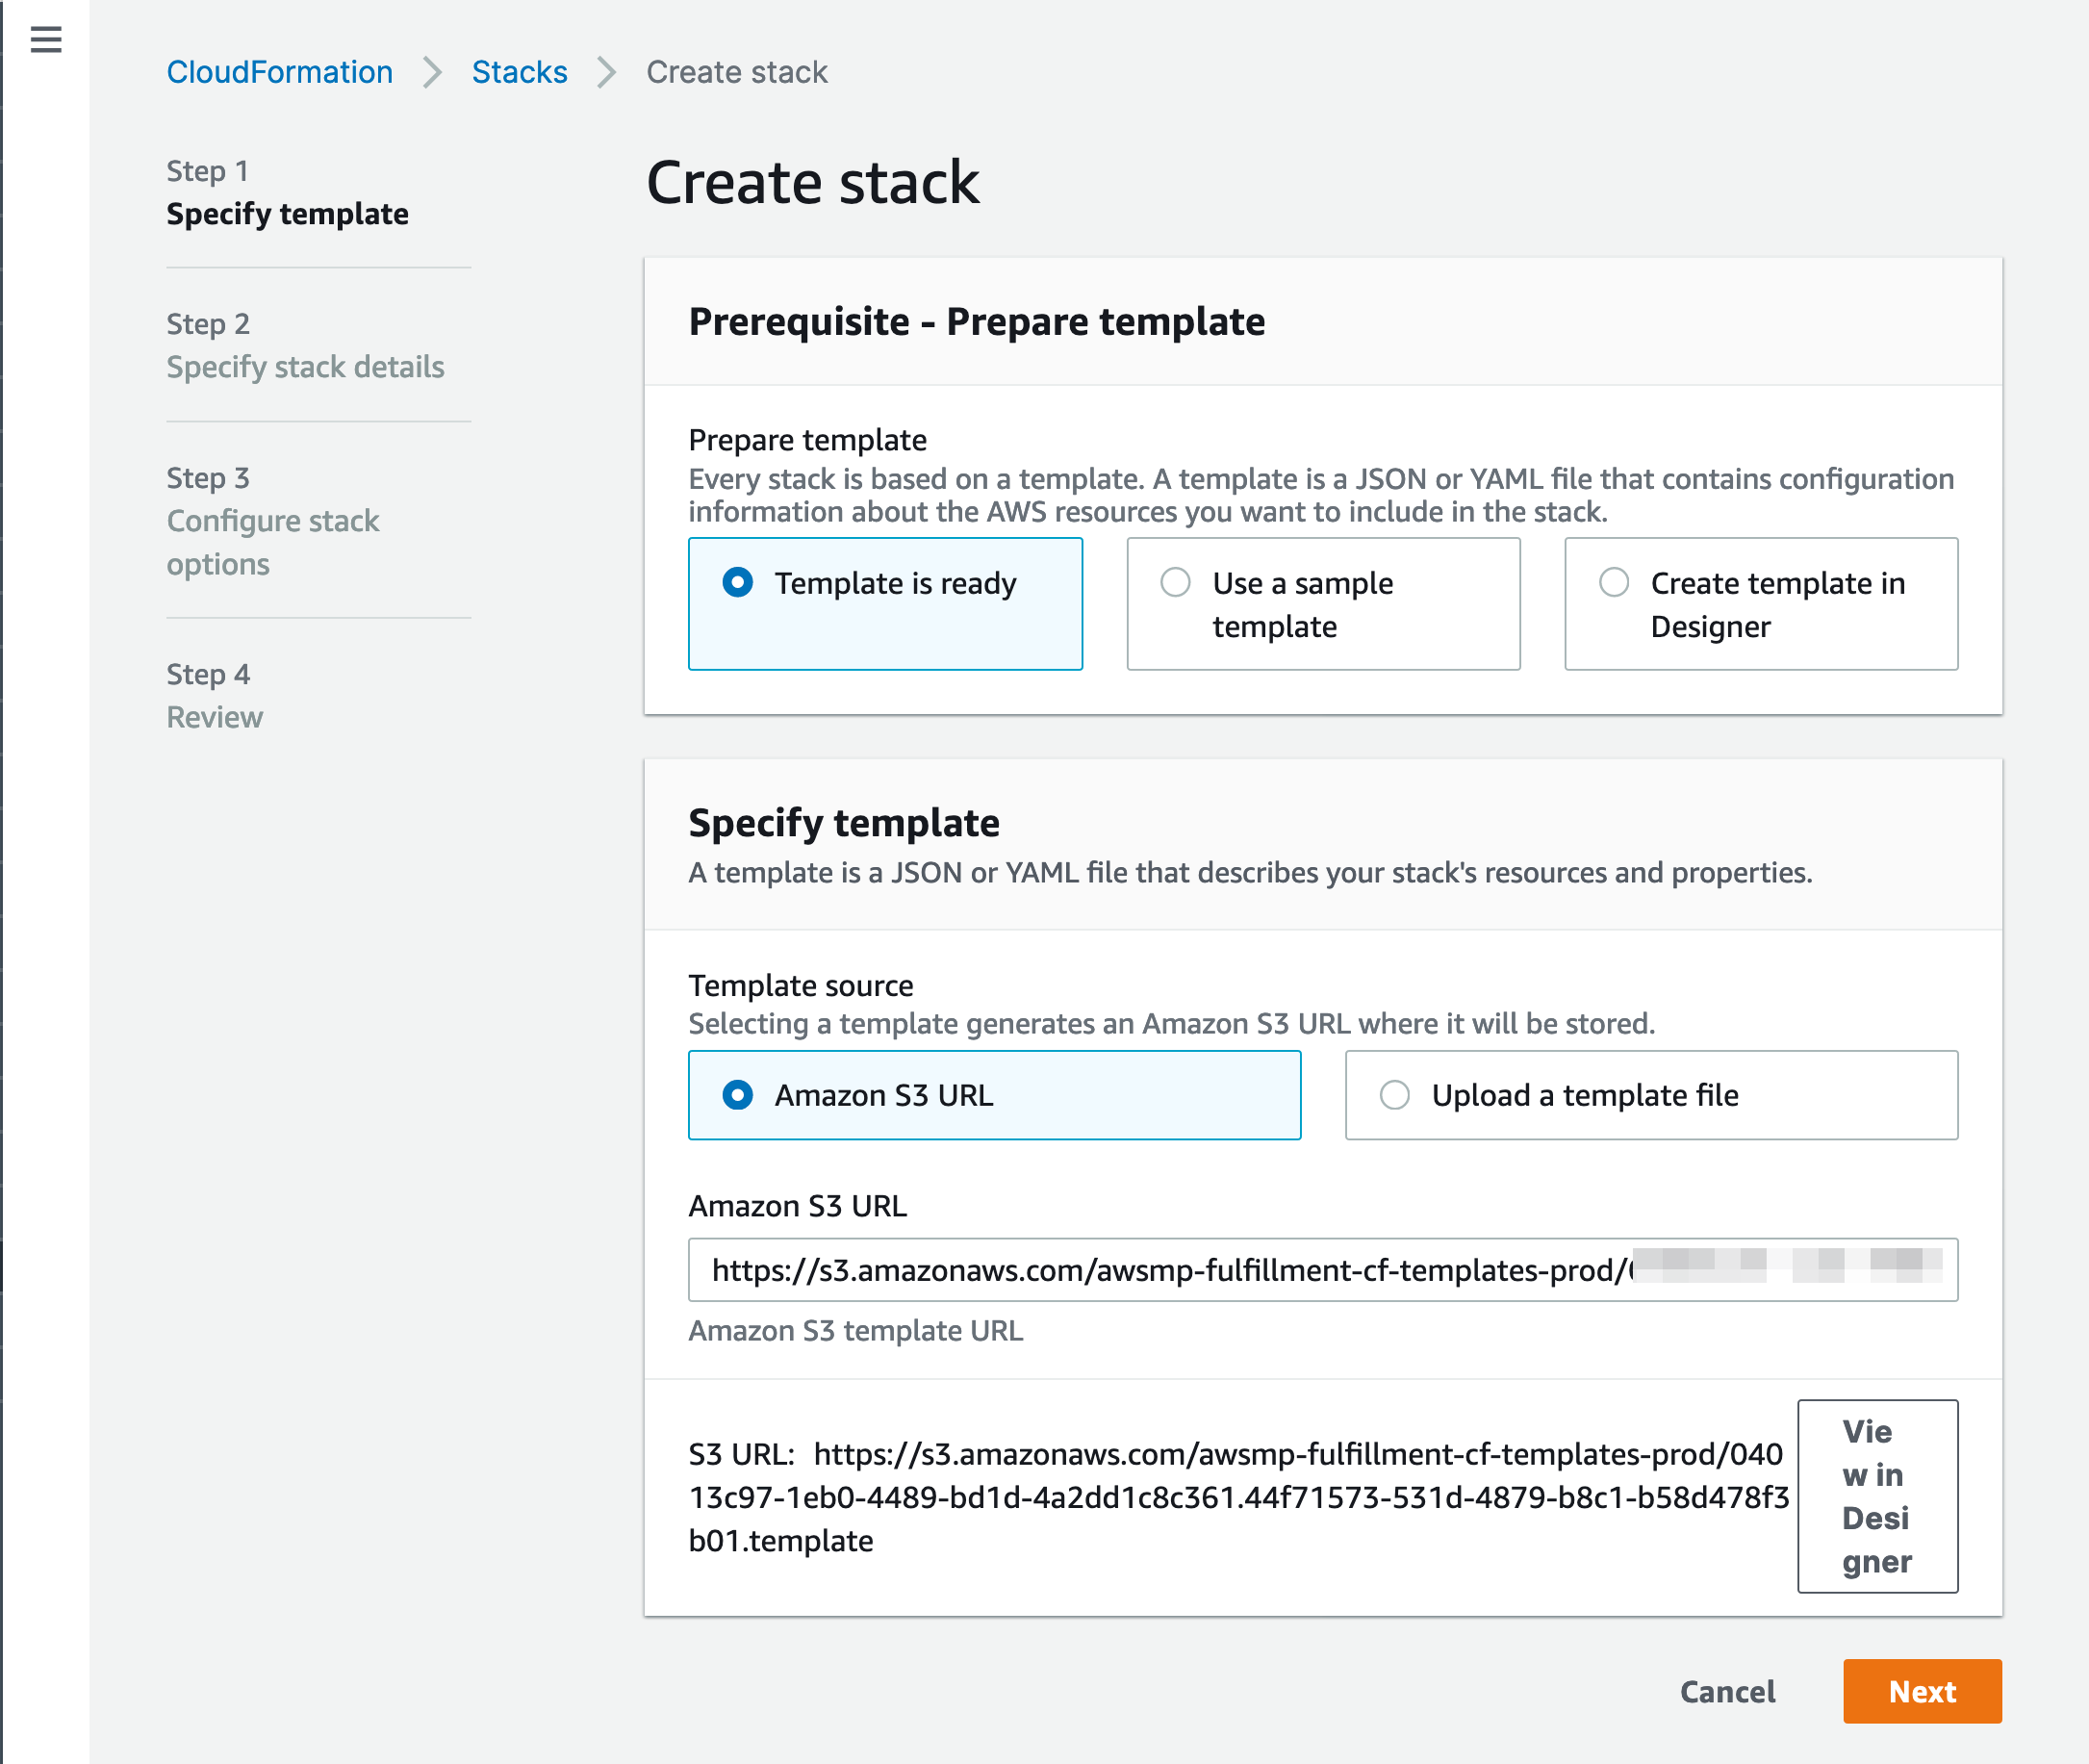
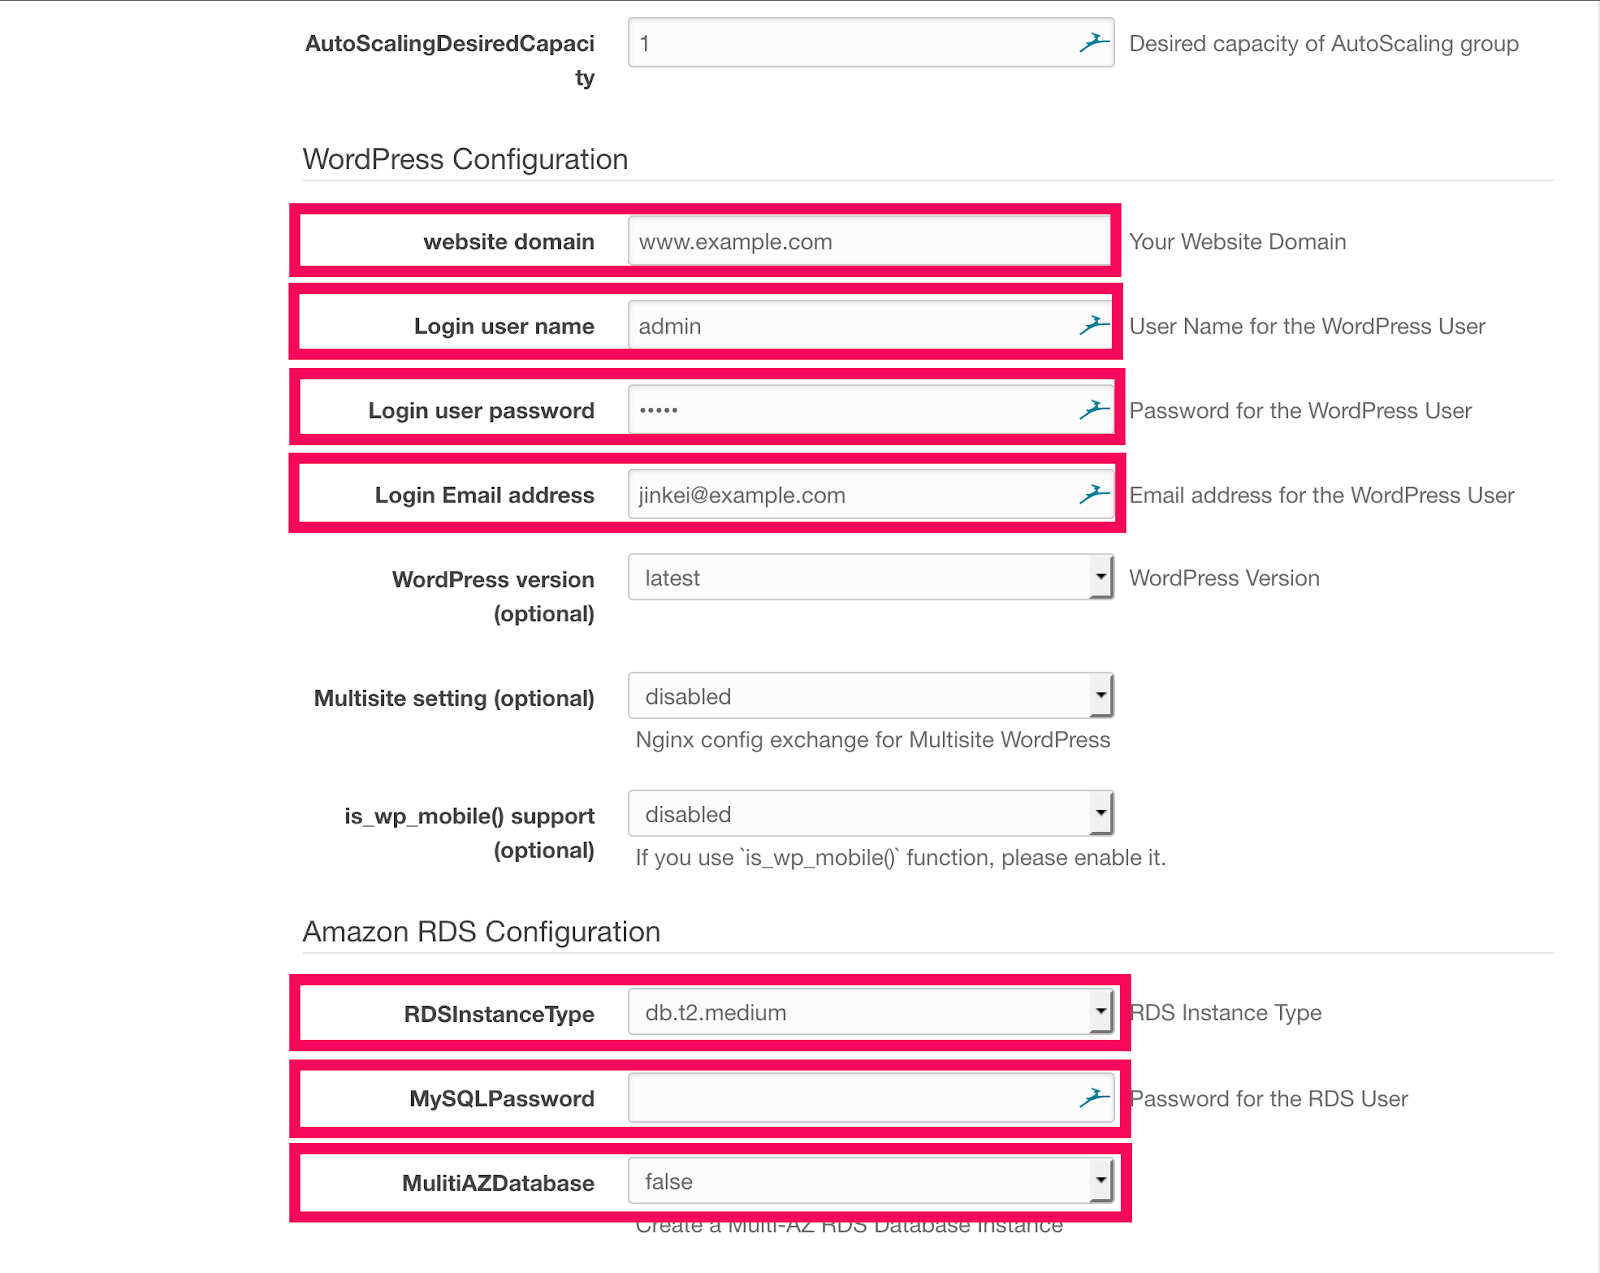
Step 1-7. Create stack section.
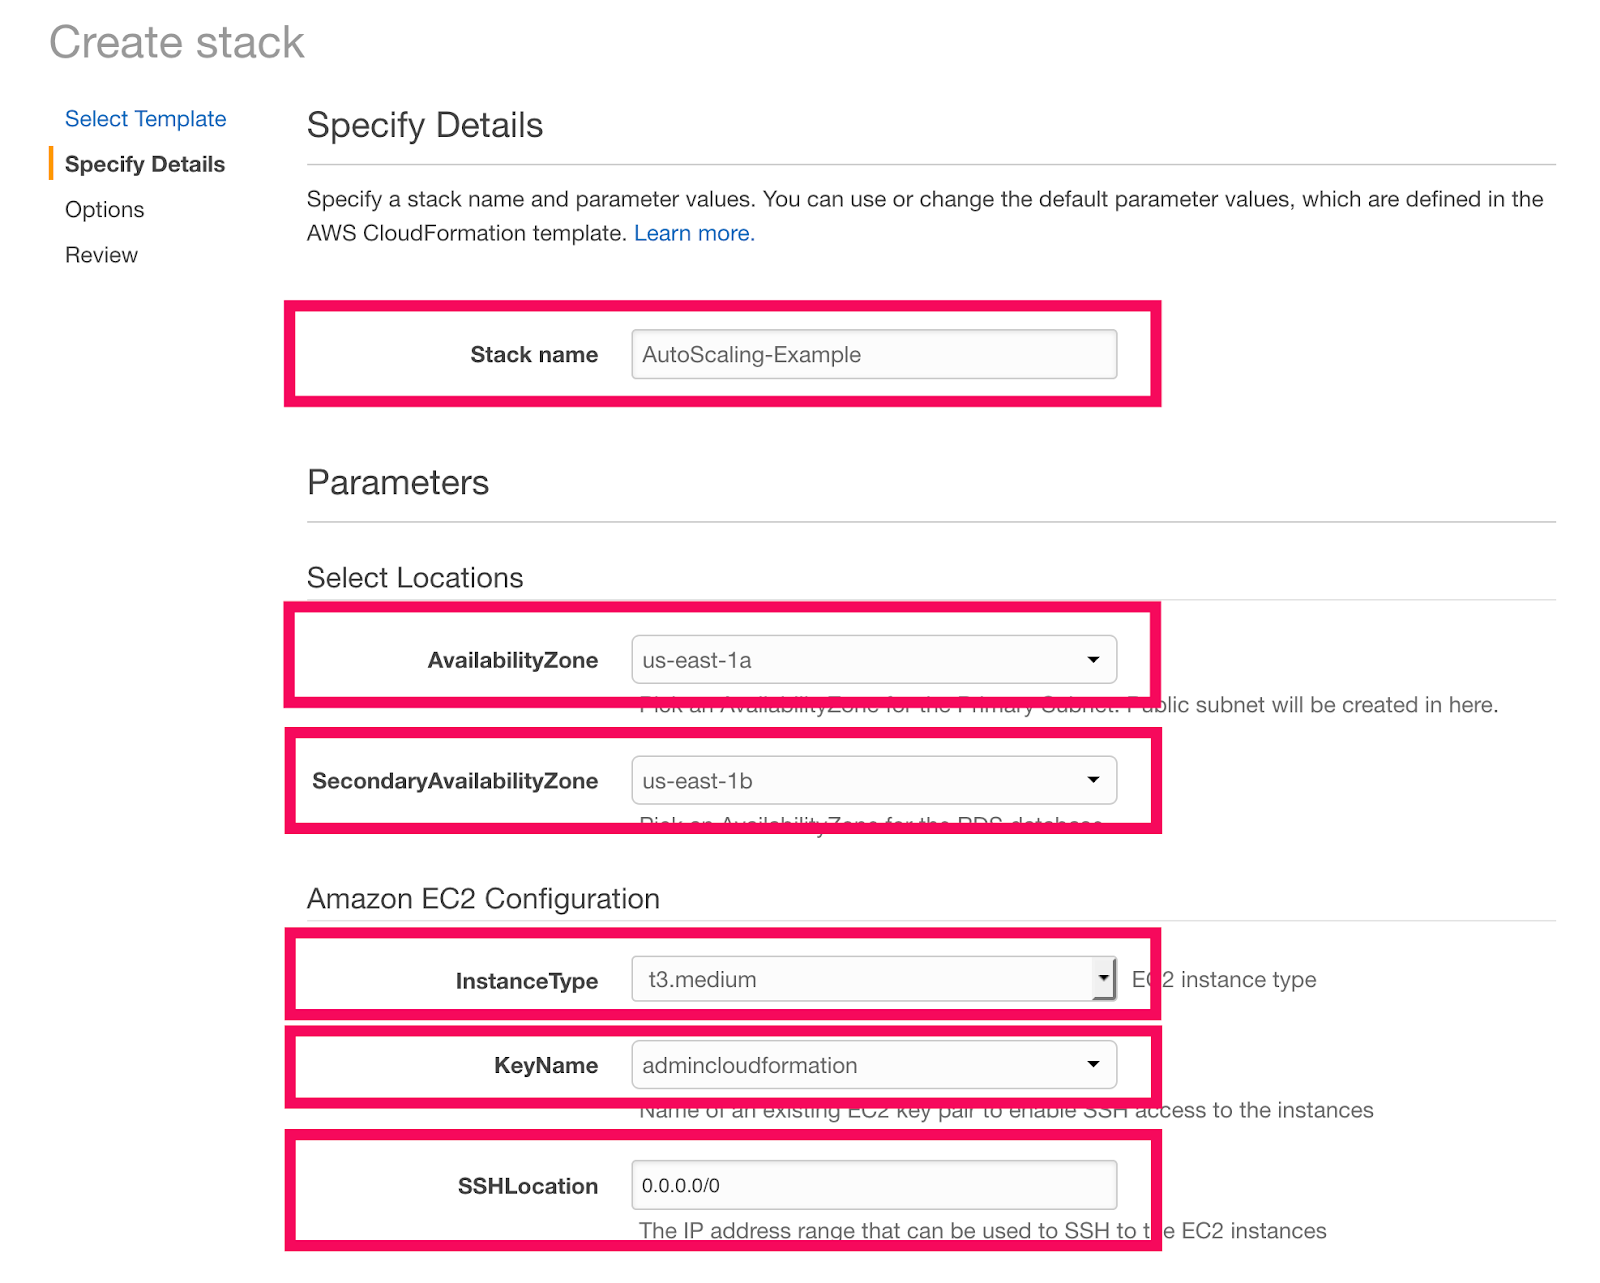
[CloudFormation] Setting up details and parameters then click [Next]
Red rectangles are necessary.
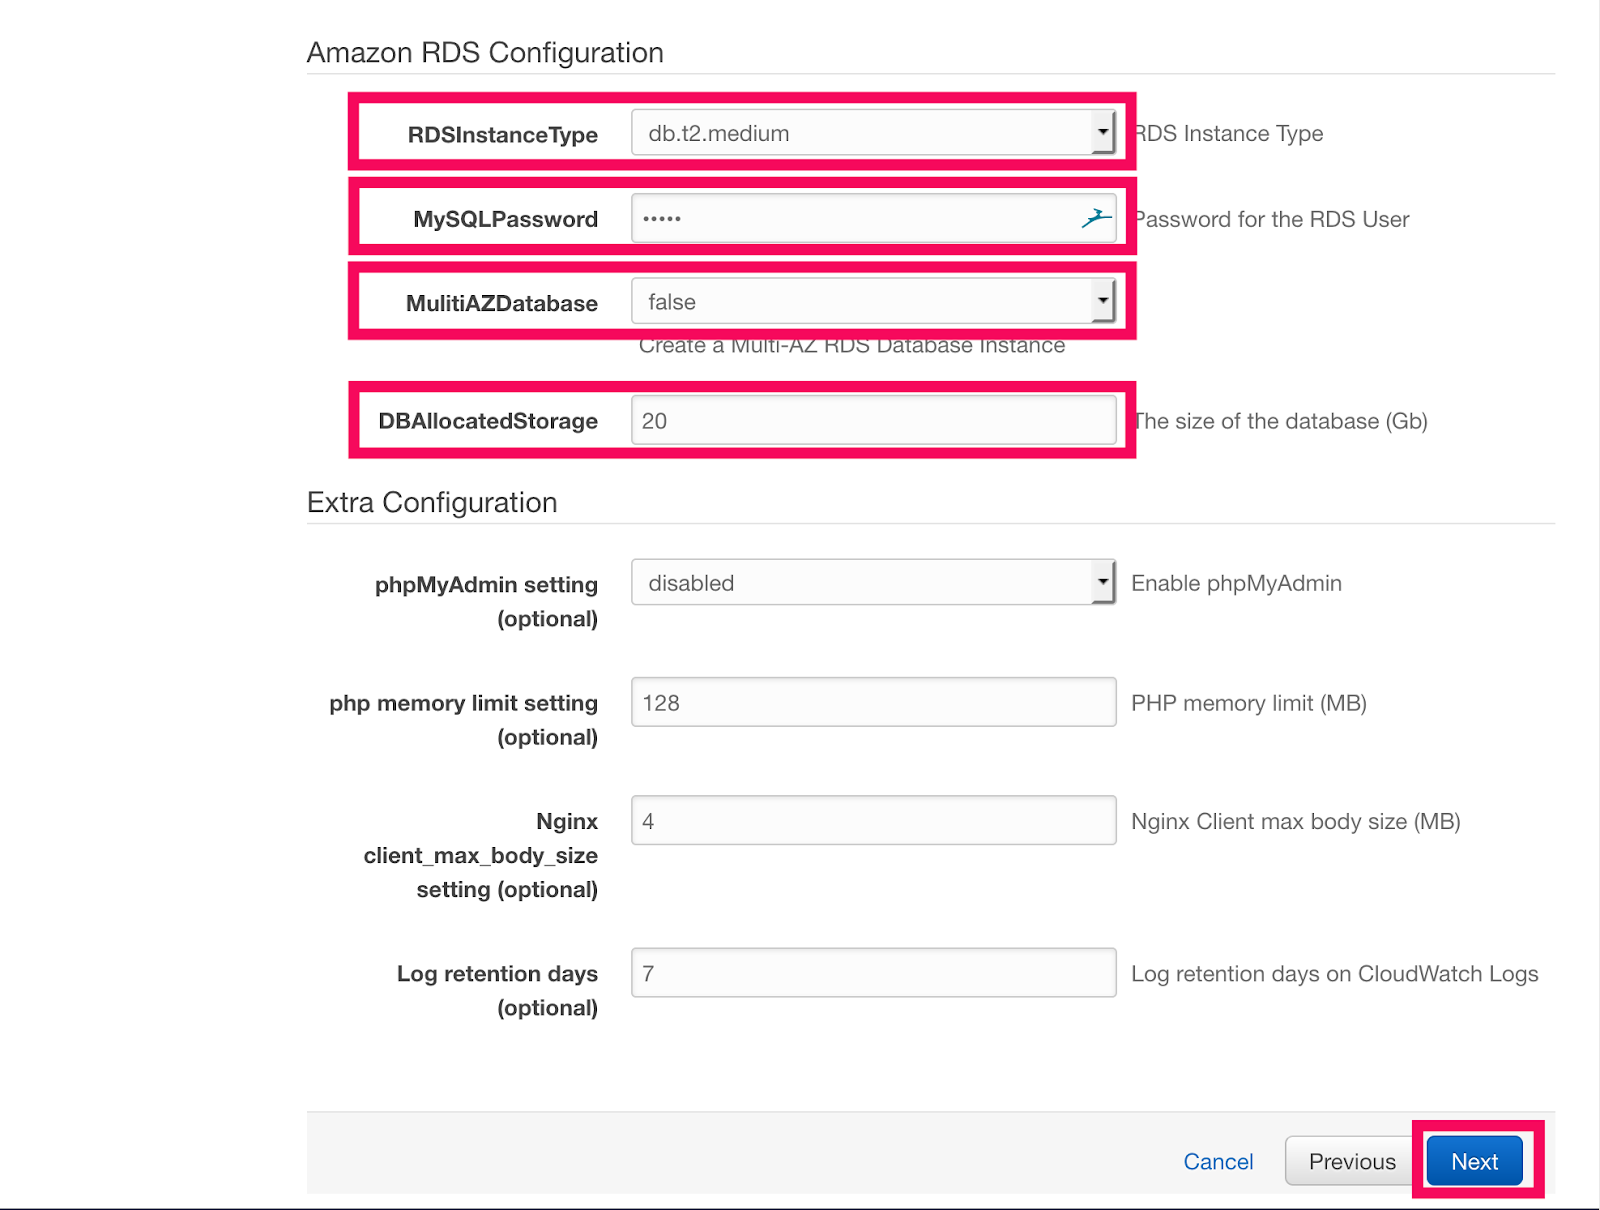
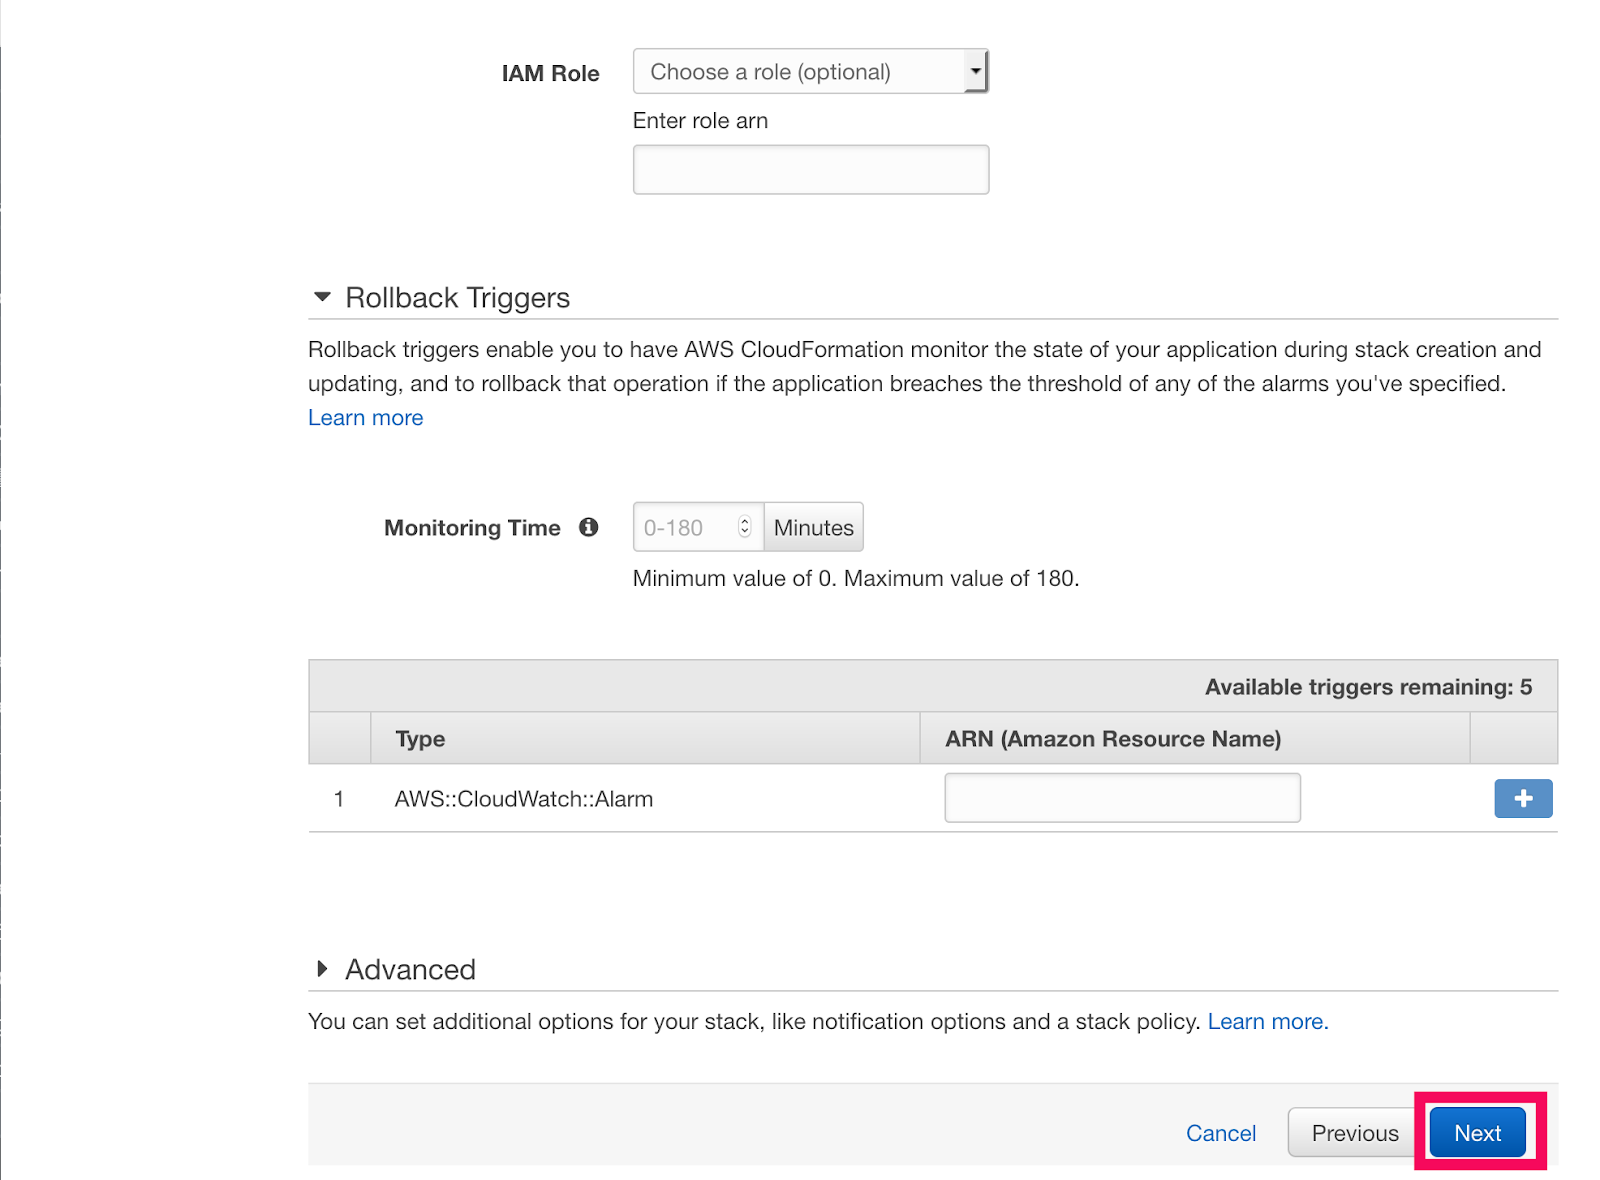
Step 1-8. Click [Next] button on bottom of the page.
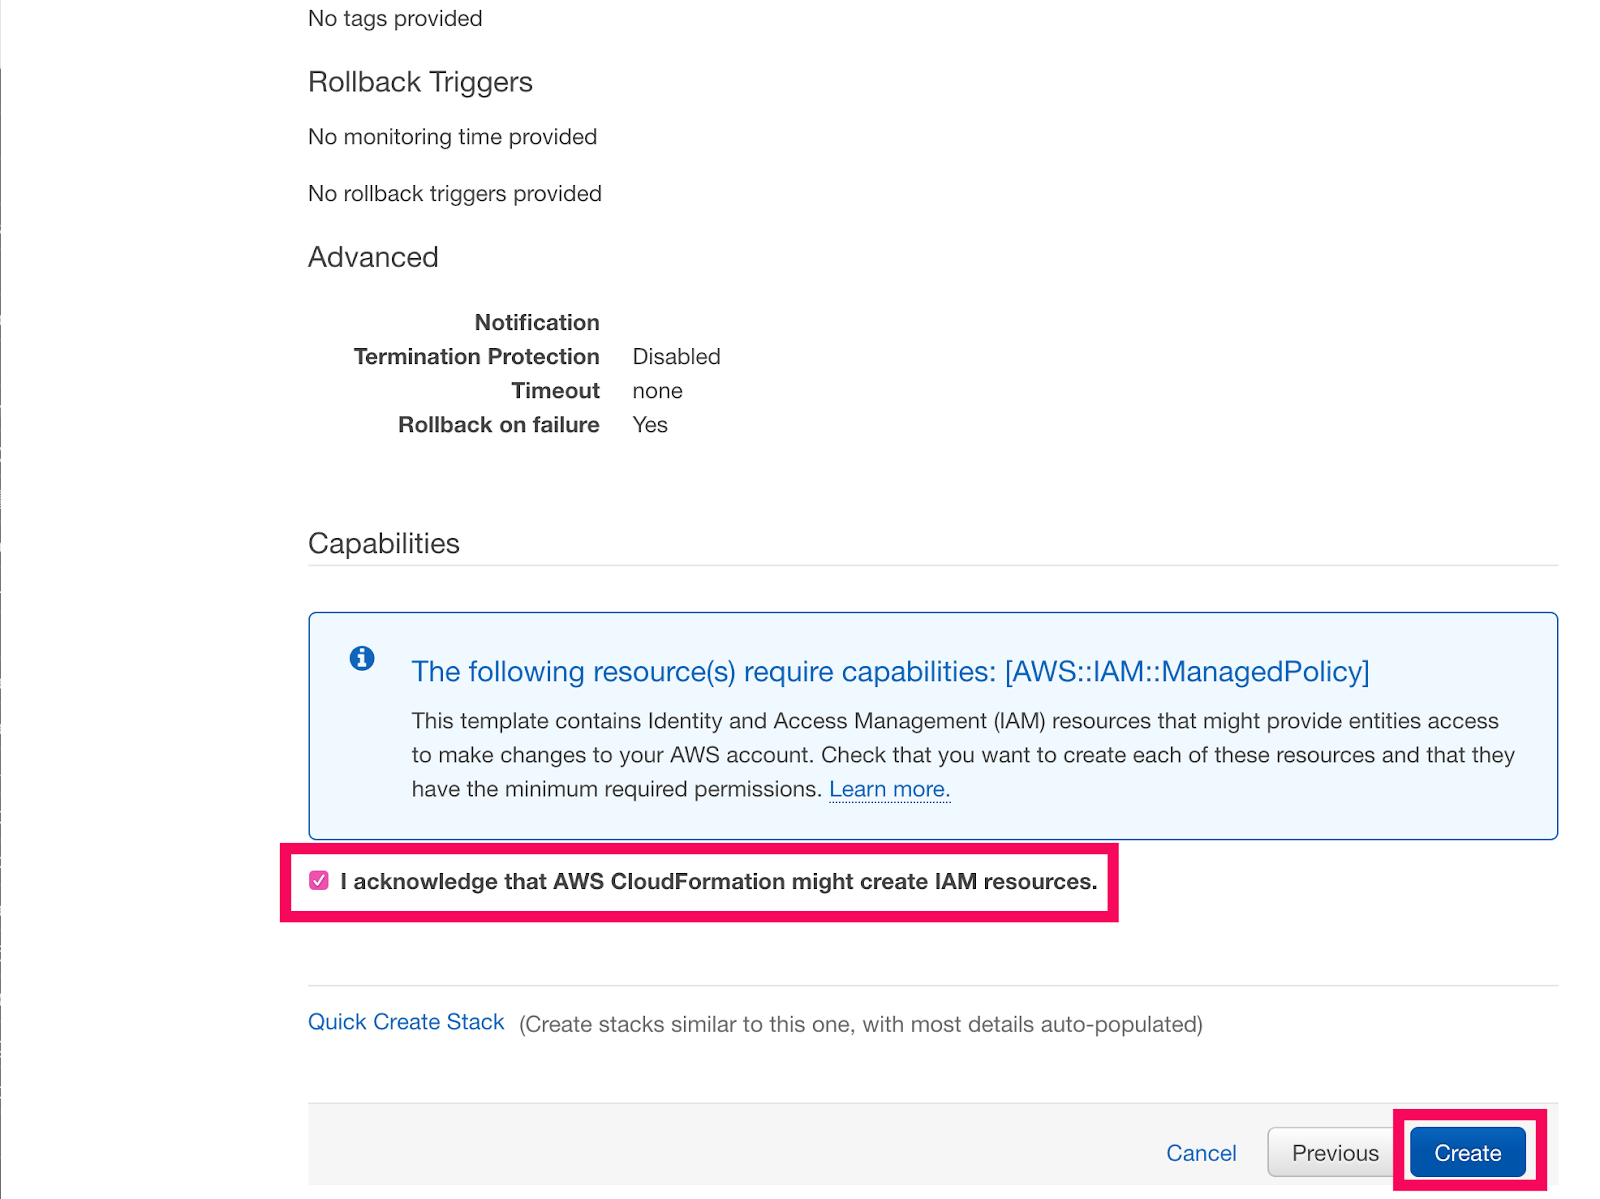
Step 1-9. Check acknowledgement on and click [Create]
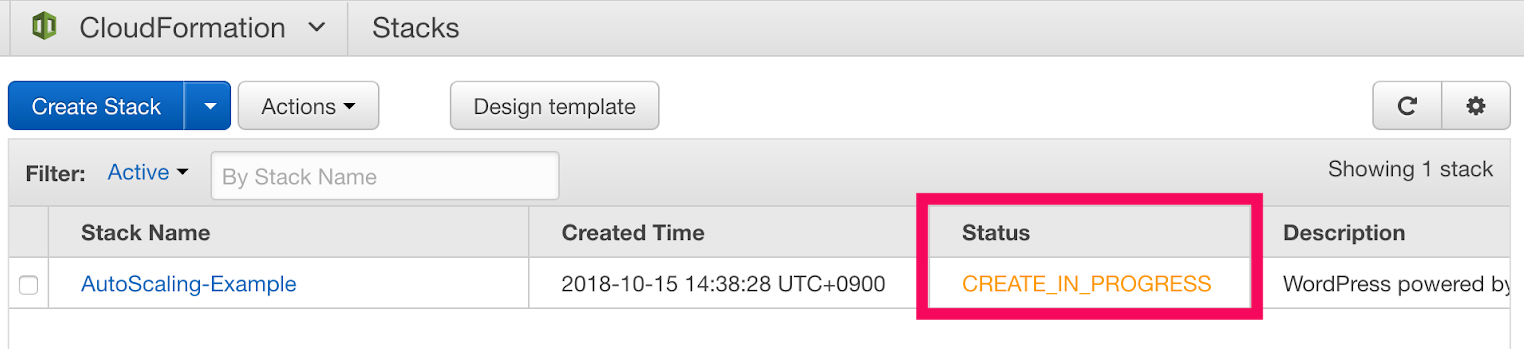
Then Stack creation will be in progress.
The stack is successfully created.
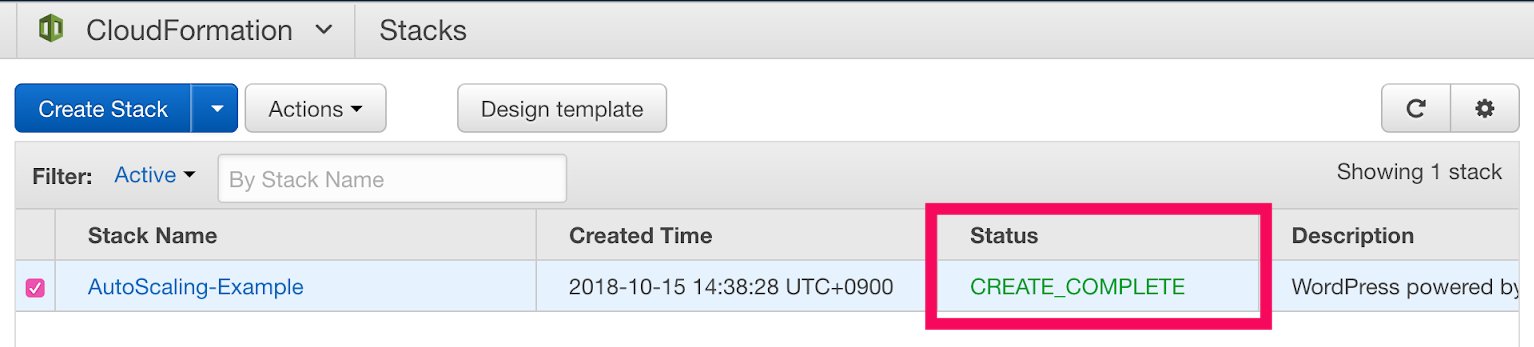
Finally, the Stack is created. Let’s make a SSL digital certificate request on Amazon Certificate Manager in the next step.
Step 2. [ACM] Request SSL digital certificate on ACM (Amazon Certificate Manager) for your domain (www.example.com)
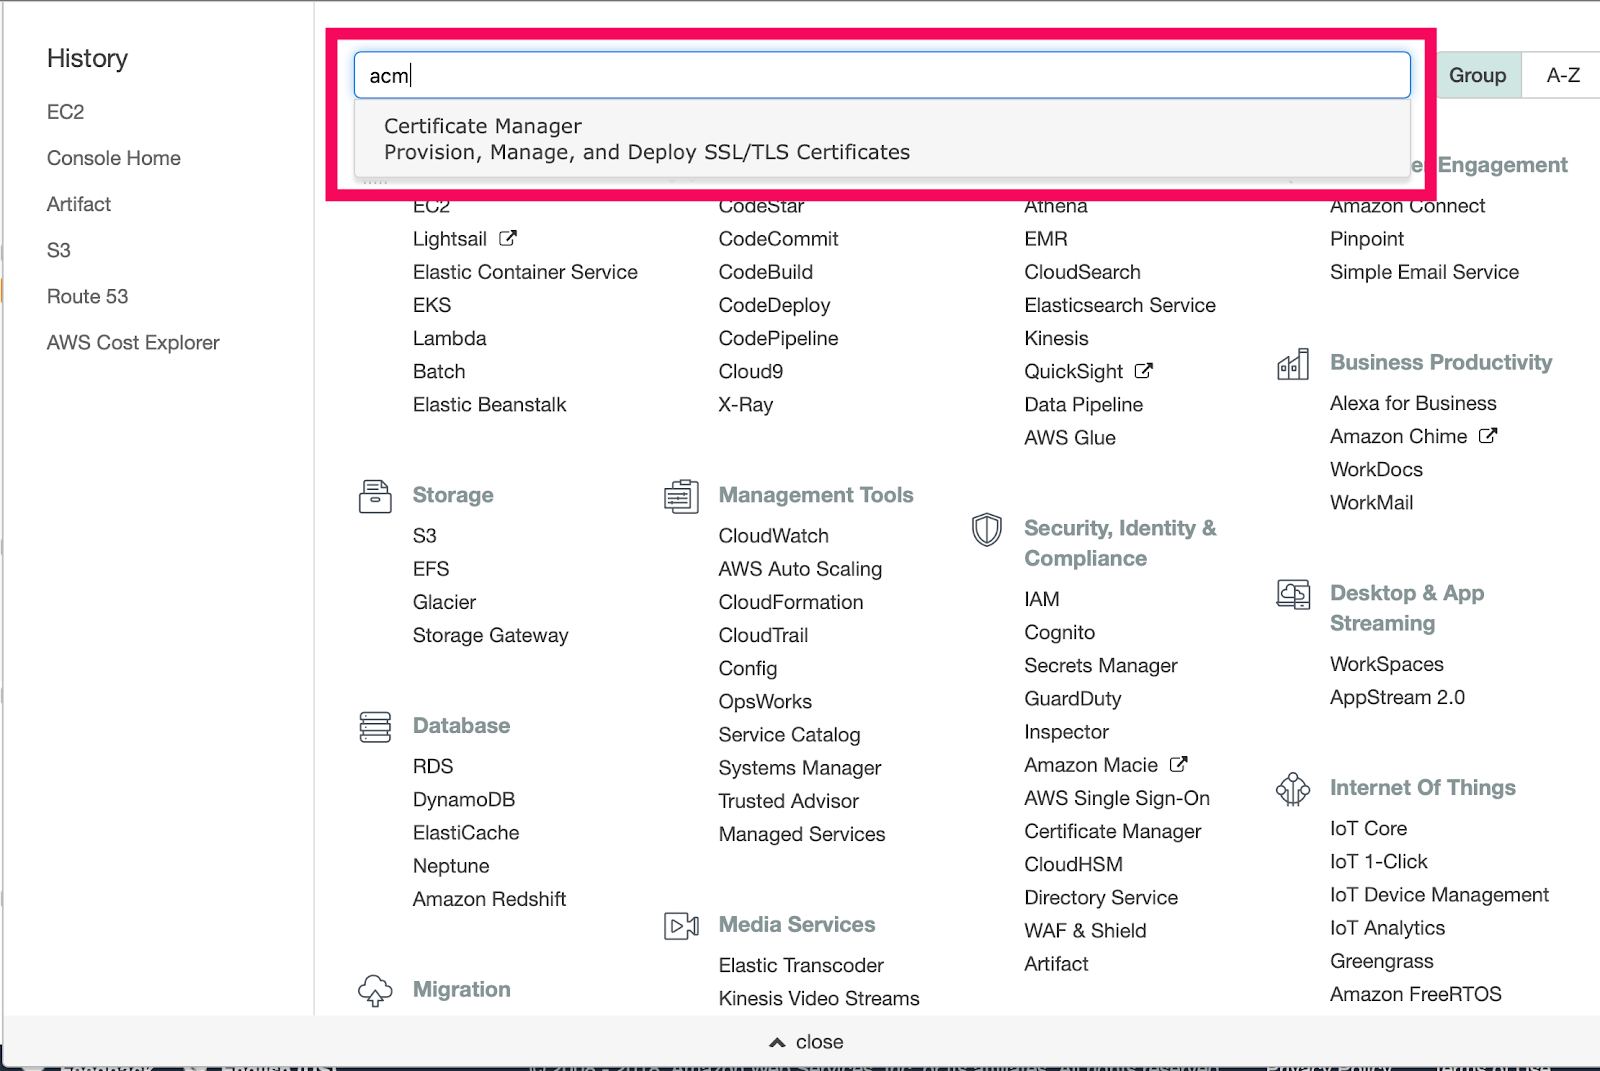
Step 2-1. Navigate to Certificate Manager
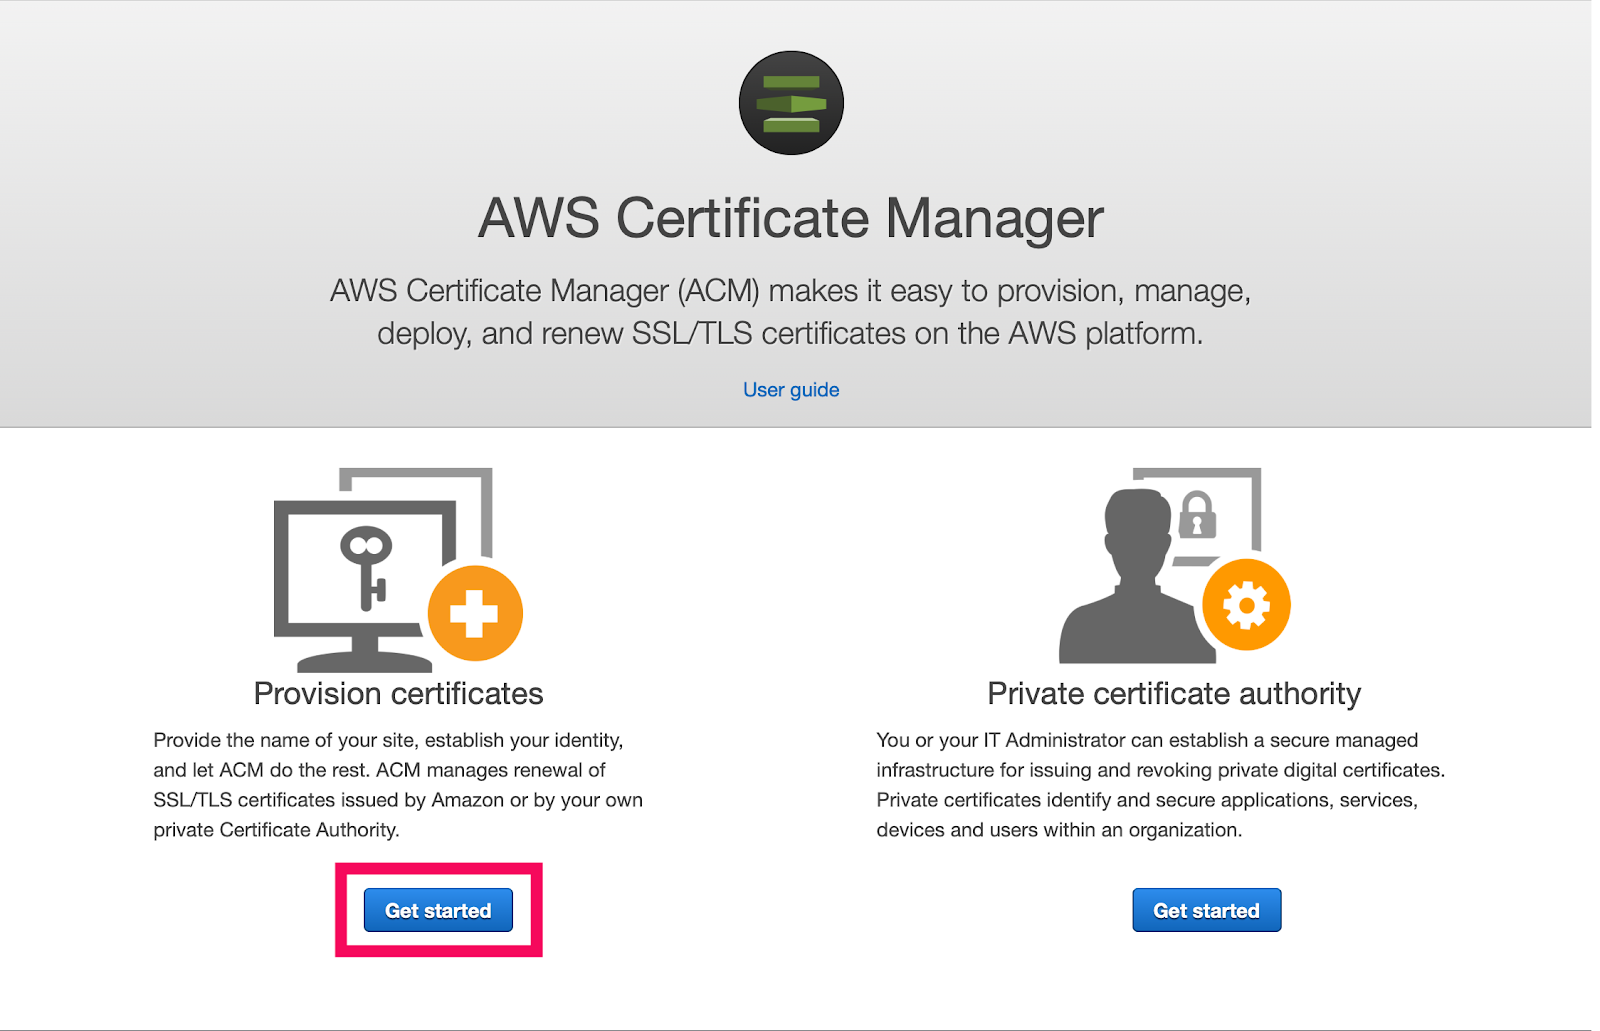
Step 2-2. Click [Get started]
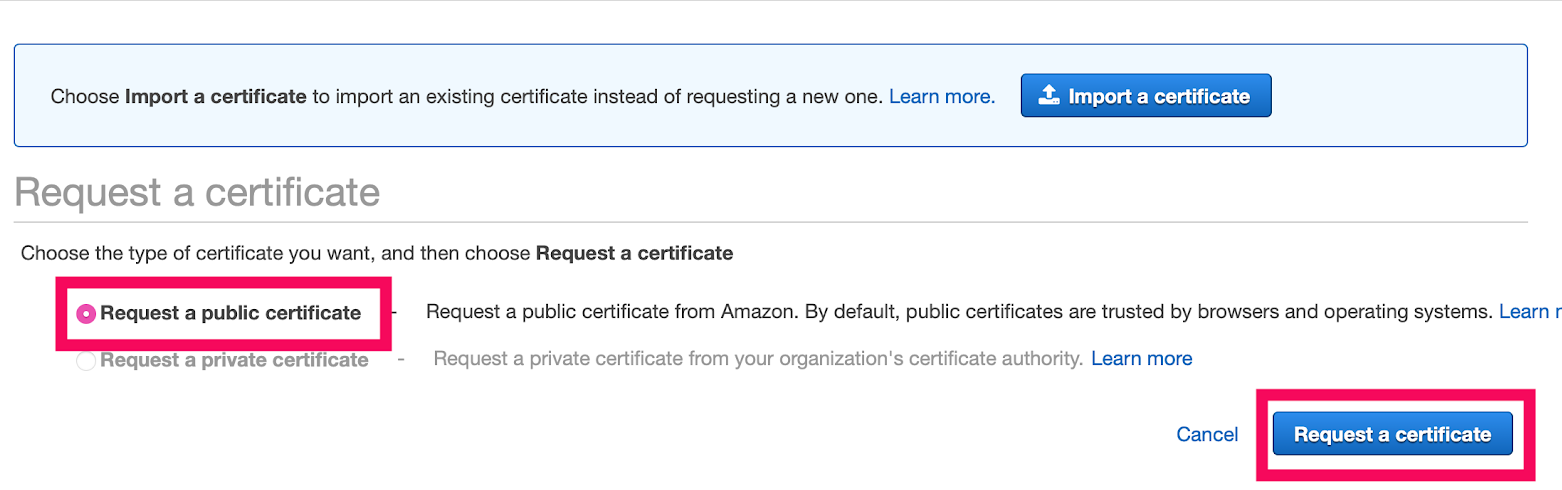
Step 2-3. Choose [Request a public certificate], then click [Request a certificate]
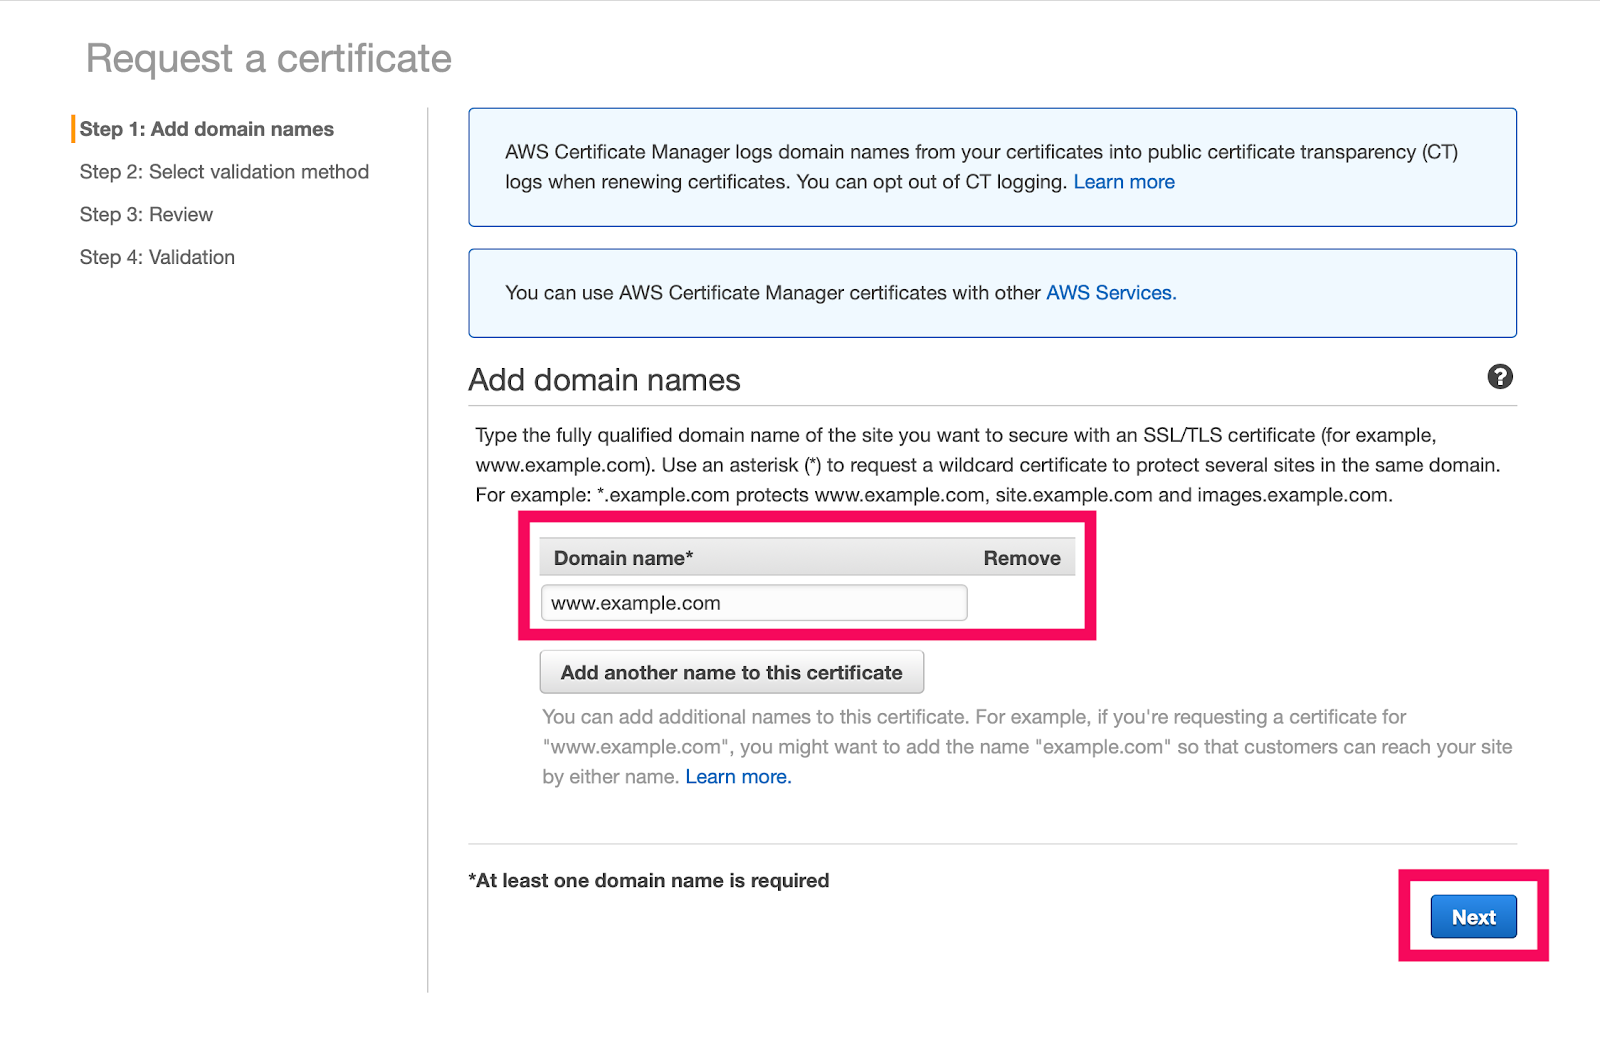
Step 2-4. Input your domain name to input area, then click [Next].
In this document www.example.com is set to a sample.
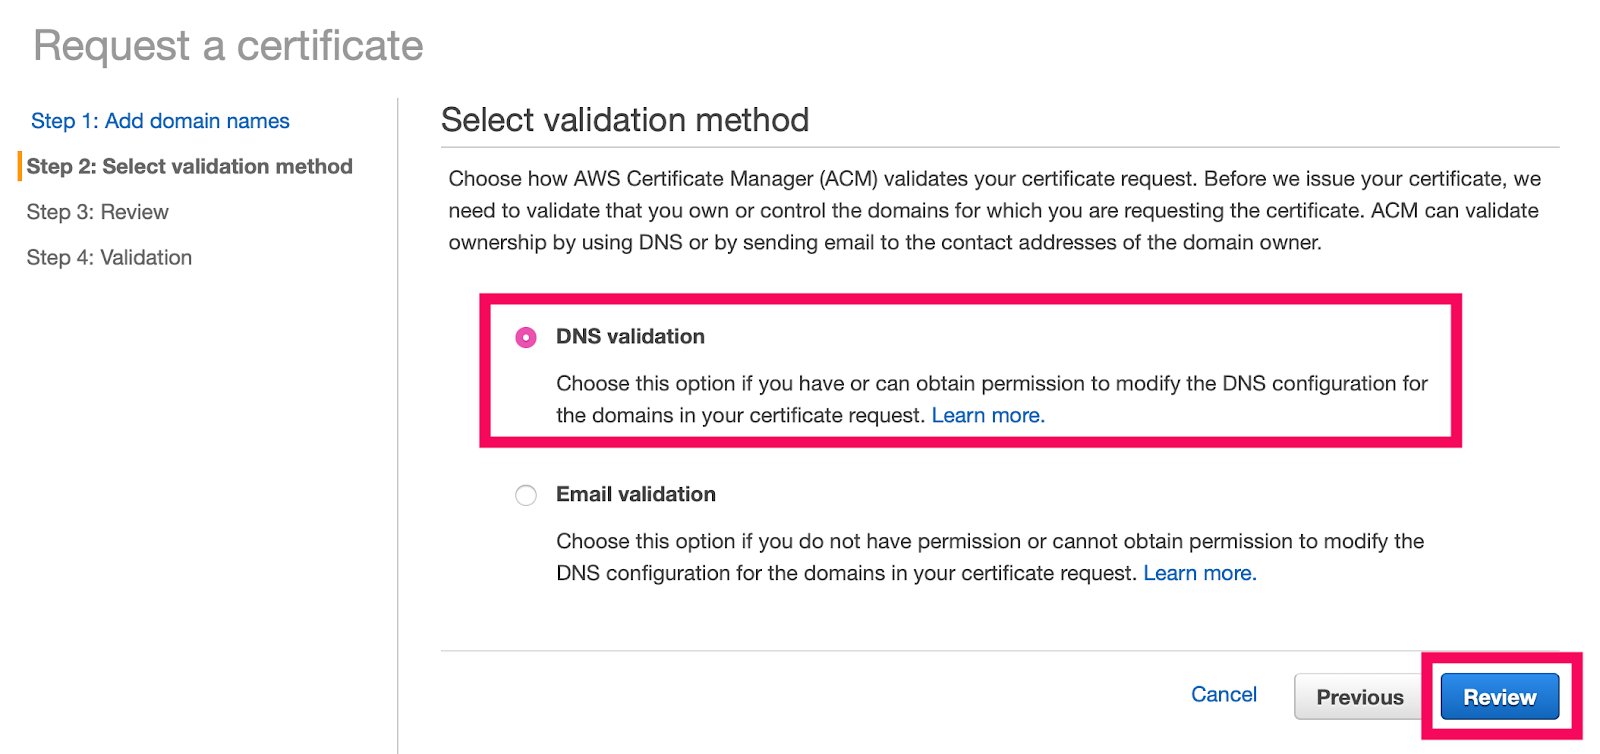
Step 2-5. Select [DNS validation] then click [Review]
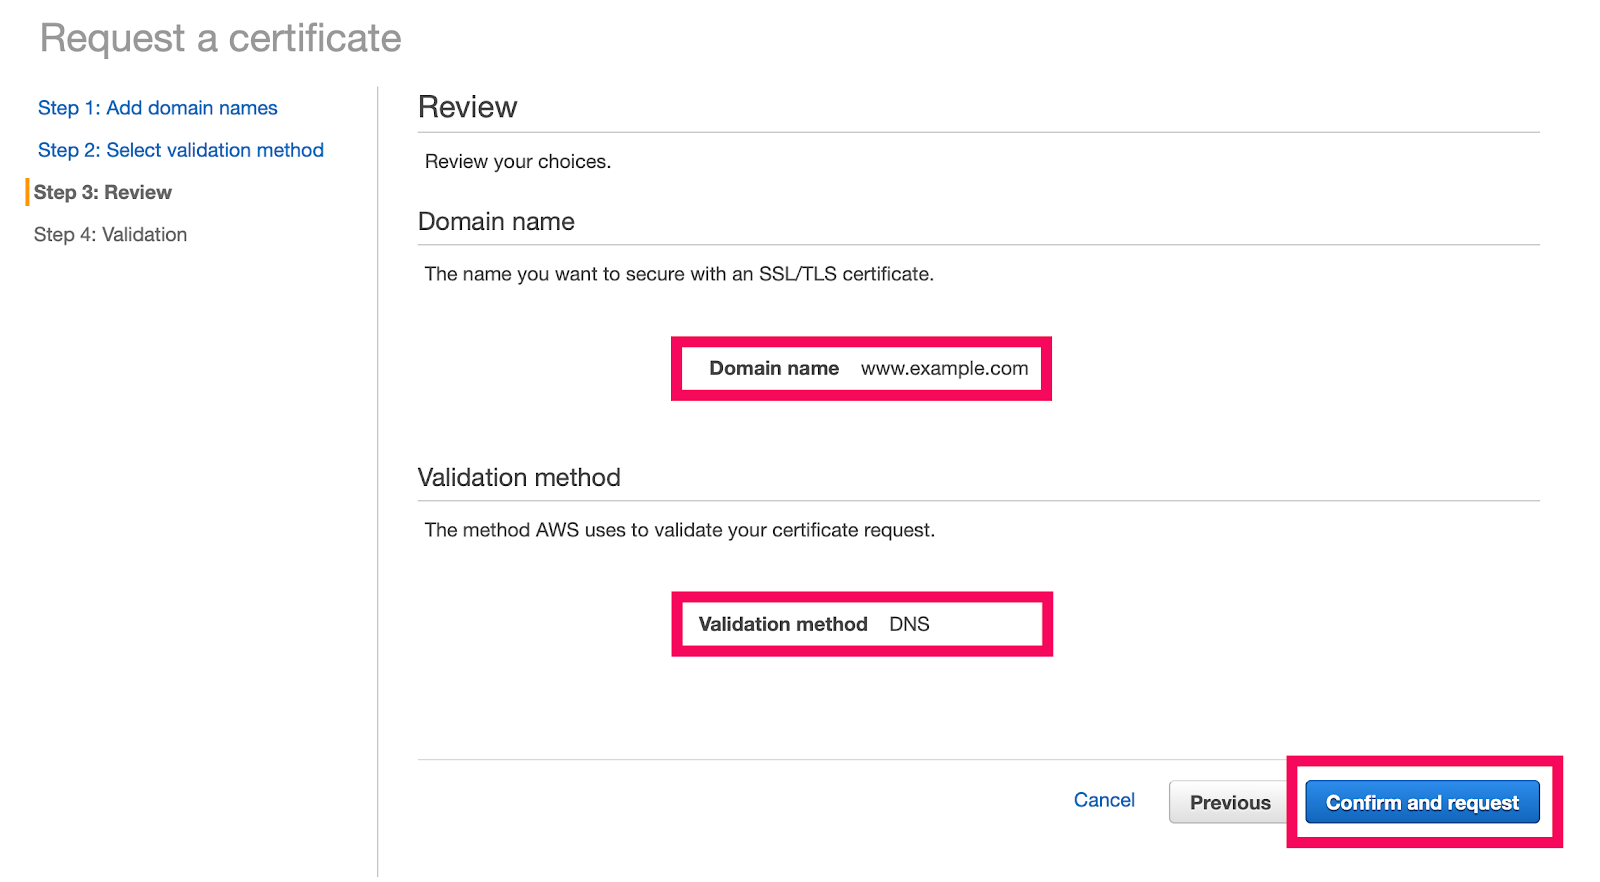
Step 2-6. Review and confirm request
Click [Confirm and request]
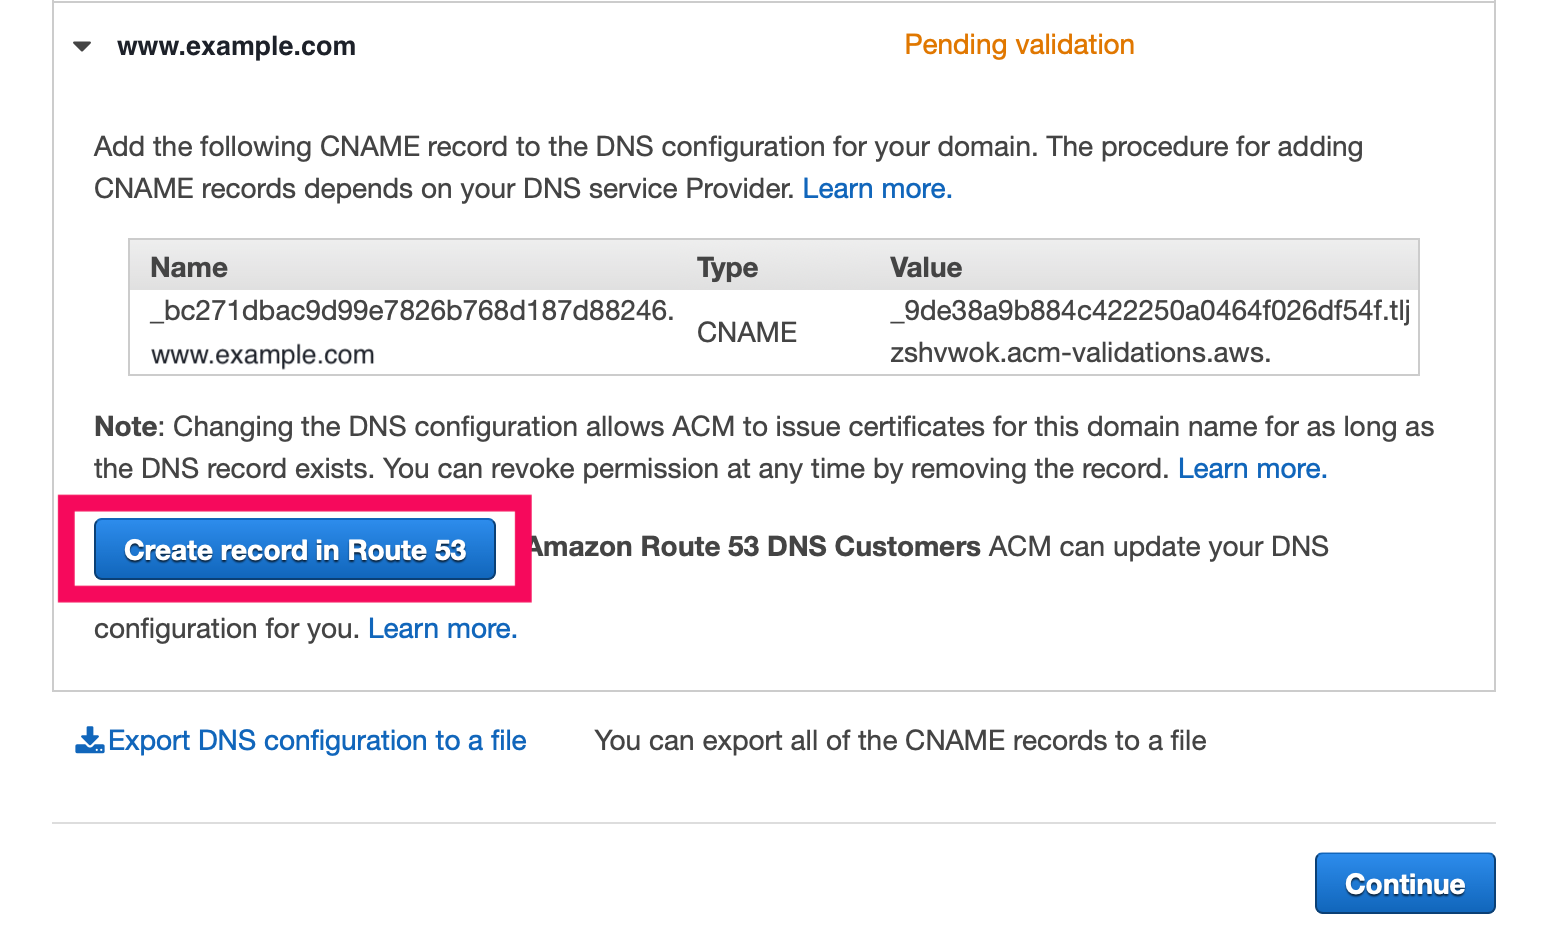
Step 2-7. Let’s add validation record to Route 53.
Click your domain name (www.example.com) then click [Create record in Route 53]
It’ll create a record to Route 53 on our AWS account.
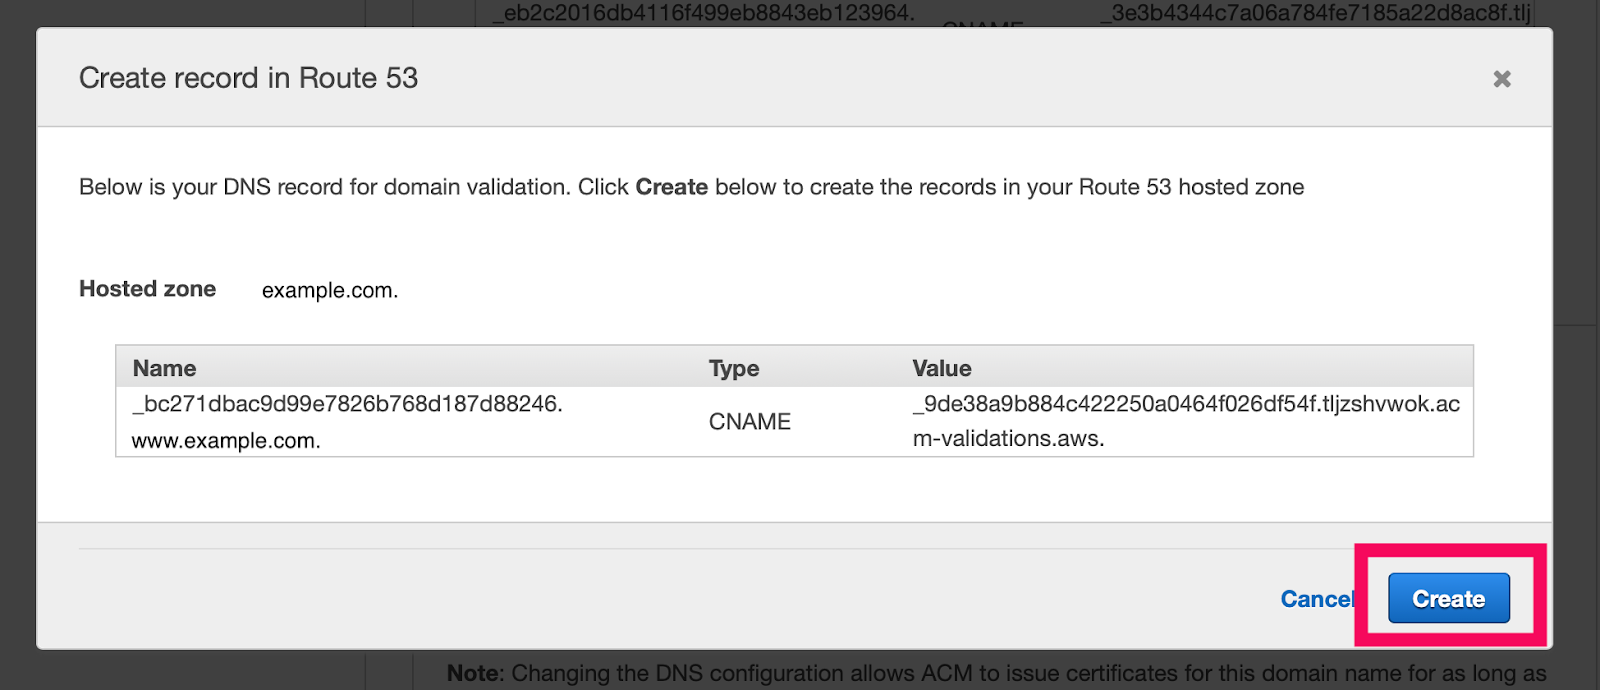
Step 2-8. Click [Create] to create validation record.
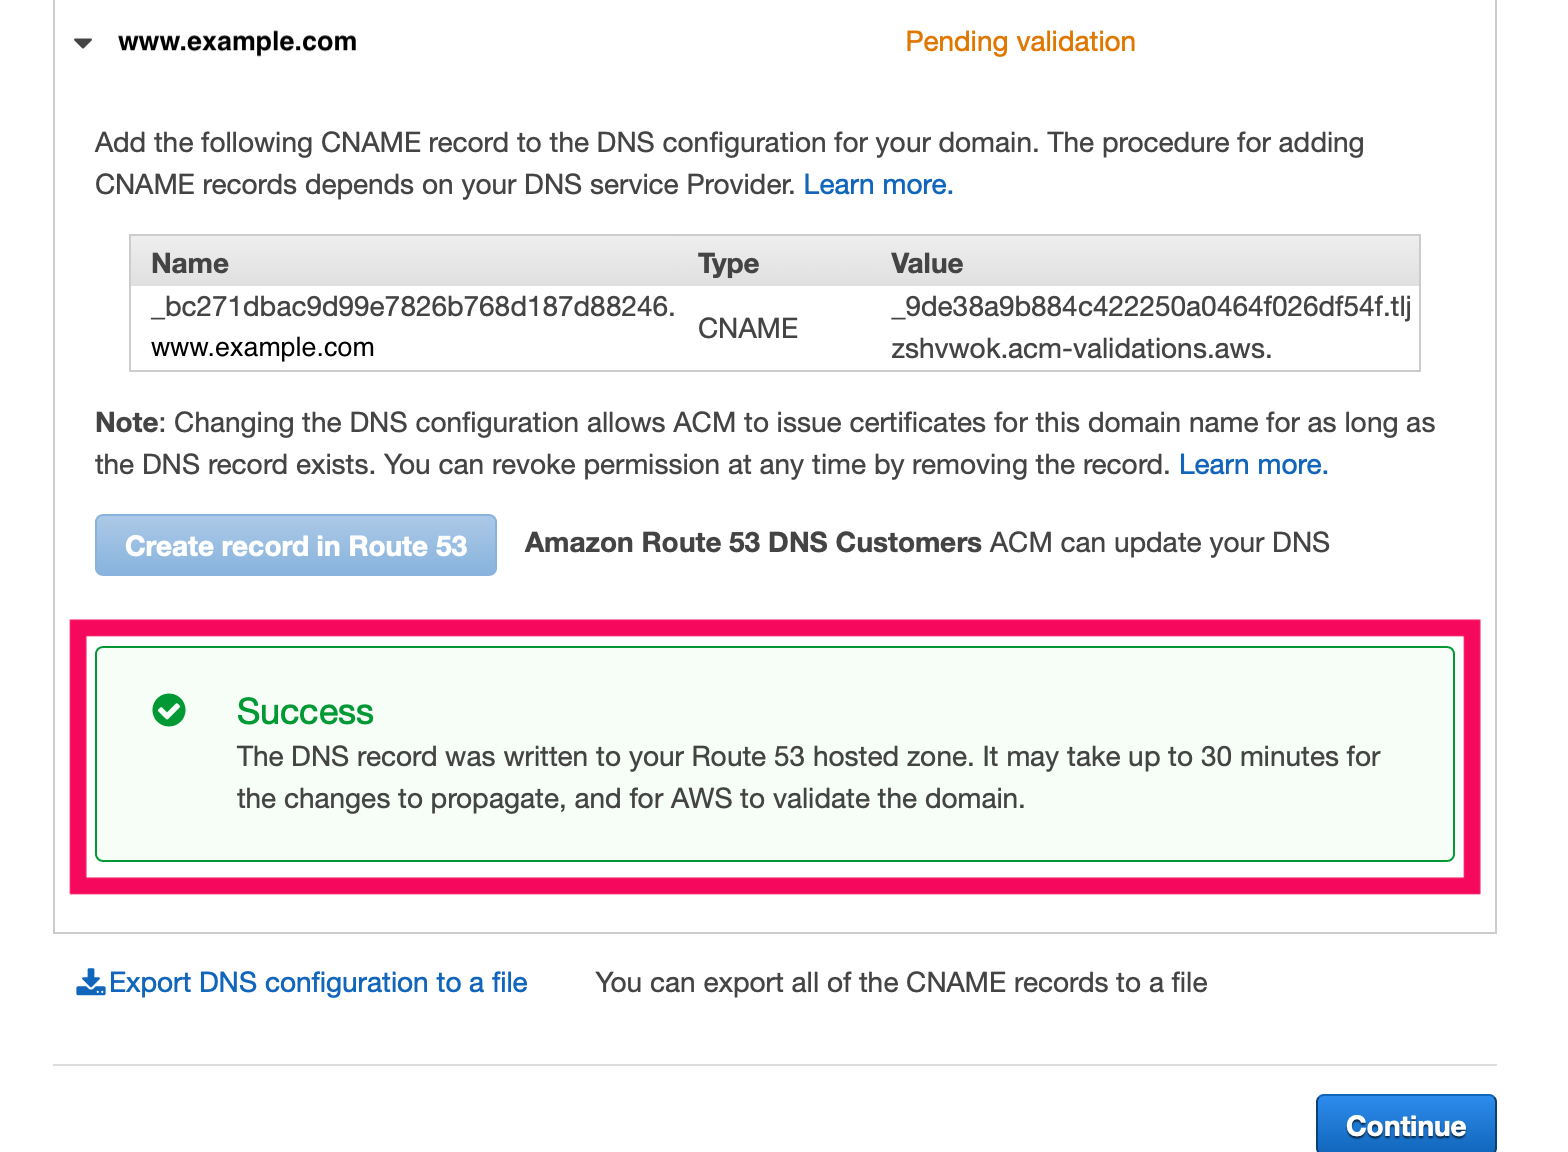
Step 2-9. Validation record is created successfully.
Click [Continue] to step forward.
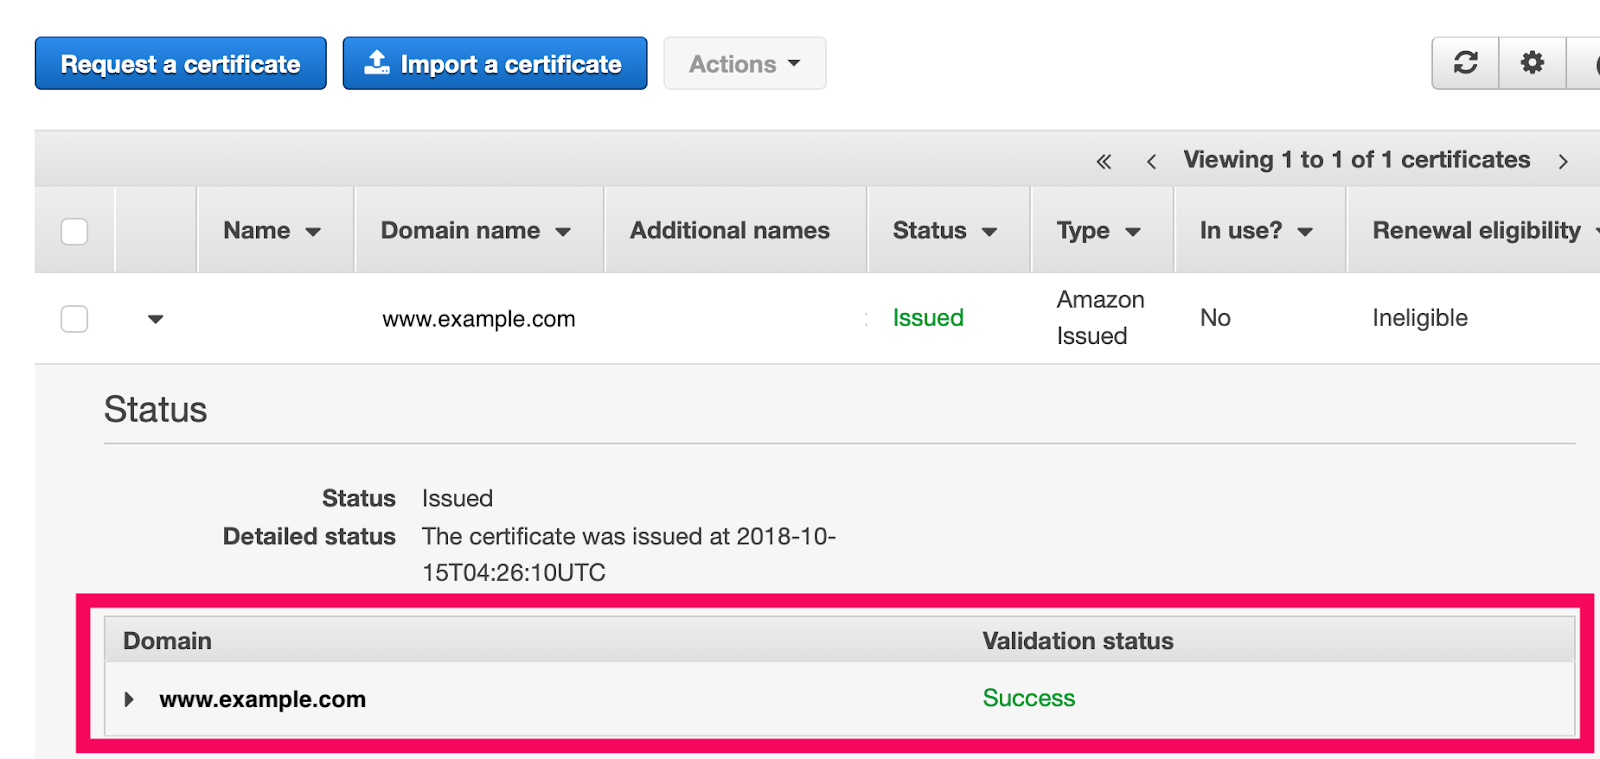
Step 2-10. While later, validation status will turn Success
Check the status of CloudFront Distribution you've created in Step1, and attach created SSL certificate to it.
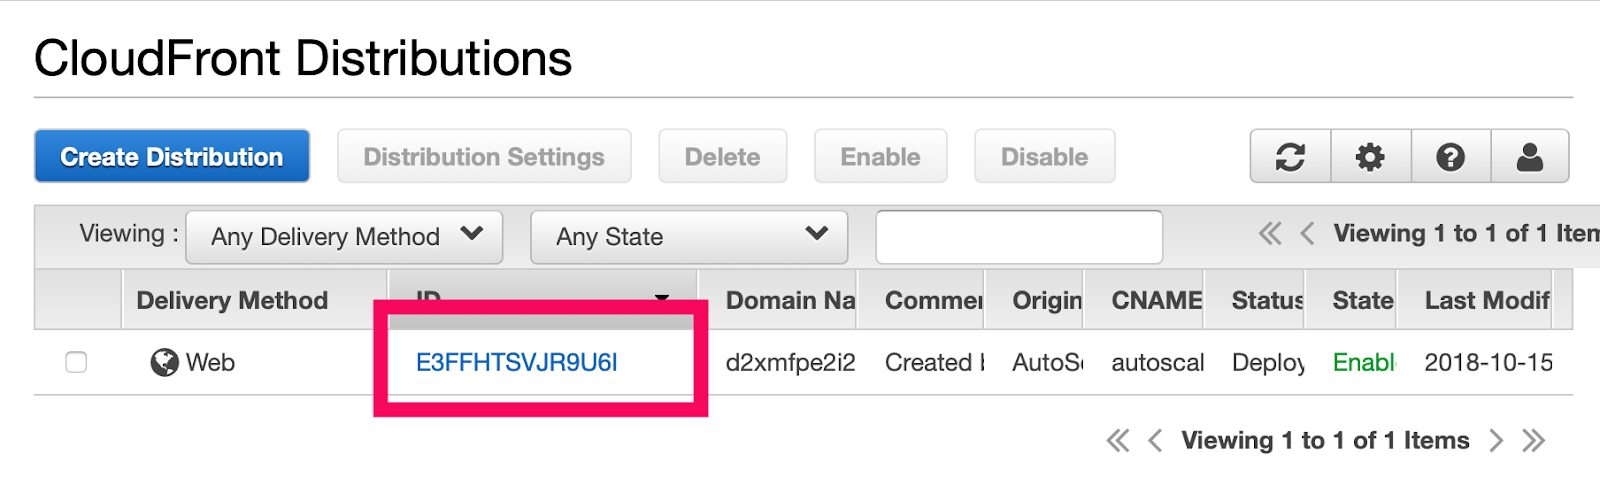
Step 3. After CRETE_COMPLETE of CloudFormation, navigate CloudFront Distributions
Step 3-1. Choose [Custom SSL Certificate] and issued certificate.
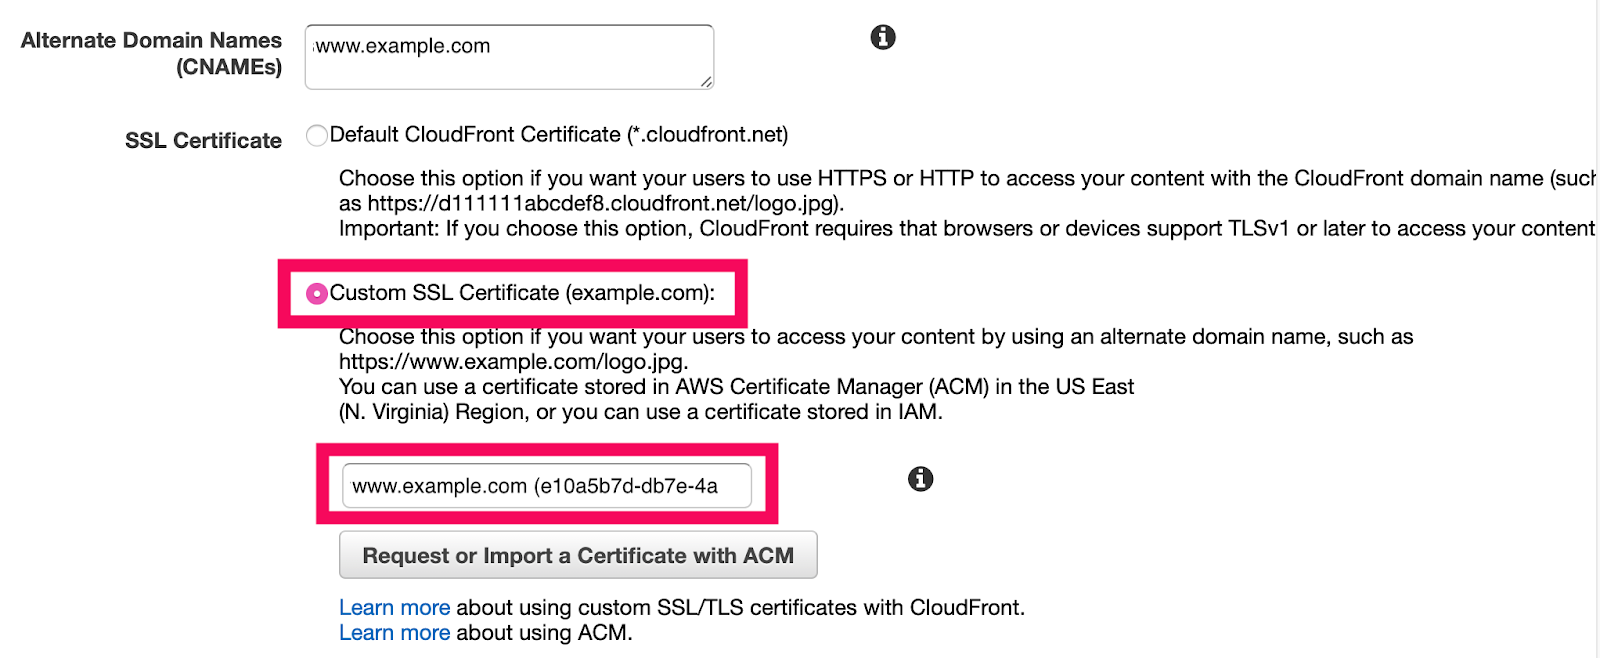
Step 3-2. Click [Yes, Edit]
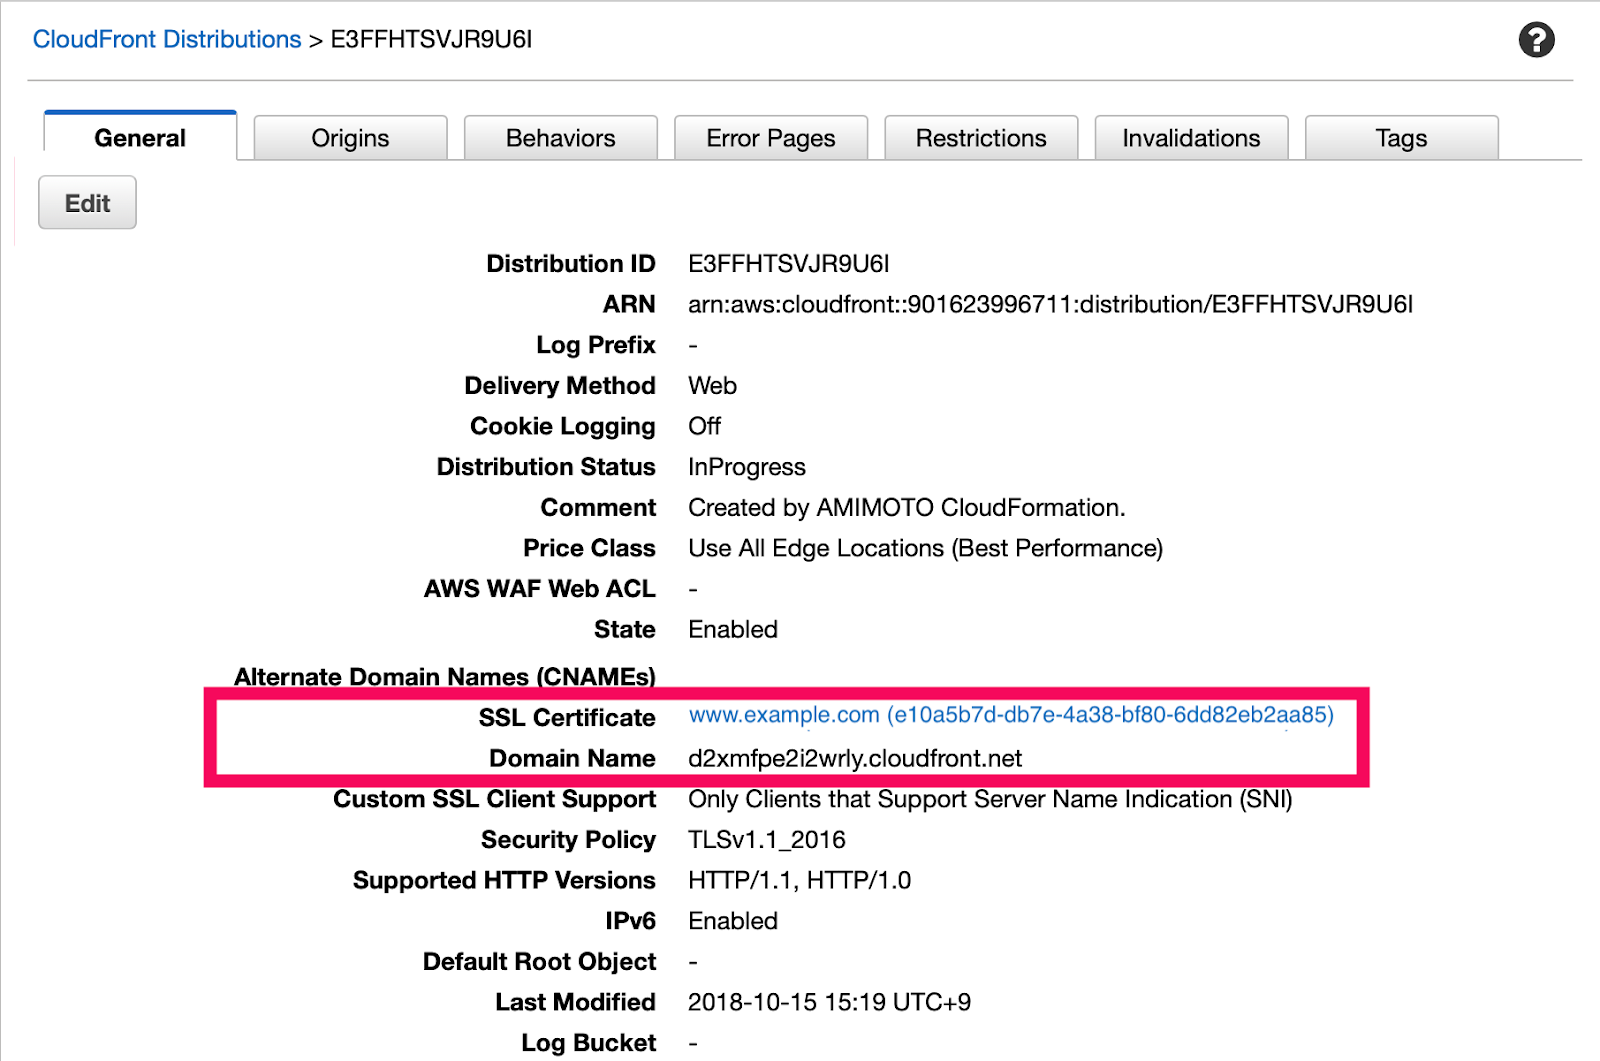
Step 3-3. Confirm settings
Step forward to make ALIAS record on Route 53.
Step 4. [Route 53] Set make ALIAS record of DOMAIN, pointing to CloudFront ID
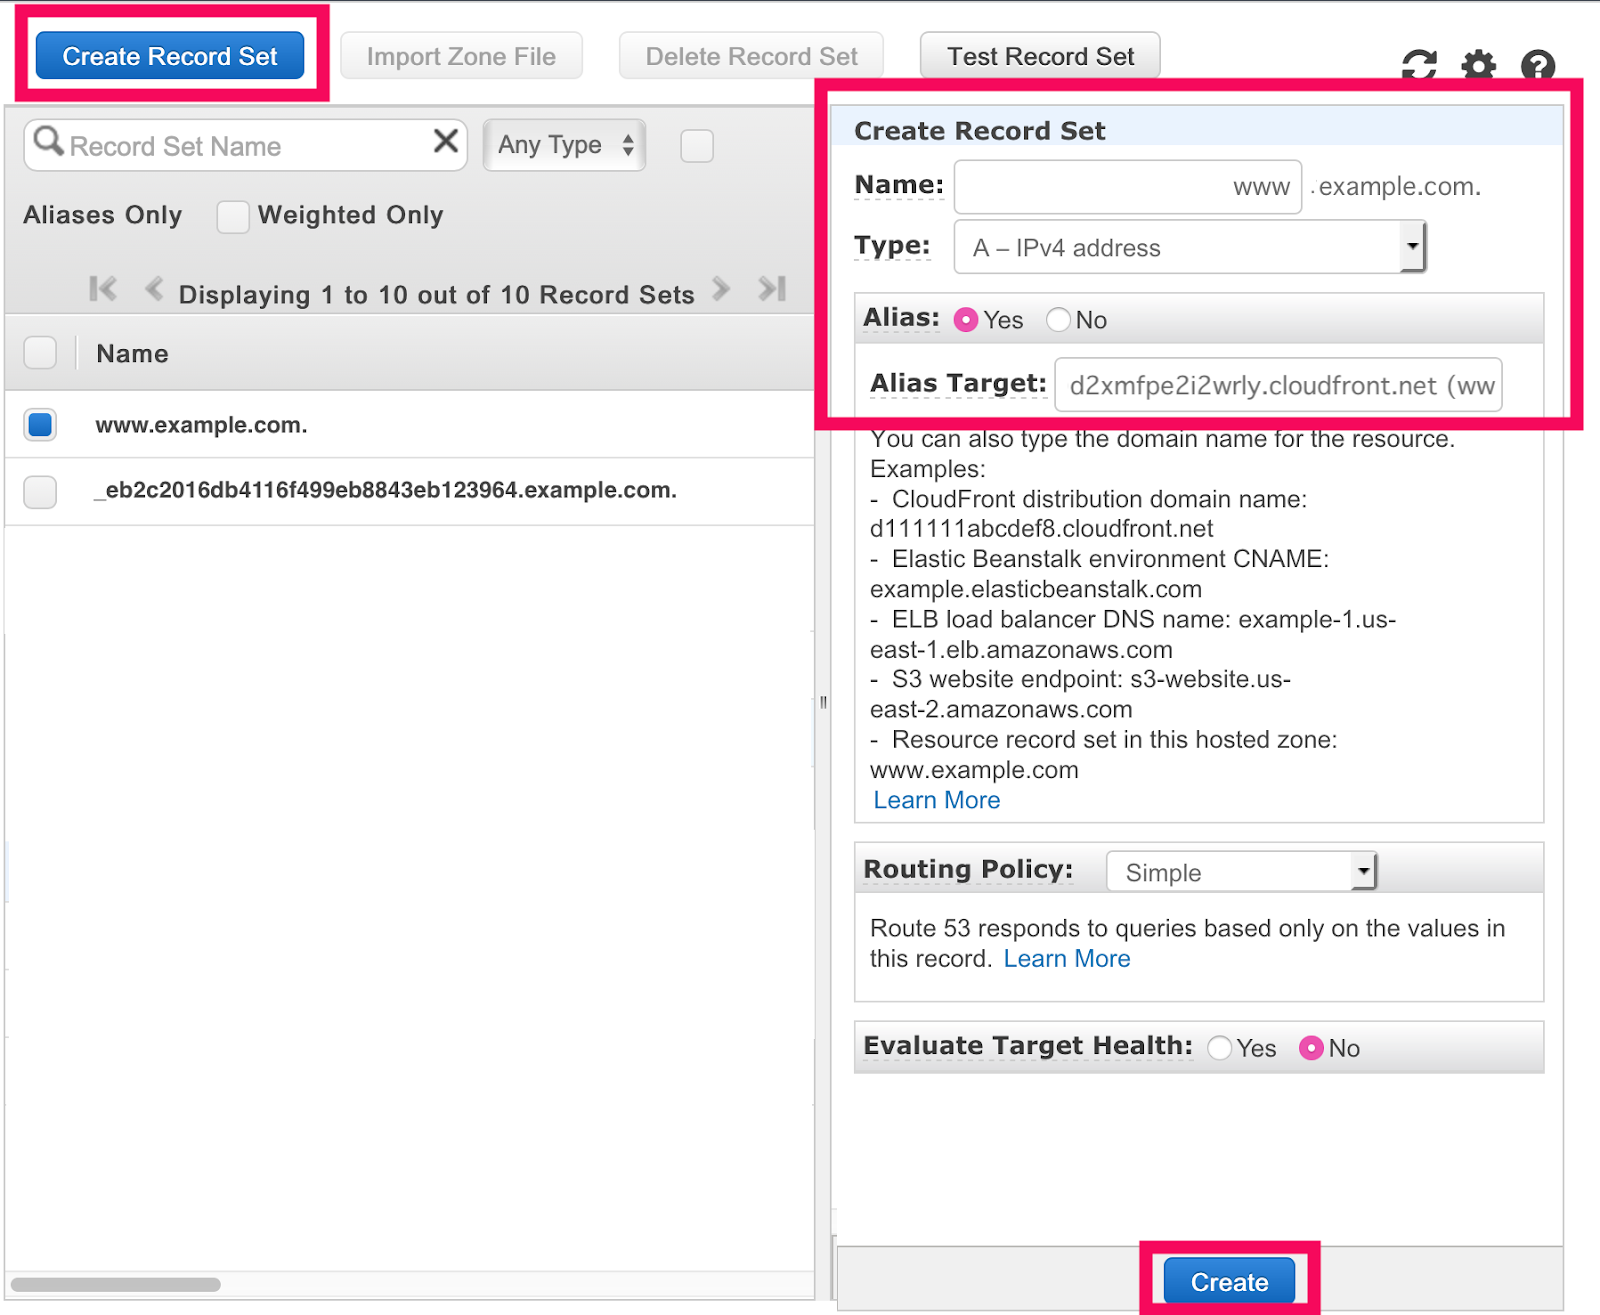
Step 4-1. Click [Create Record Set] and set following values.
- Input www to [Name] field.
- Choose [A -- IPv4 address].
- Select [Yes] on [Alias].
- Choose created a CloudFront ID in [Alias Target].
Then, after complete, click [Create]
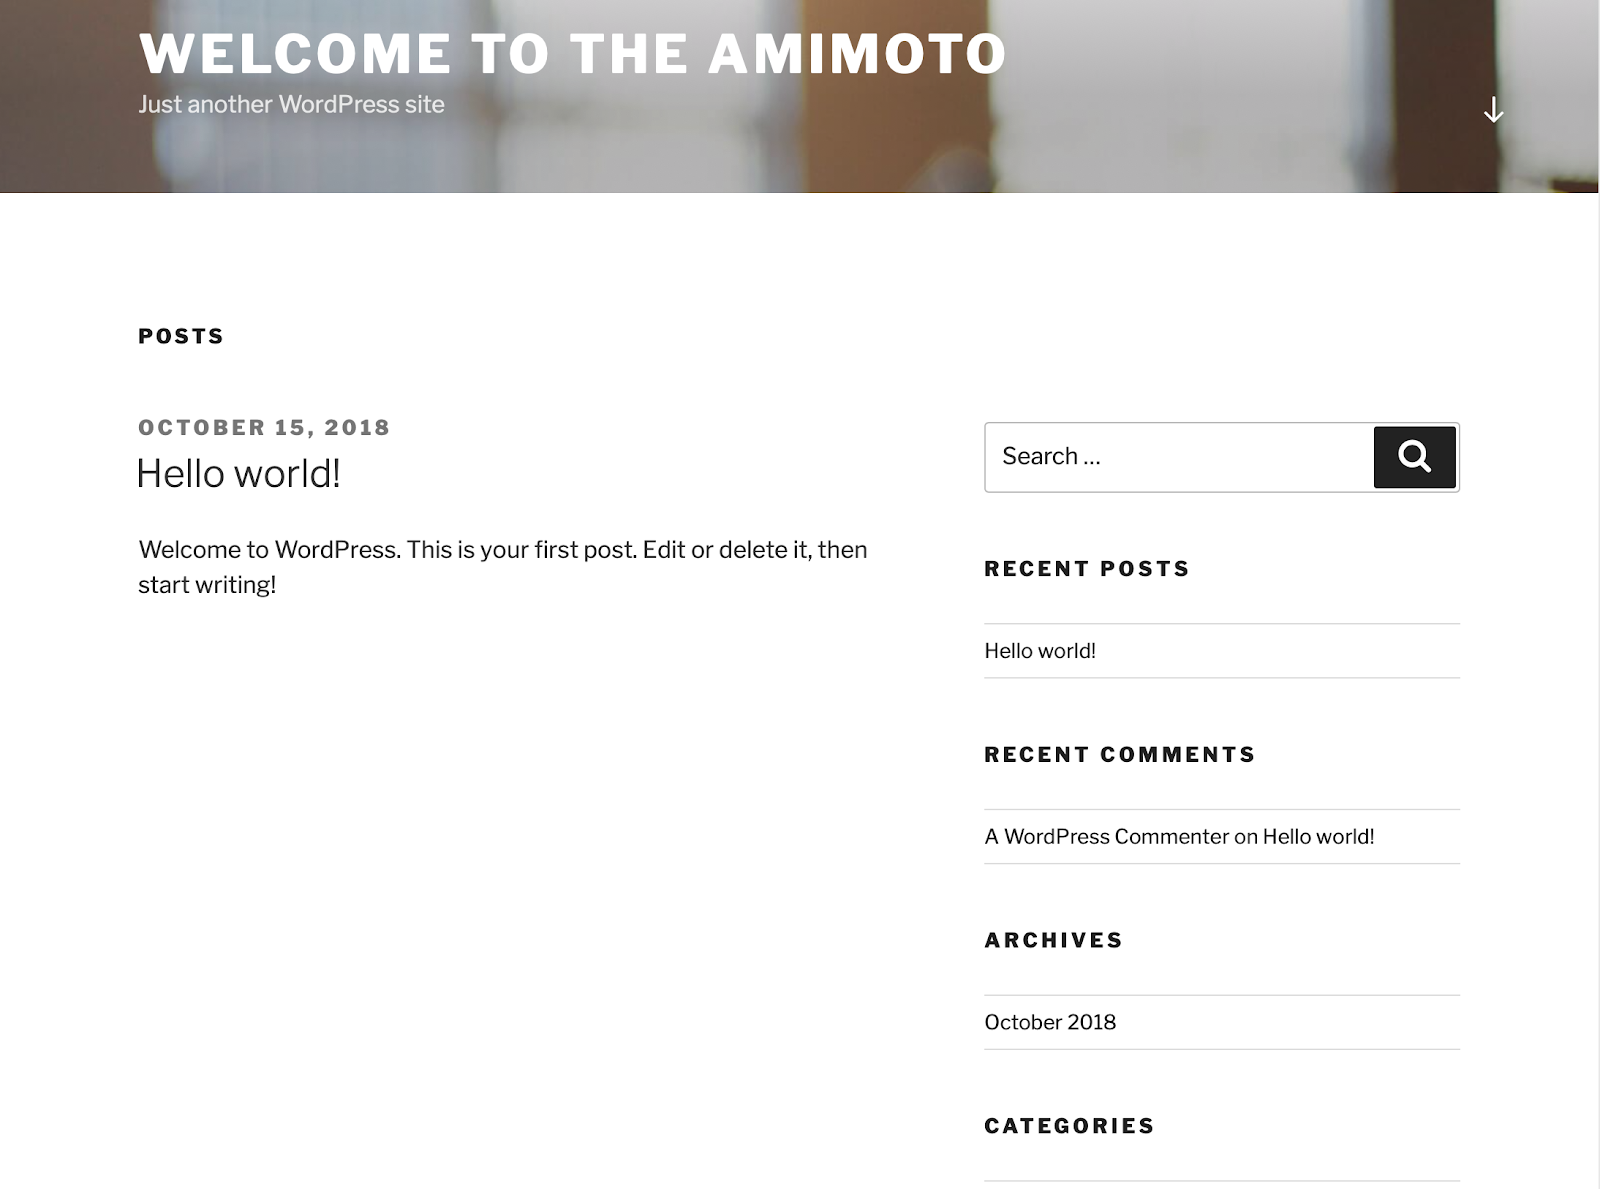
Step5. [WordPress] Access DOMAIN to check WordPress has been set up.
Let’s access to your WordPress after applying the DNS setting.
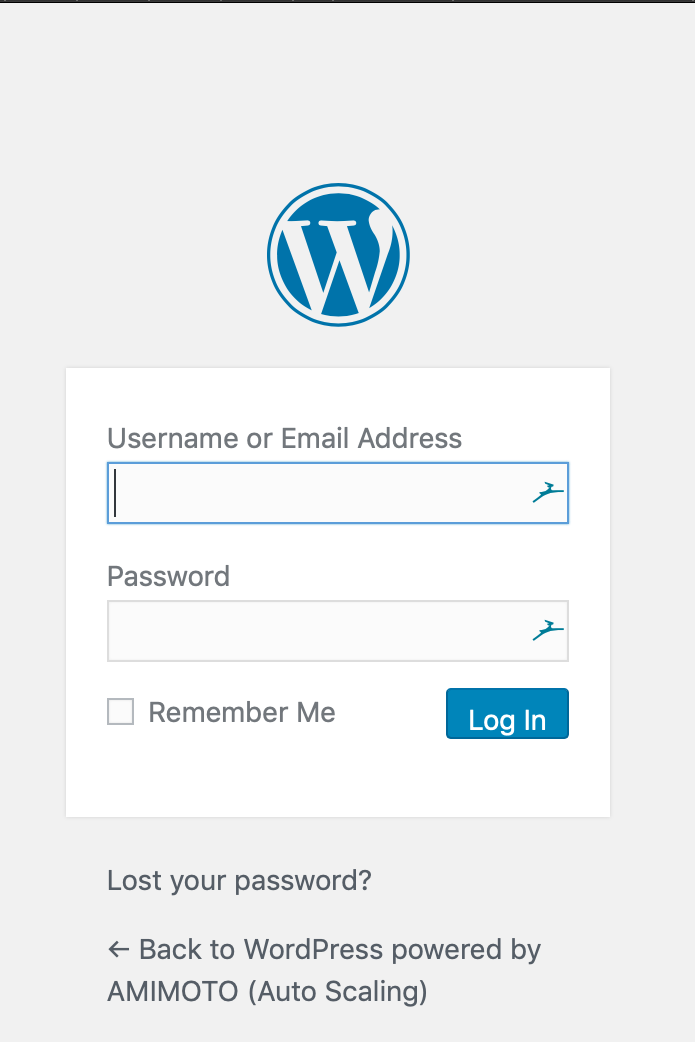
Step 5-1. WordPress ID/PW is set in the setup process of Step 1, so log-in to WordPress with set credentials.
That's all!